Skip to the walkthrough

Your Shopify storefront. Now with someone to ask.

Add Reesponder to your active theme, then test a conversation on the store itself. Your products stay on the page. The answers are right beside them.

Follow the setup
Online storefront on a desktop monitor
ShopifyShopify

Connect the domain customers actually visit.

Start in Reesponder and open the installation route for your Shopify website.

Start with your store’s public address.

In Reesponder, open Websites, enter your store name and public domain, then click Start automatic setup. Use your custom domain if that is where customers shop.

Use the storefront domain linked to the website you are adding. If customers use a custom domain, start with that address. You will need access to the Shopify store that serves it and permission to edit the active theme.
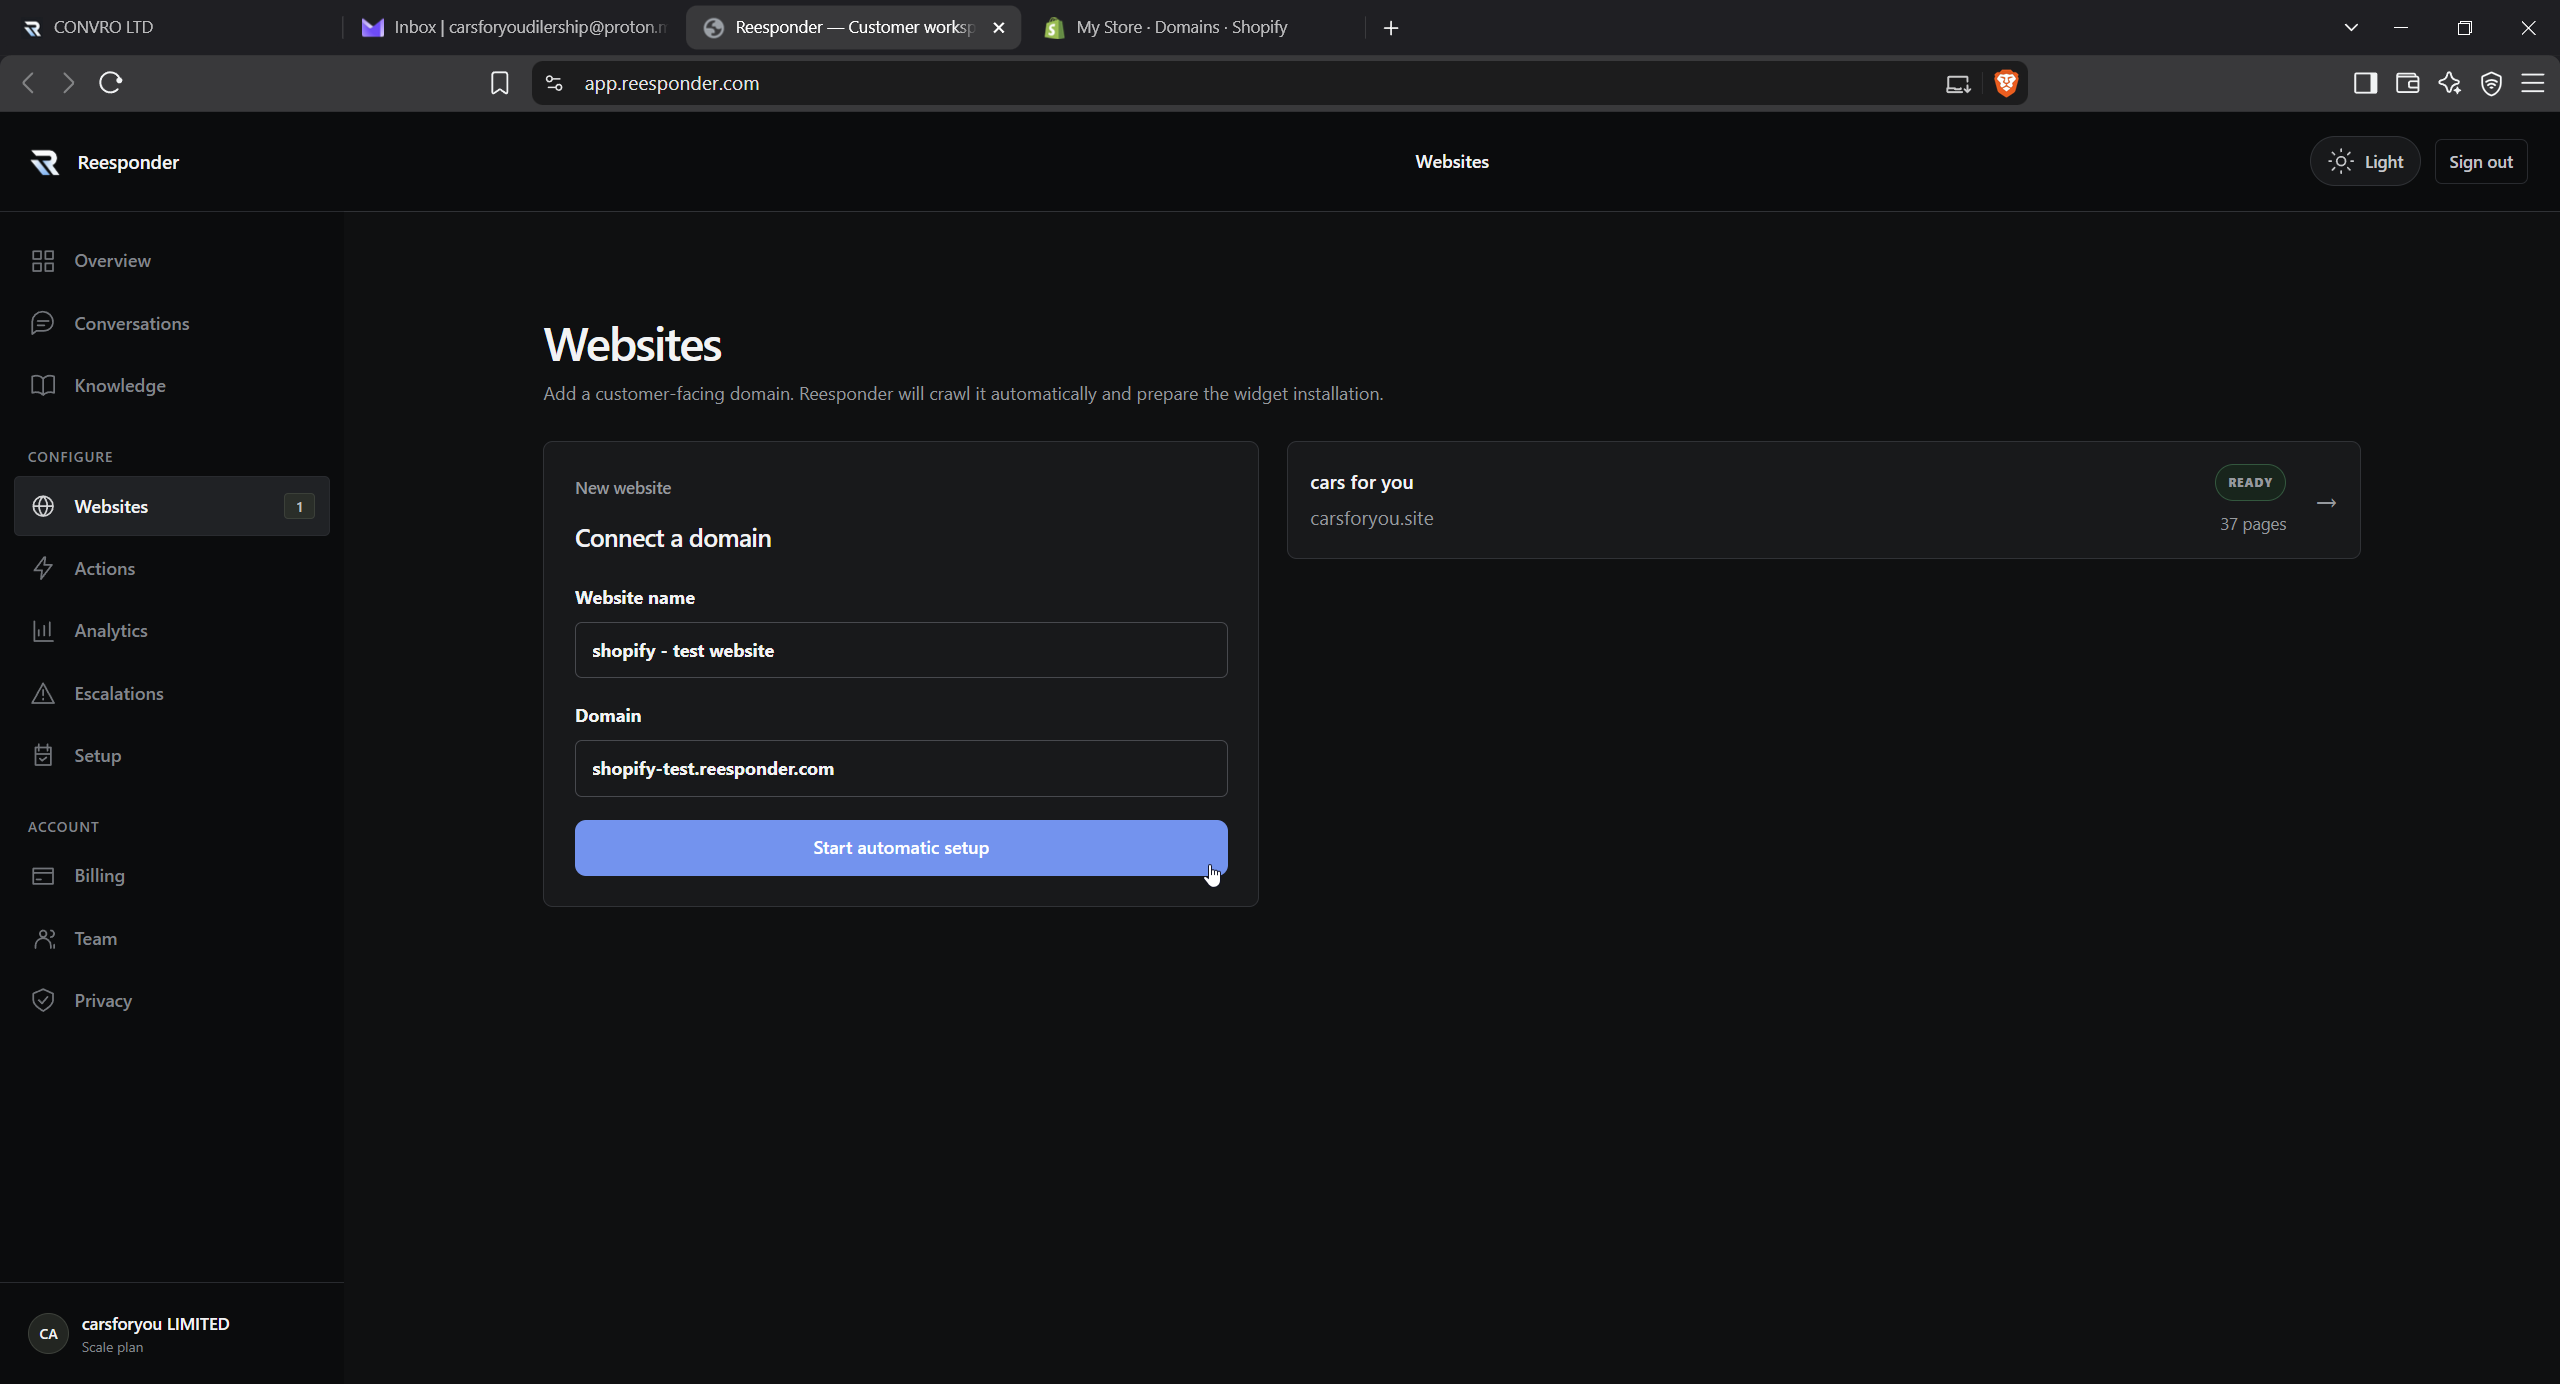
Add the domain customers visit.

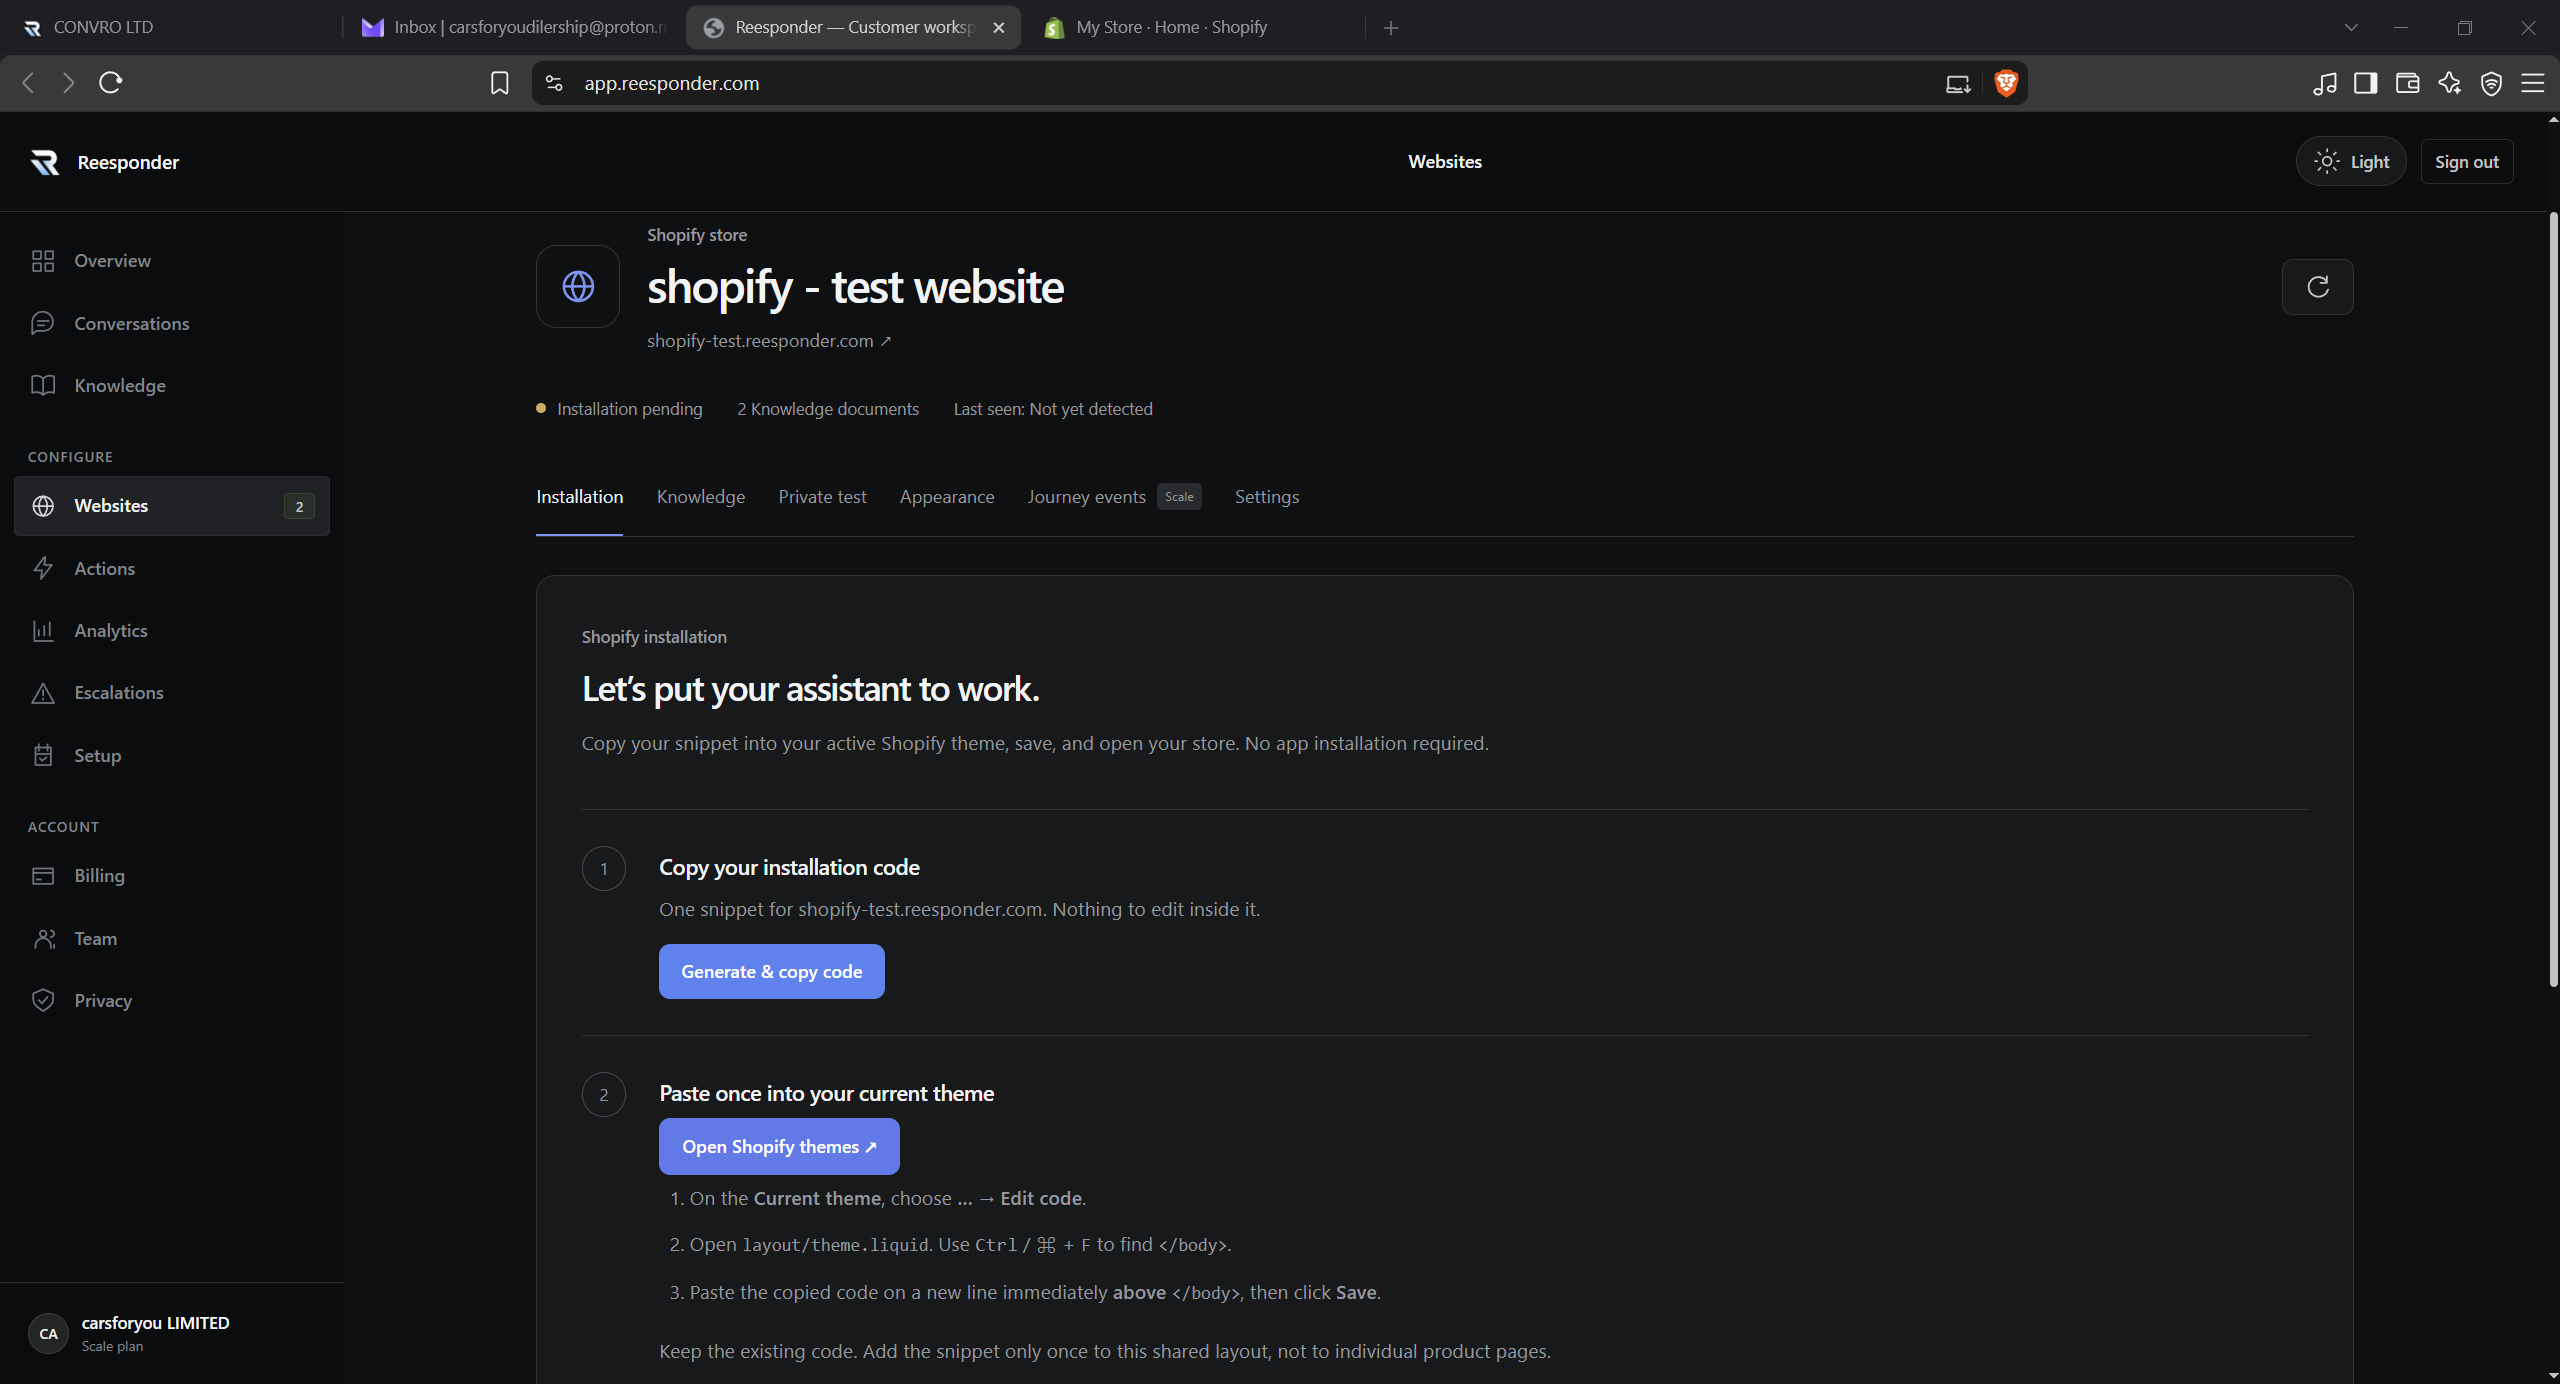
Open the website. Reesponder shows the Shopify installation guide.

The Installation tab shows the instructions for the detected platform. Continue here to prepare the snippet for your store.

The Shopify route keeps the installation instructions beside the website they belong to. It provides the generated code and a link to your themes. This walkthrough installs the storefront widget through the theme layout.

Open the website. Reesponder shows the Shopify installation guide.

Use the snippet made for this store.

The generated code identifies the website and its authorised installation. Copy it from your own panel.

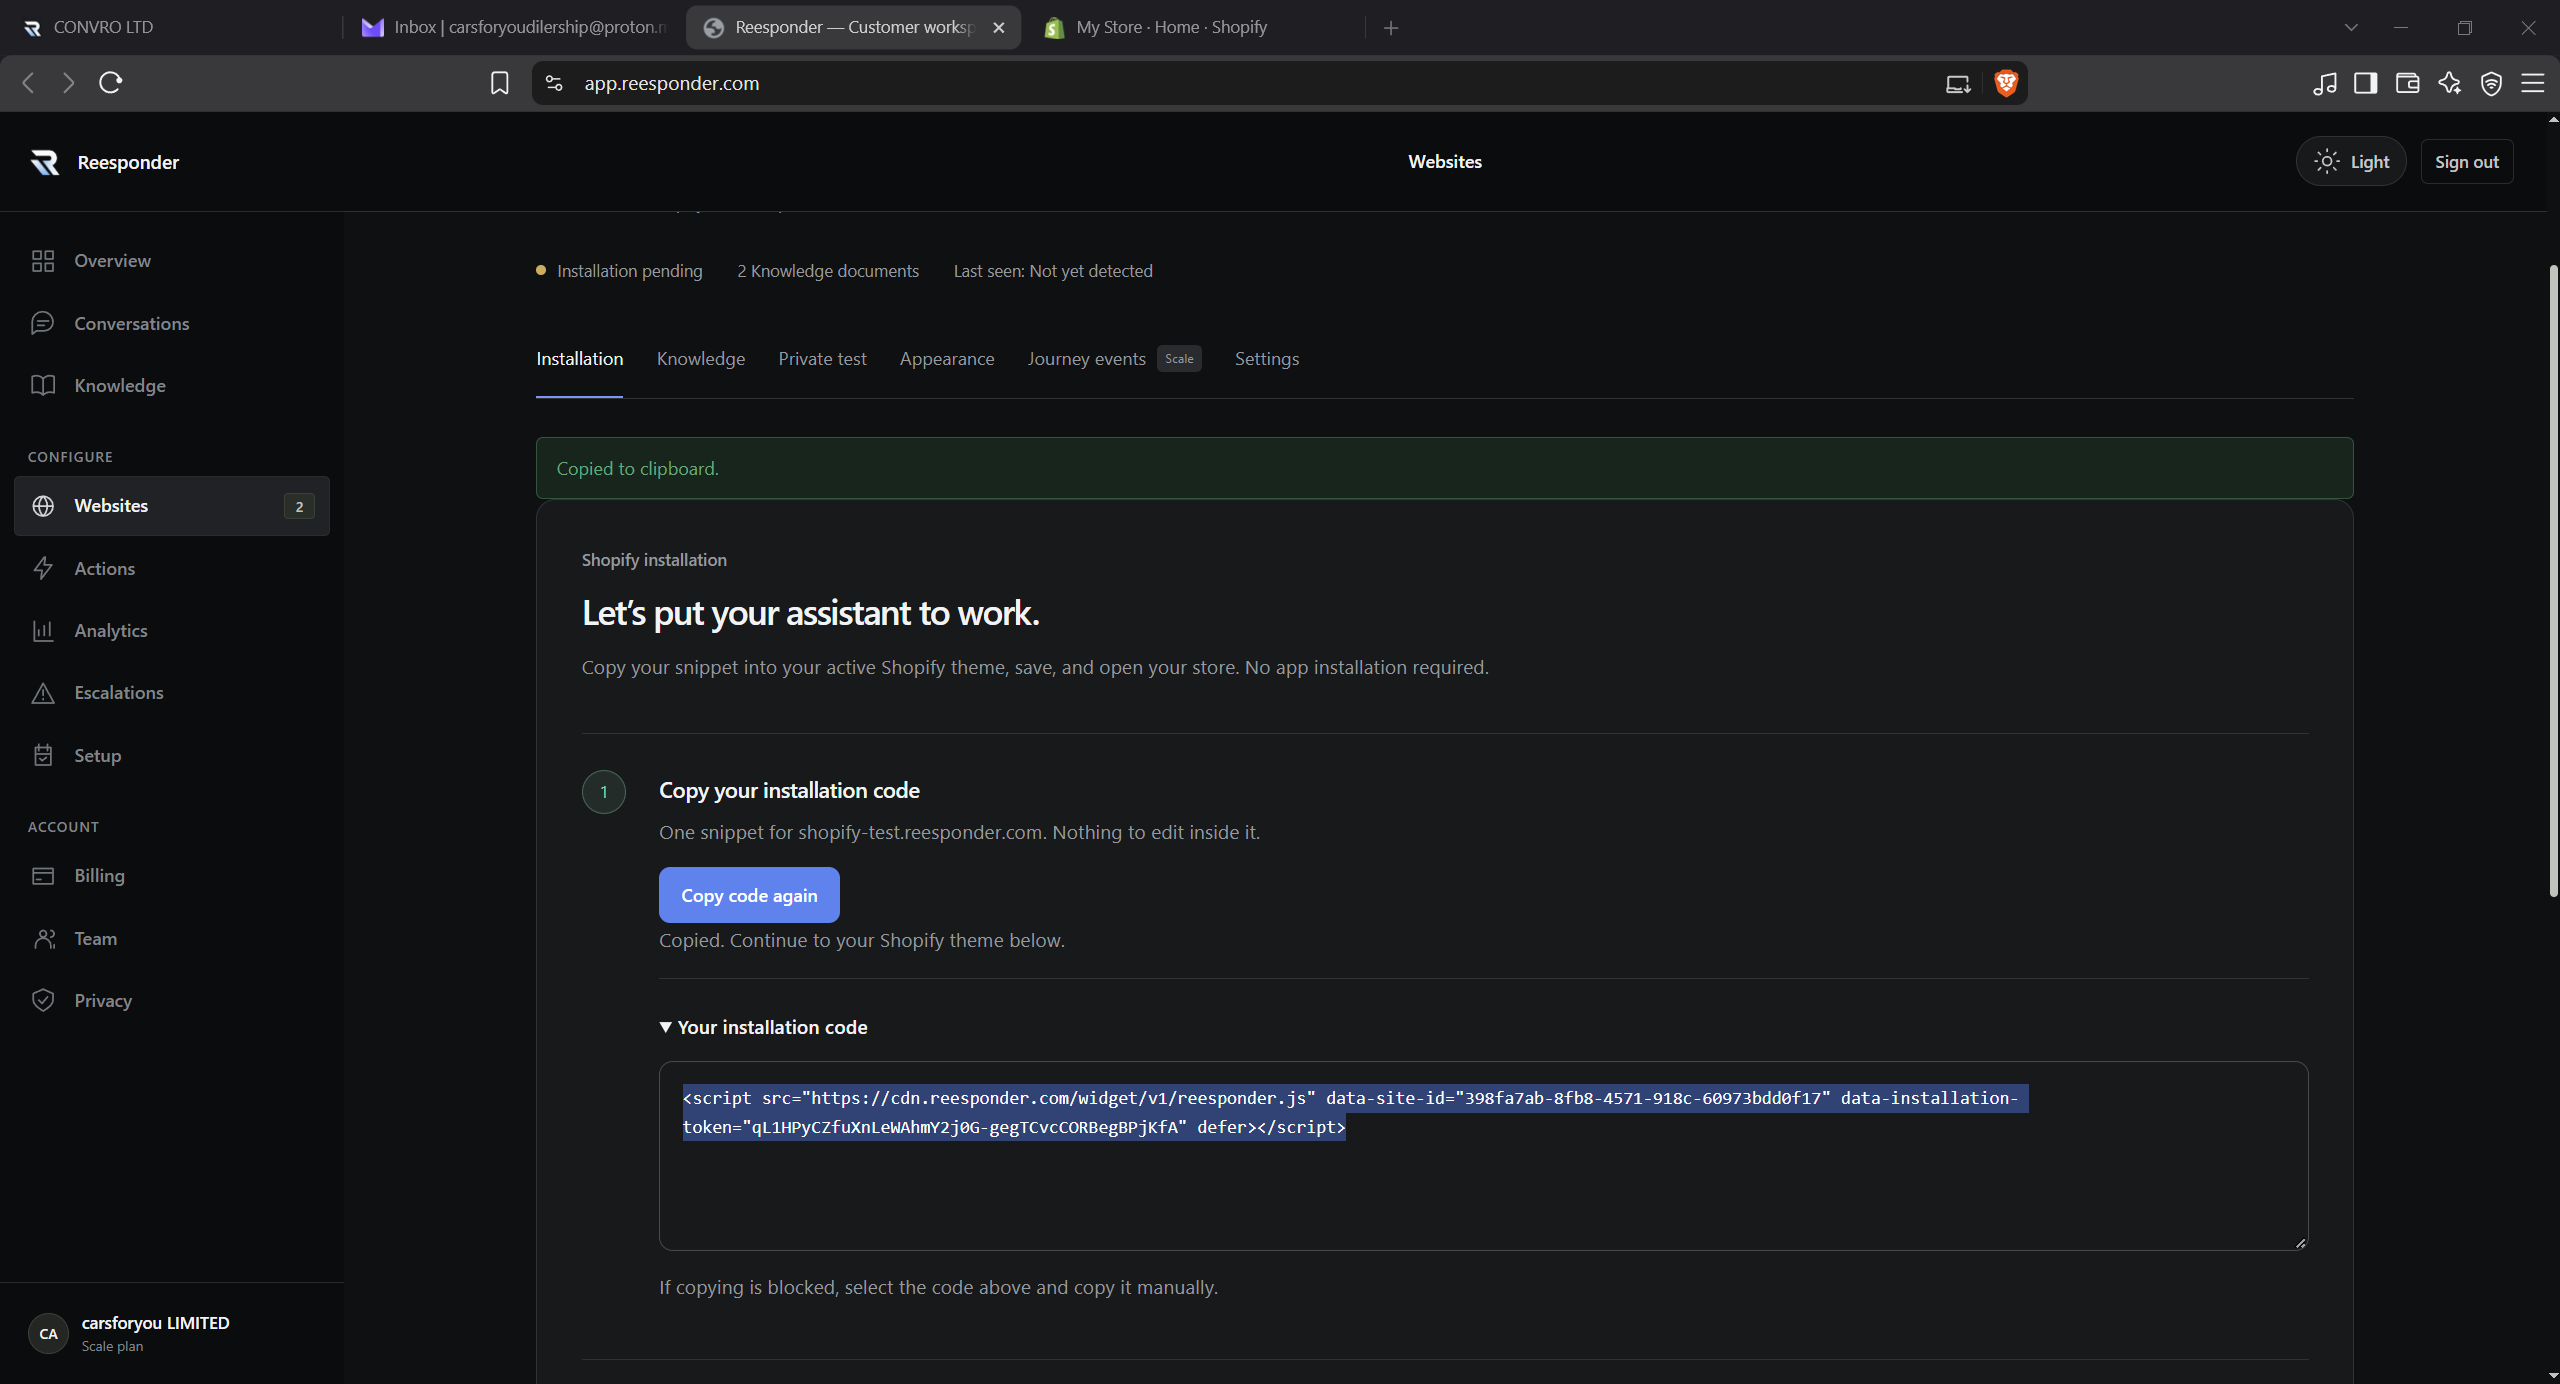
Generate and copy your store’s snippet.

Click Generate & copy code. The snippet is prepared for this domain. You can expand Your installation code to select it manually if your browser blocks clipboard access.

Use the full snippet exactly as generated, including its site identifier and installation token. Do not copy the example values visible in a screenshot. If automatic copying is blocked, expand the code and copy it manually.

Copy the complete generated code without changing its values.

Put the widget into the shared storefront layout.

Work in the active theme and preserve the existing Liquid code. The before-and-after screenshots show exactly where the snippet goes.

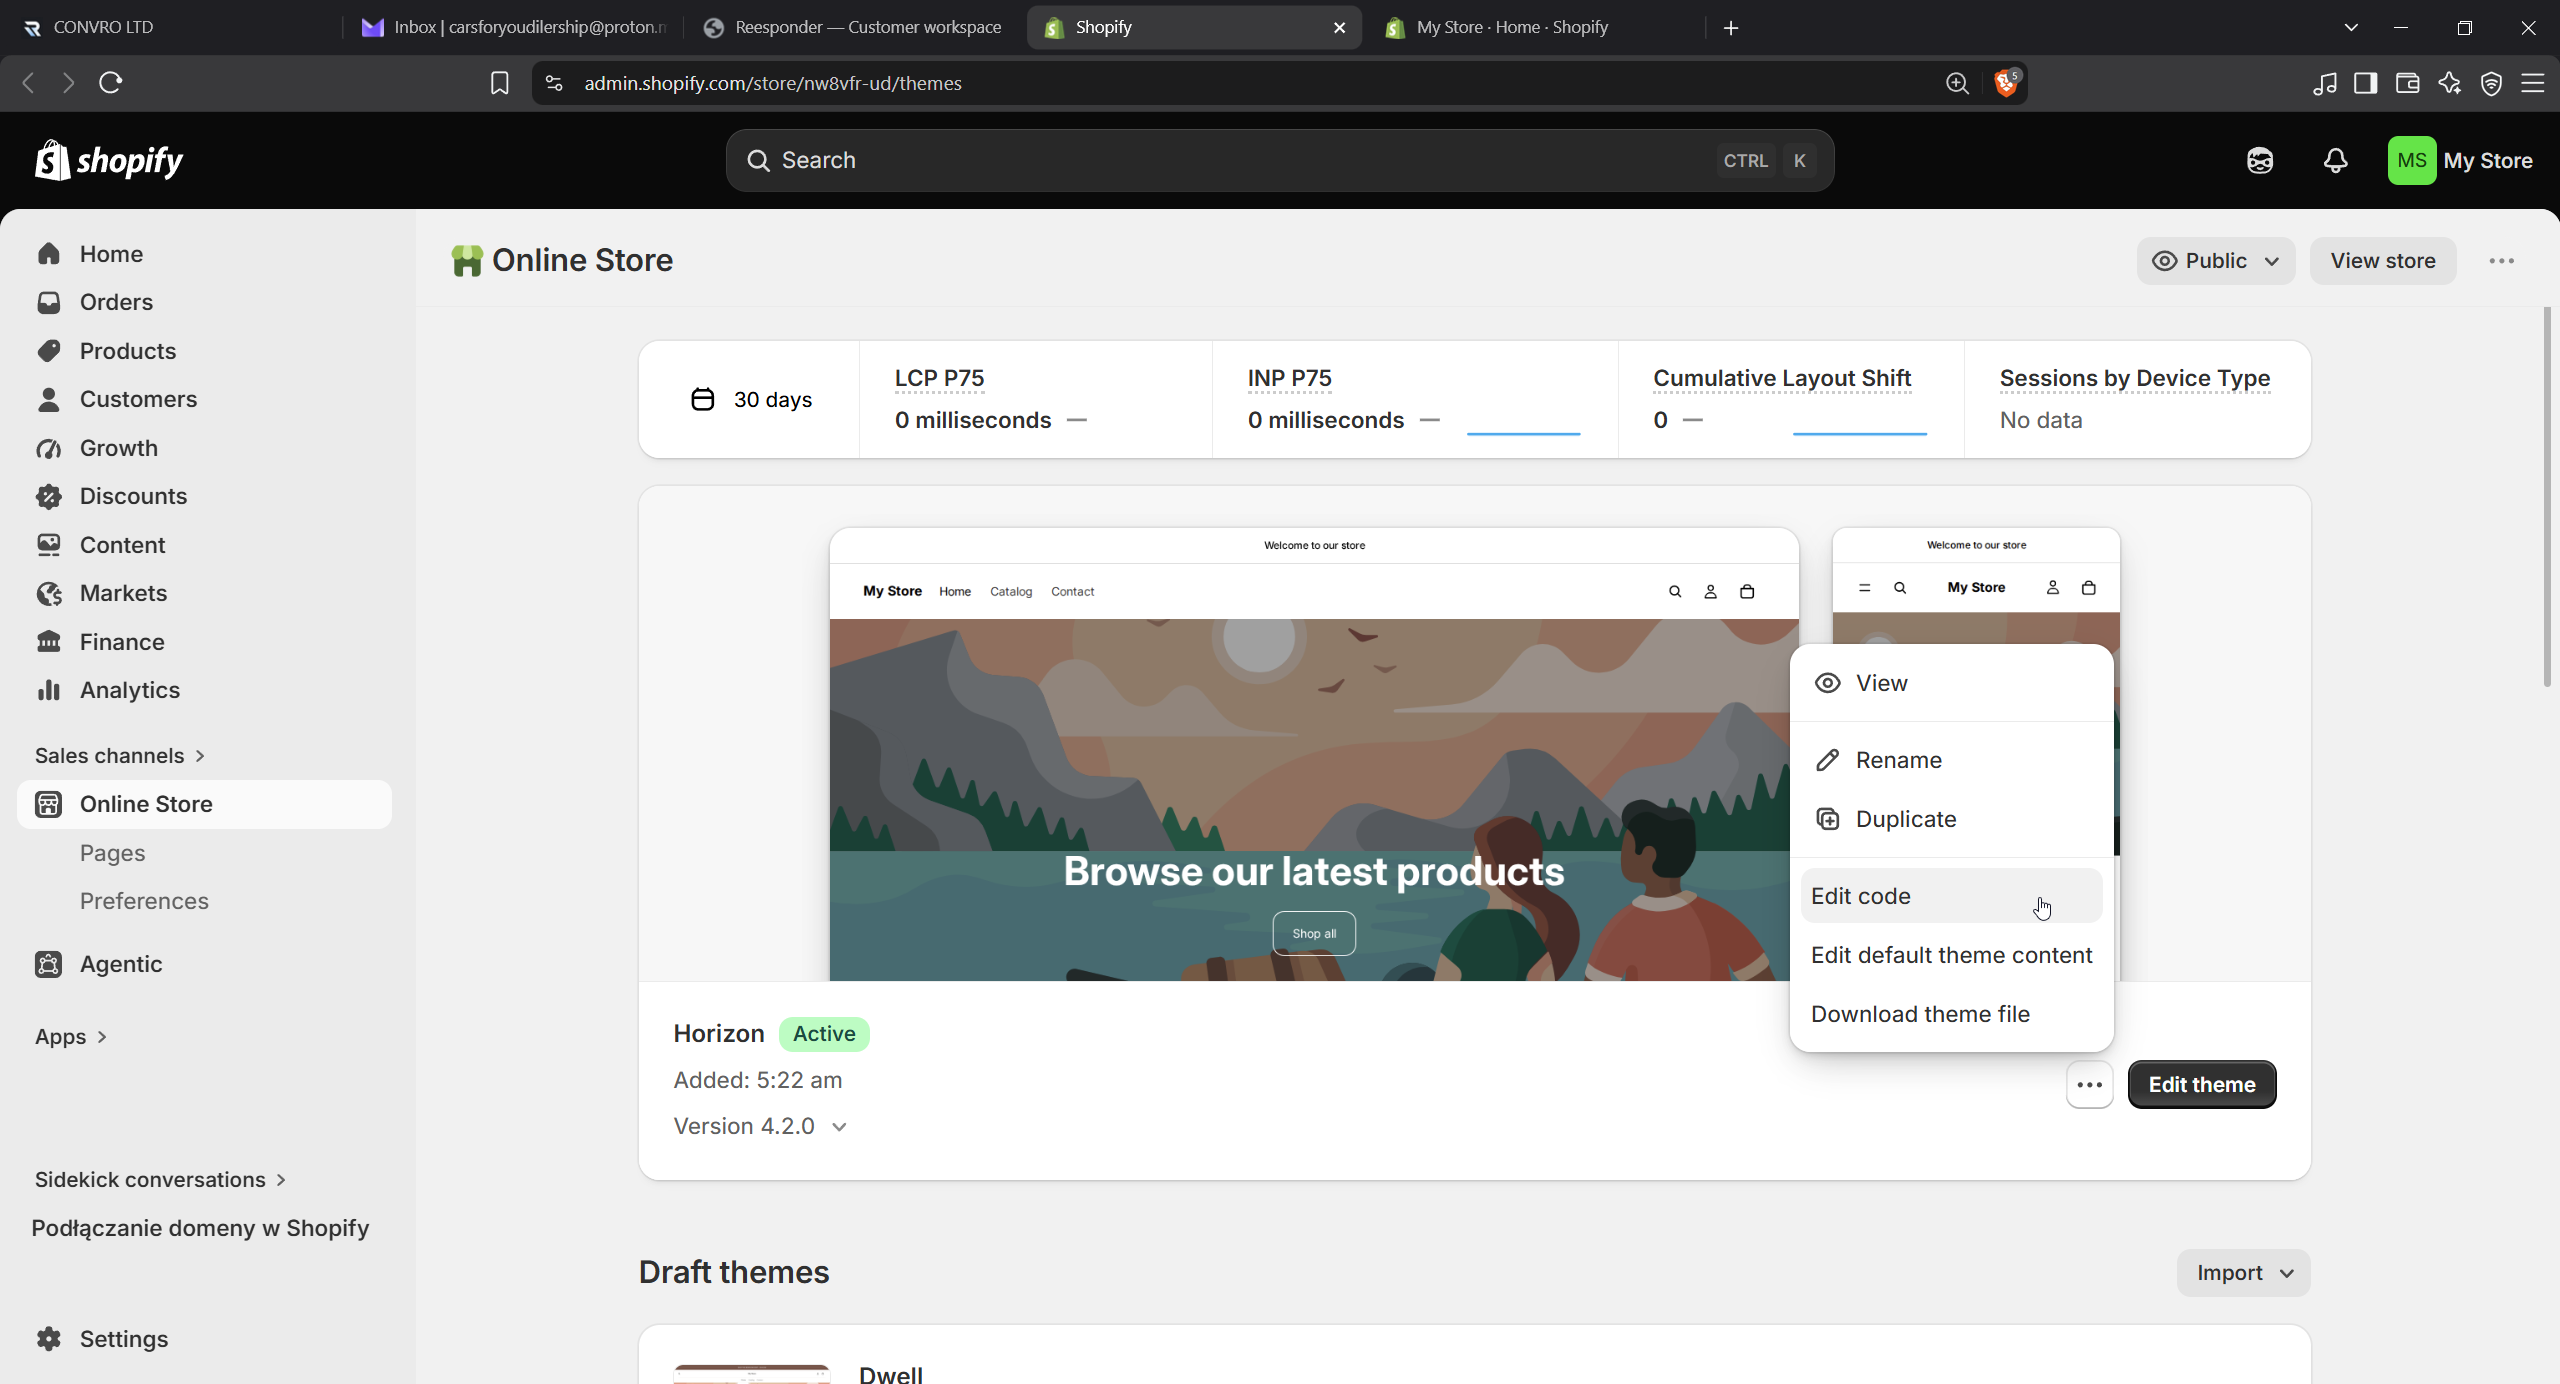
Open your active theme’s code.

Click Open Shopify themes and choose the correct store if Shopify asks. On your active theme, open the three-dot menu and select Edit code.

Check the store name and the active theme before editing. This matters if your account manages several stores or you have unpublished theme copies. Keep a theme backup through your usual Shopify workflow before changing the shared layout.

On the active theme, choose Edit code.

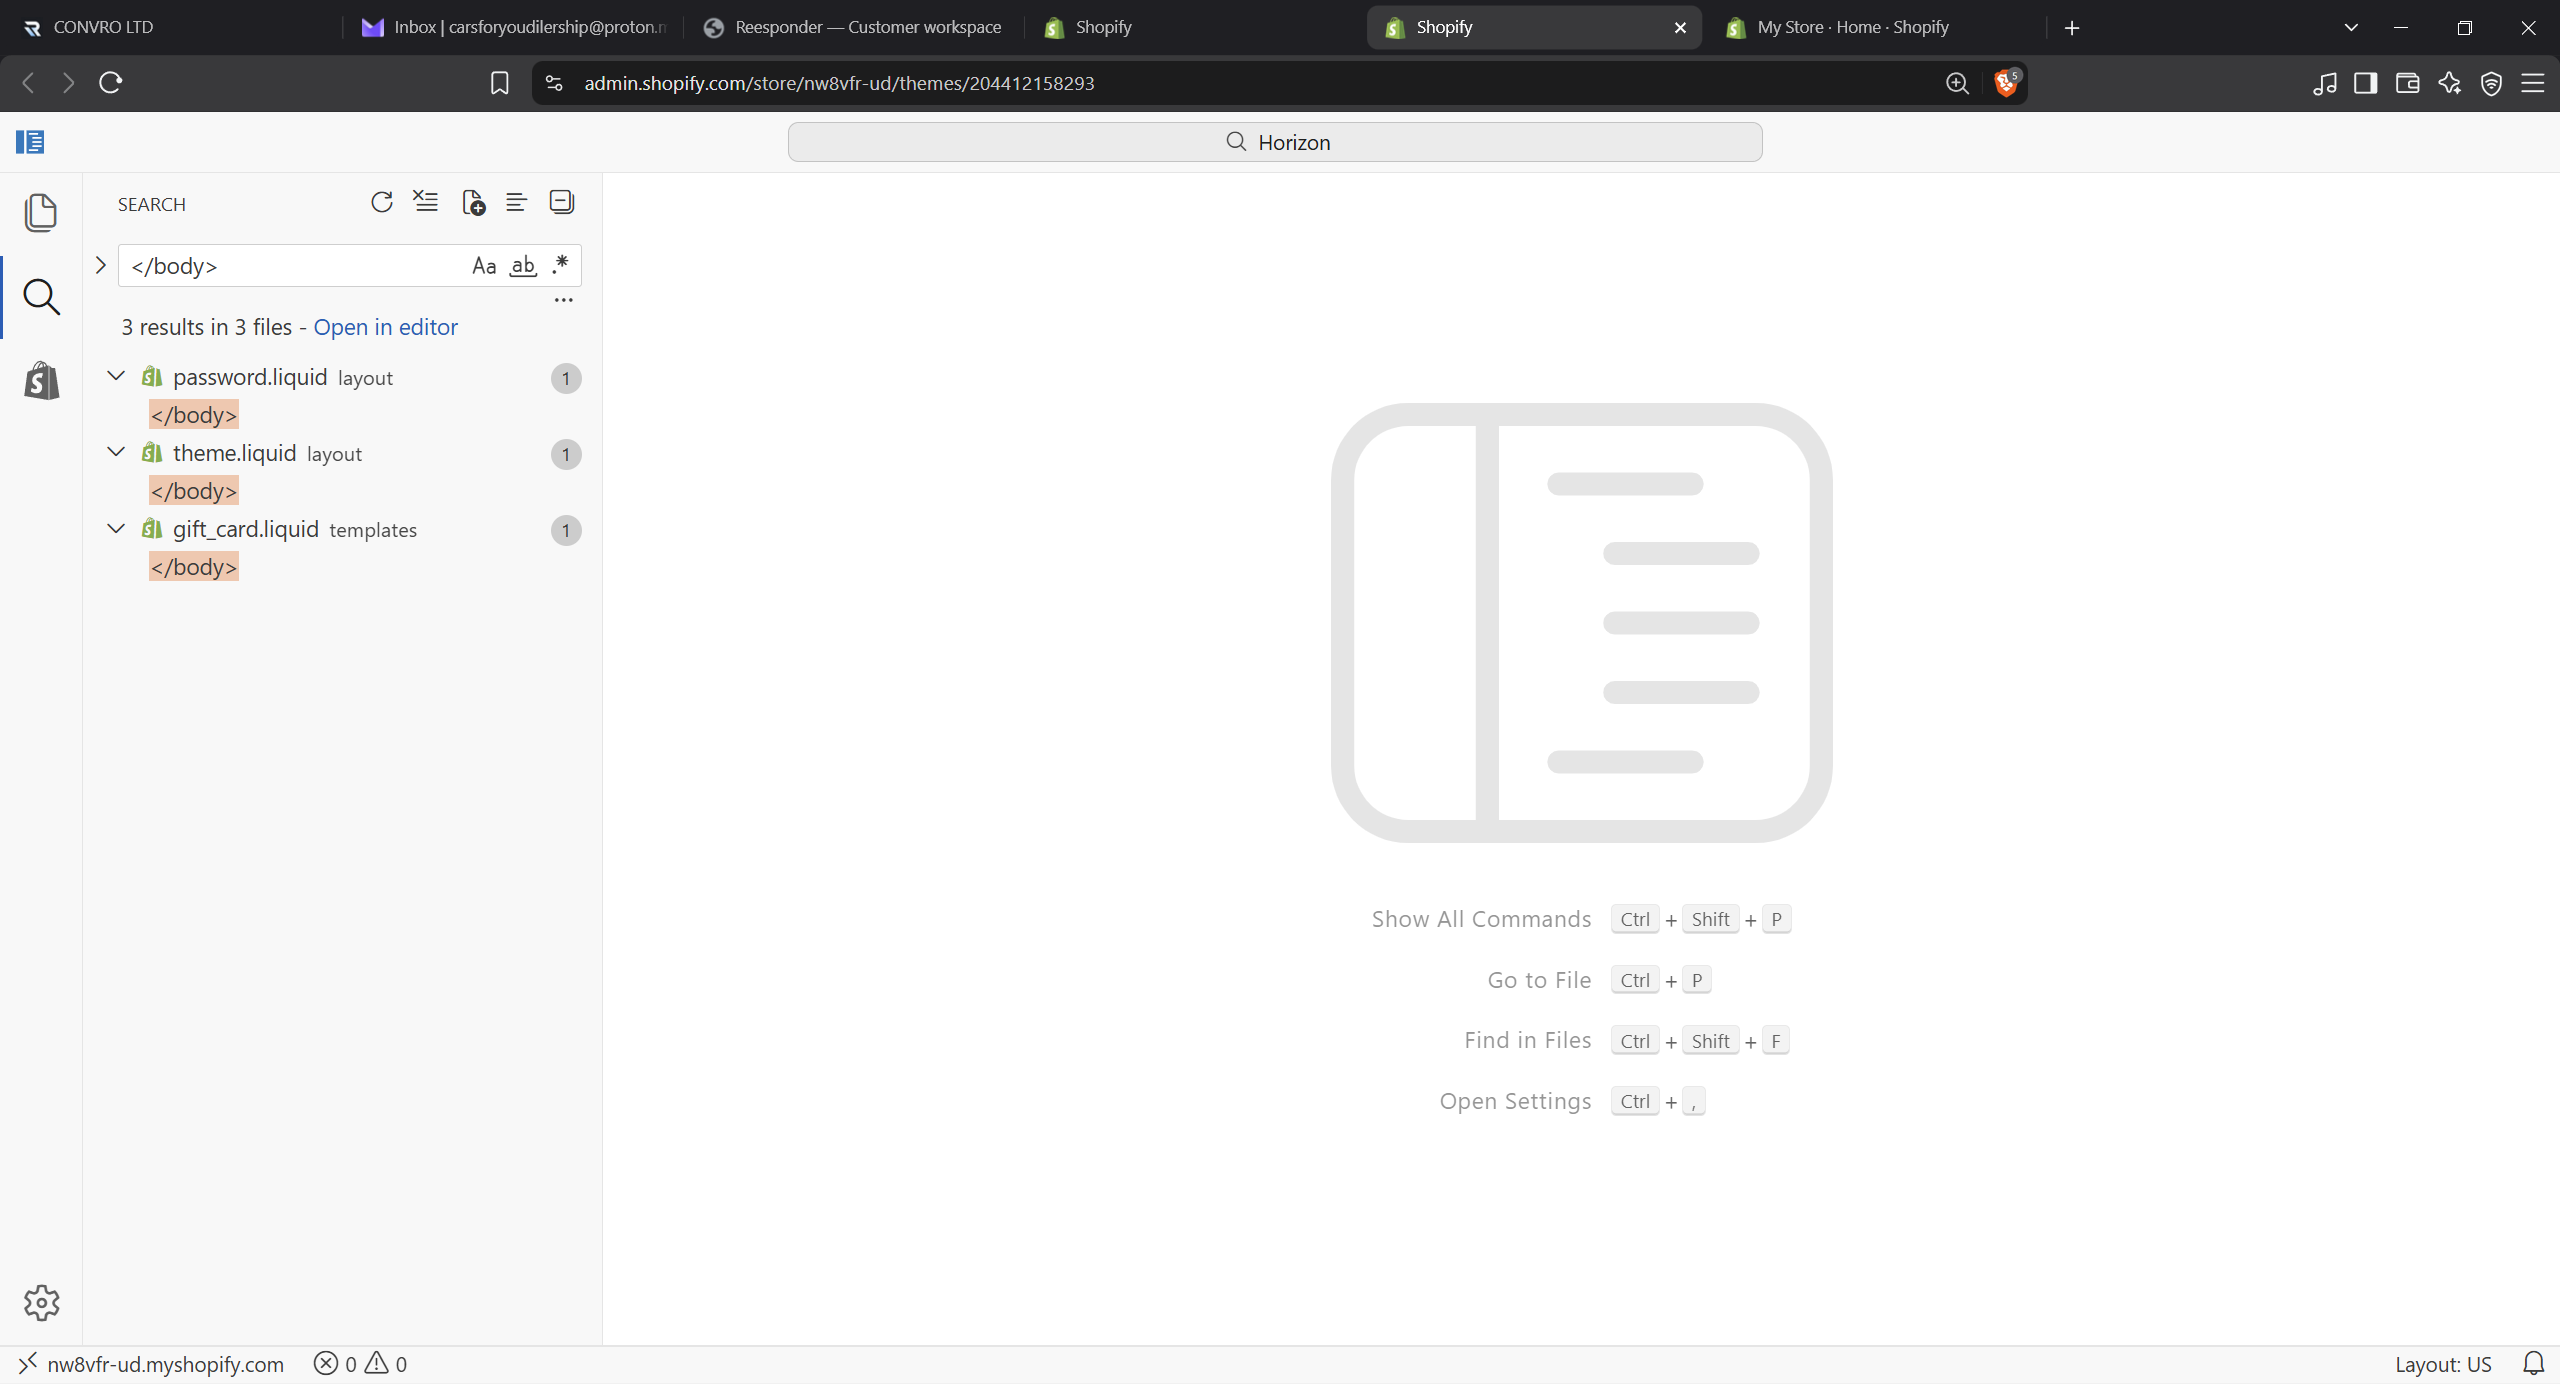
Open layout/theme.liquid. If you use search, choose the result under theme.liquid.

The shared layout is the file used by your storefront pages. Select layout/theme.liquid before pasting any code.

The search may also show other Liquid files. Choose the result under layout/theme.liquid. Adding code to the correct shared layout makes it available across the storefront pages that use that layout.

Open layout/theme.liquid. If you use search, choose the result under theme.liquid.

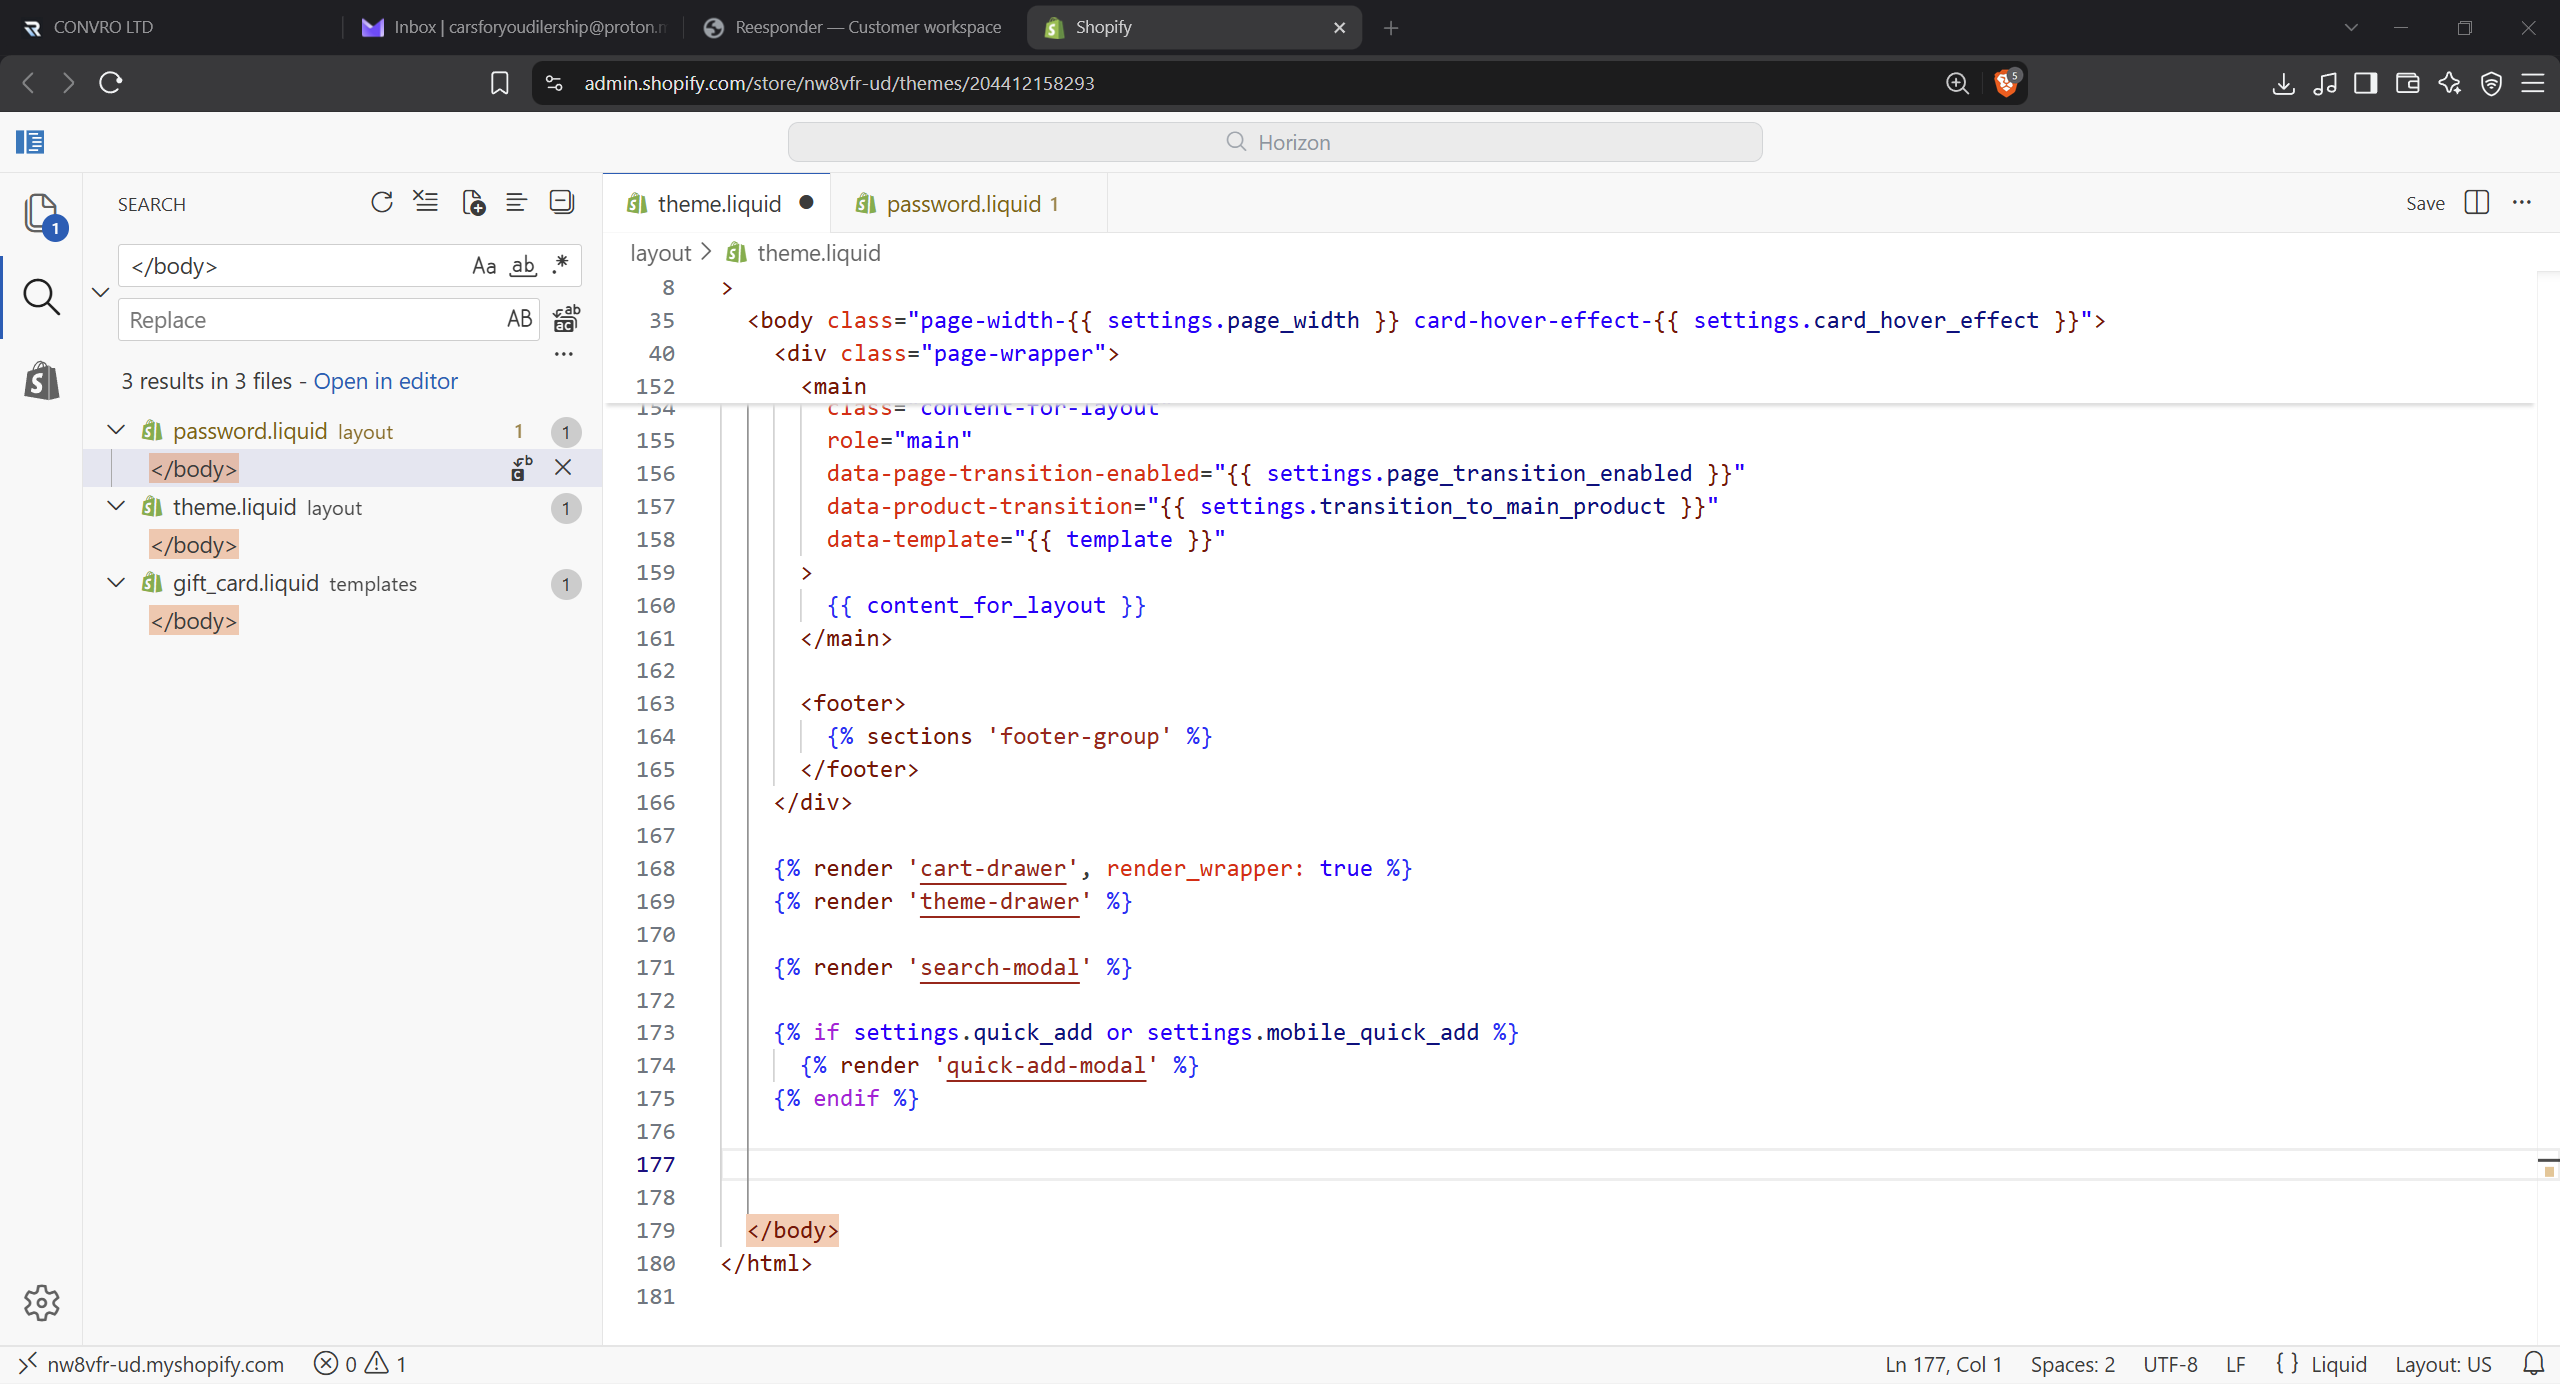
Paste above </body> and save.

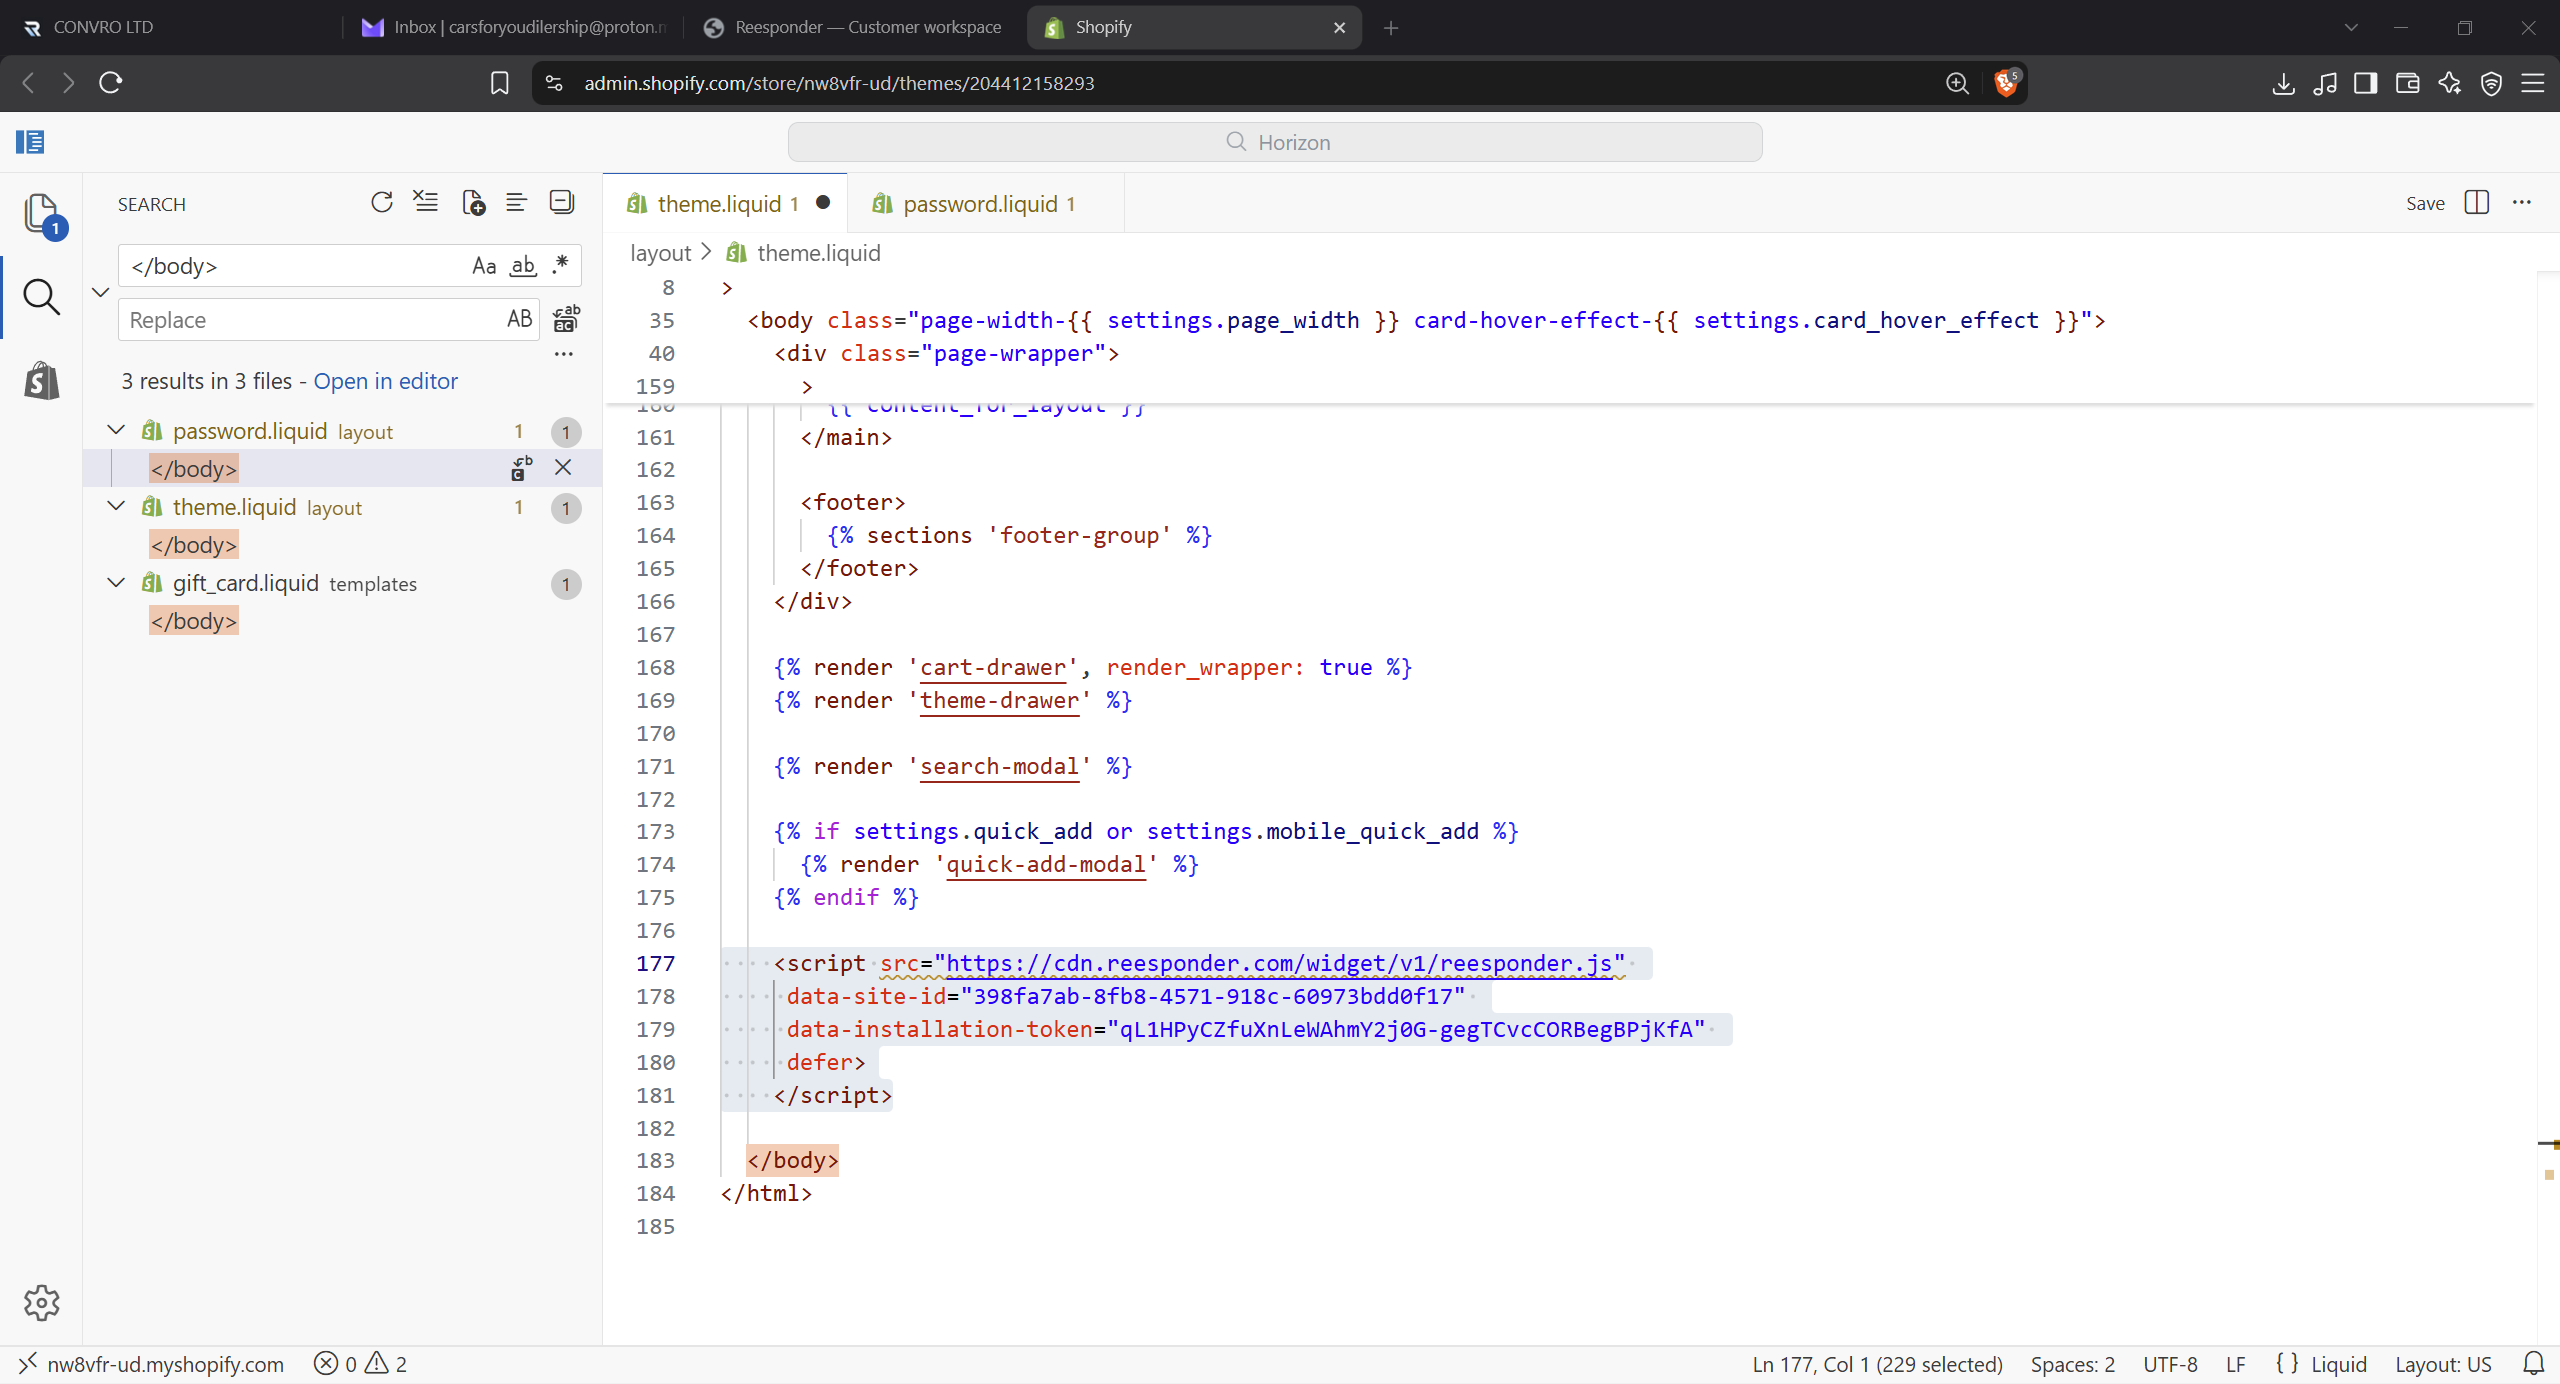
Find the closing </body> tag in layout/theme.liquid and paste the snippet on a new line immediately above it. Keep the existing code and click Save.

The screenshot shows the file before the snippet is added. Locate the closing </body> tag near the bottom. Insert a new line above it, keeping the existing scripts, Liquid expressions and closing tags in place.

Before: find the closing body tag in layout/theme.liquid.

After: paste the complete snippet above the tag and click Save.

Keep the existing theme code in place. Save your change, then open the public storefront to check the installation.

The next screenshot shows the complete code in position. Save the file before opening the storefront. Add the snippet once; repeating it in several theme components is unnecessary.

After: paste the complete snippet above the tag and click Save.

A saved theme change becomes a customer experience.

Open the public store to load the widget, confirm detection and send your first test question.

Visit your store and try the chat.

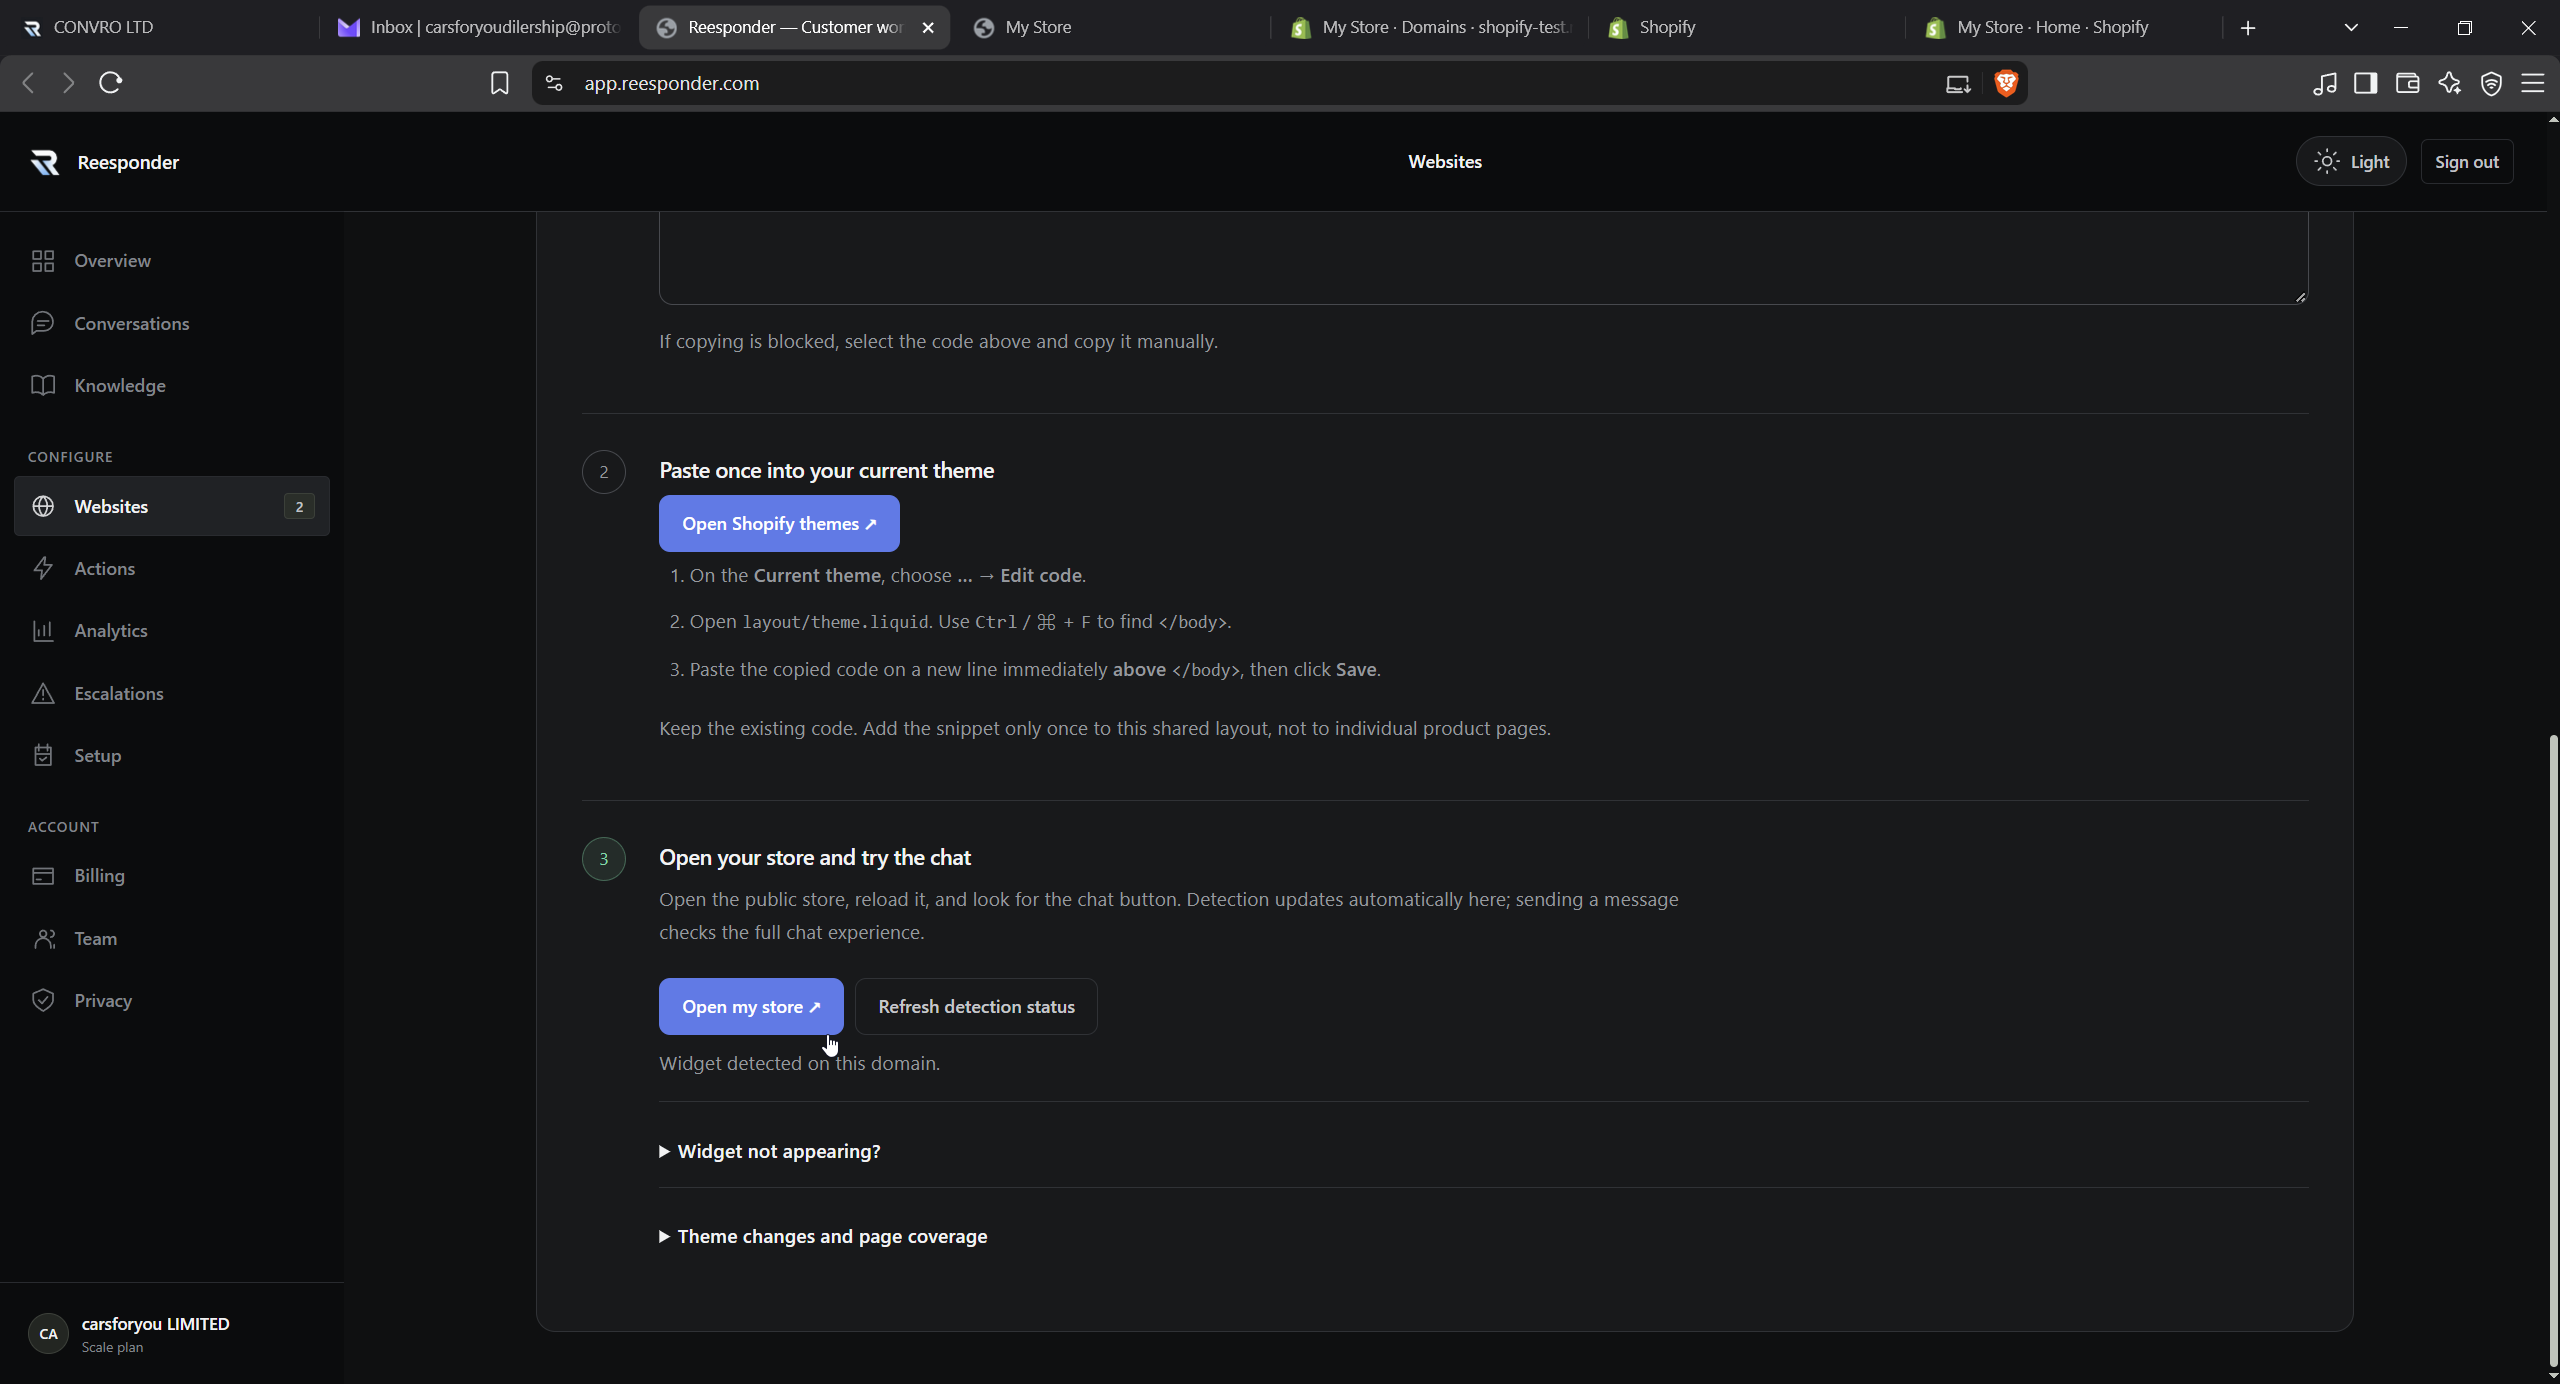
Open the public store and reload it. When the widget loads, Reesponder detects the installation. Send a message to check the conversation as well.

The panel can detect the widget only after it loads on the public store. Open the storefront, reload it, then return here and use Refresh detection status if the status has not updated yet.

Return to Reesponder to check detection, or click Refresh detection status.

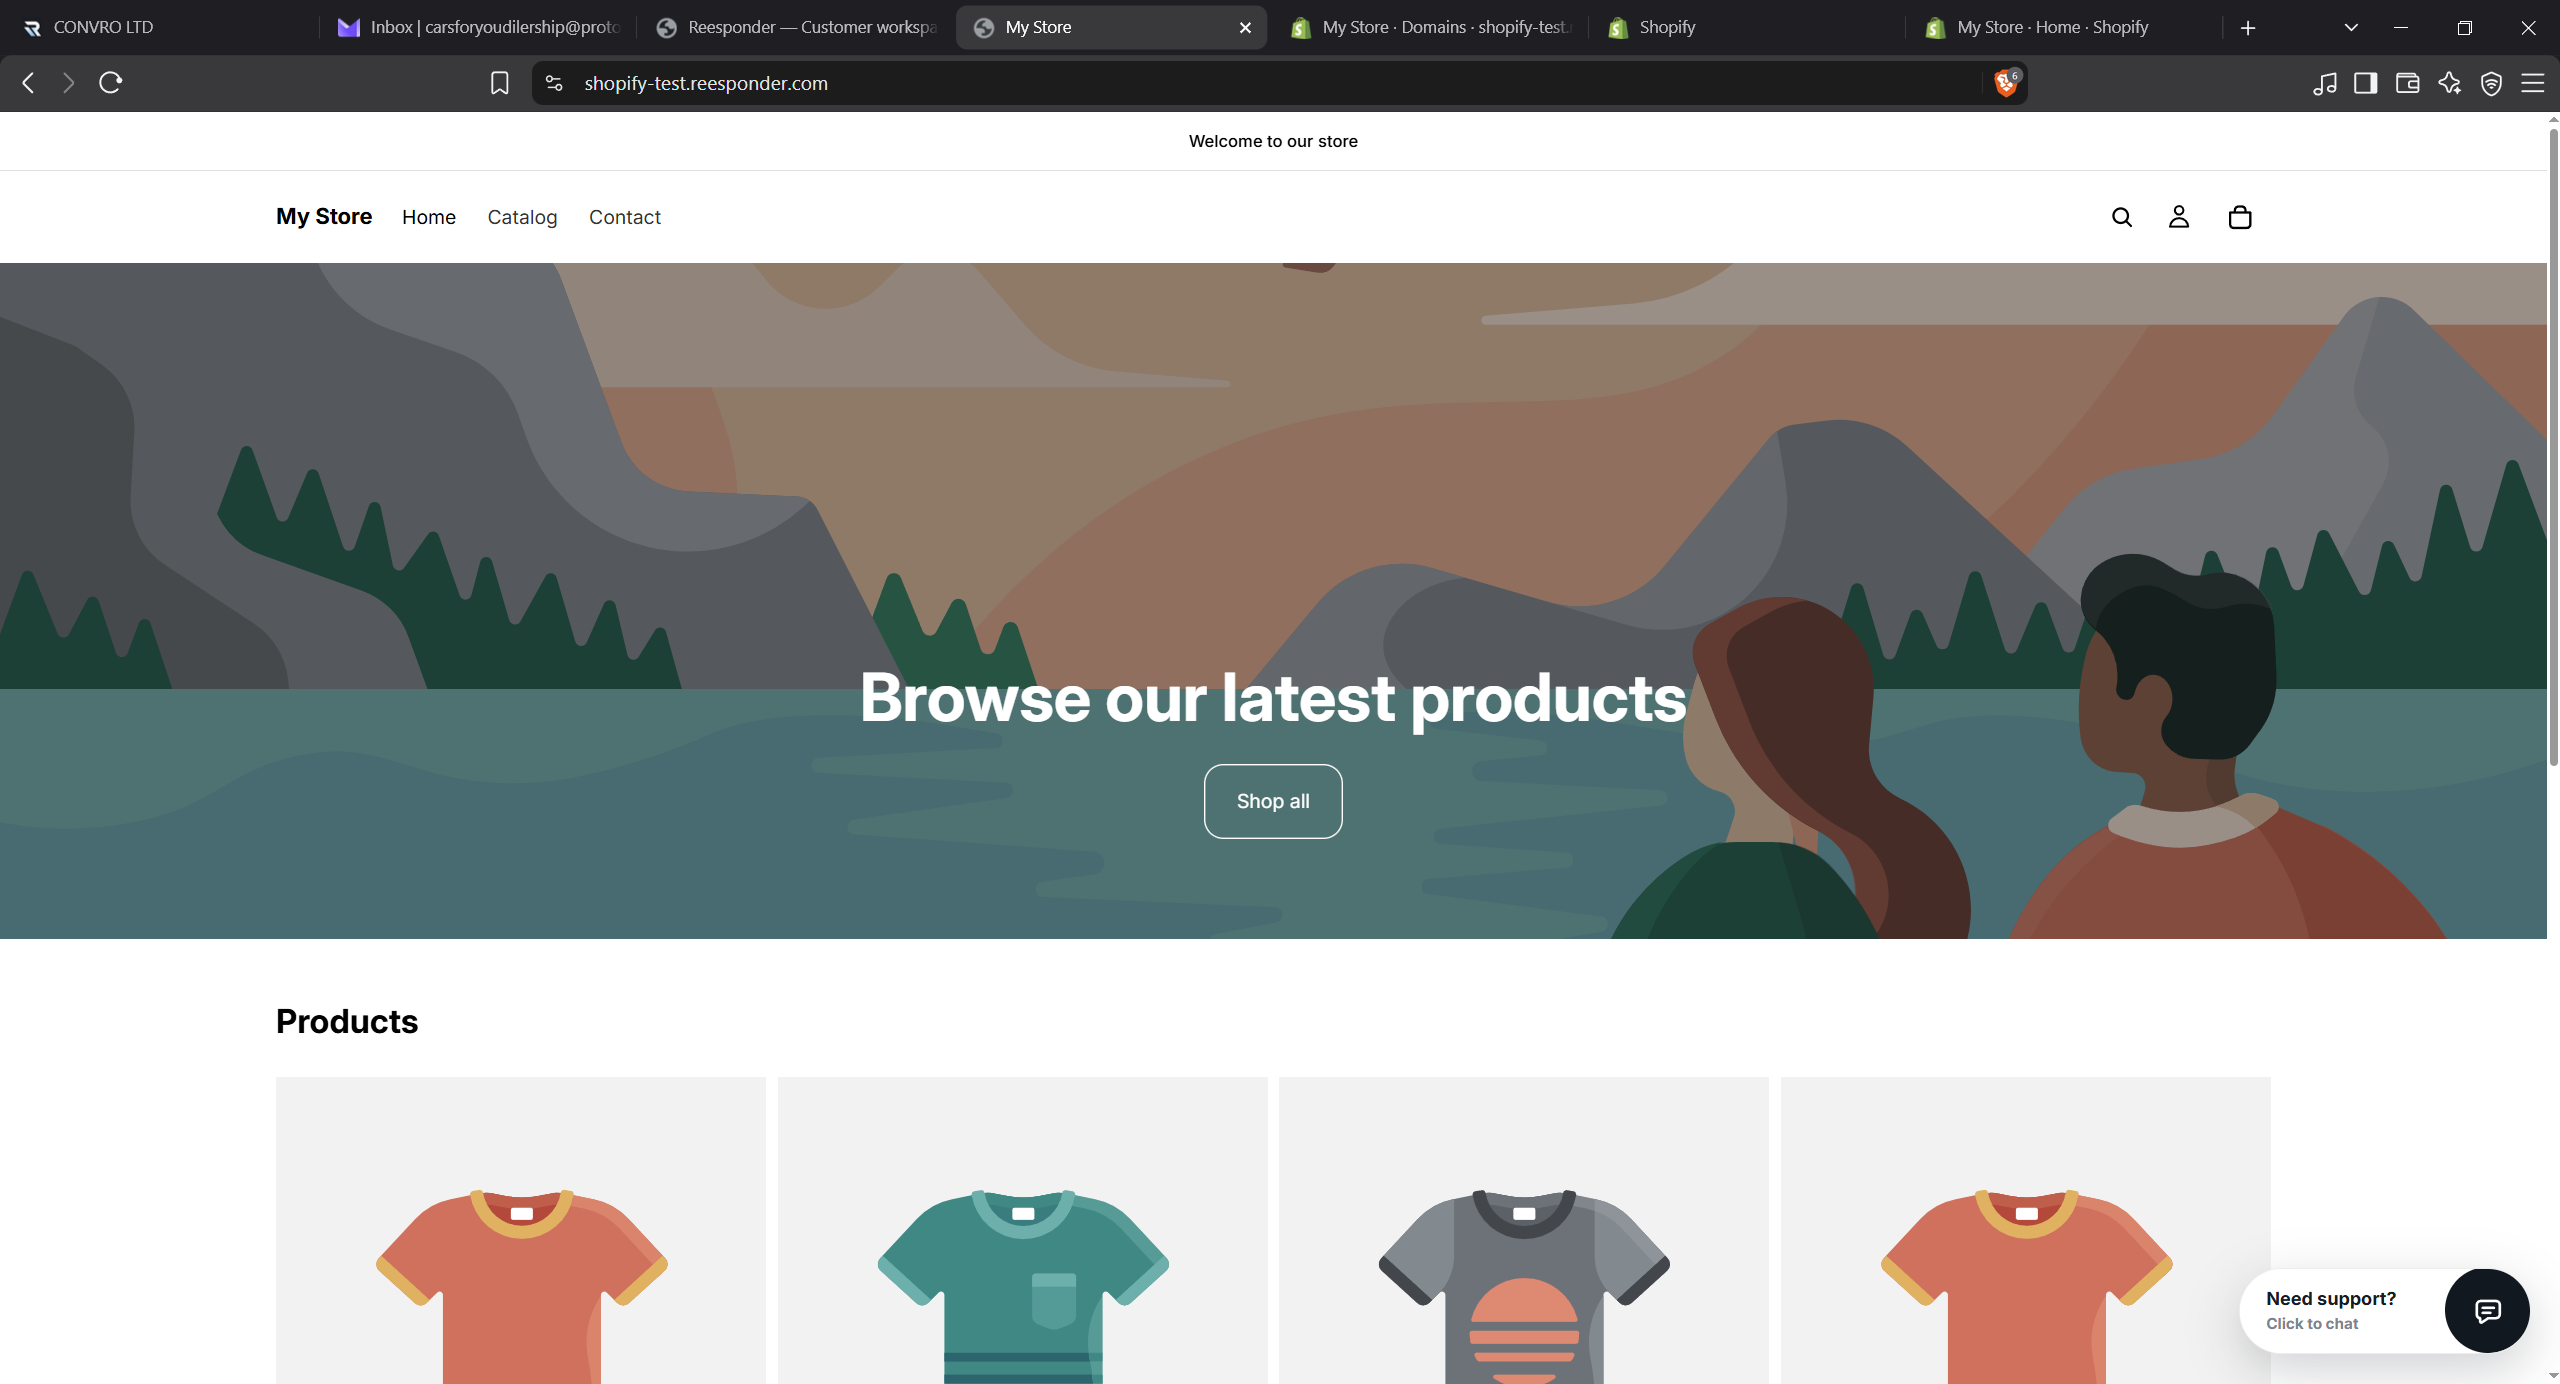
Your assistant is now on the storefront.

Visitors can open the chat while they browse. This example uses a demonstration store.

Check an ordinary storefront page as a visitor, rather than relying only on the theme editor preview. The launcher should be visible without covering an important control on your page.

The launcher appears in the corner of the store.

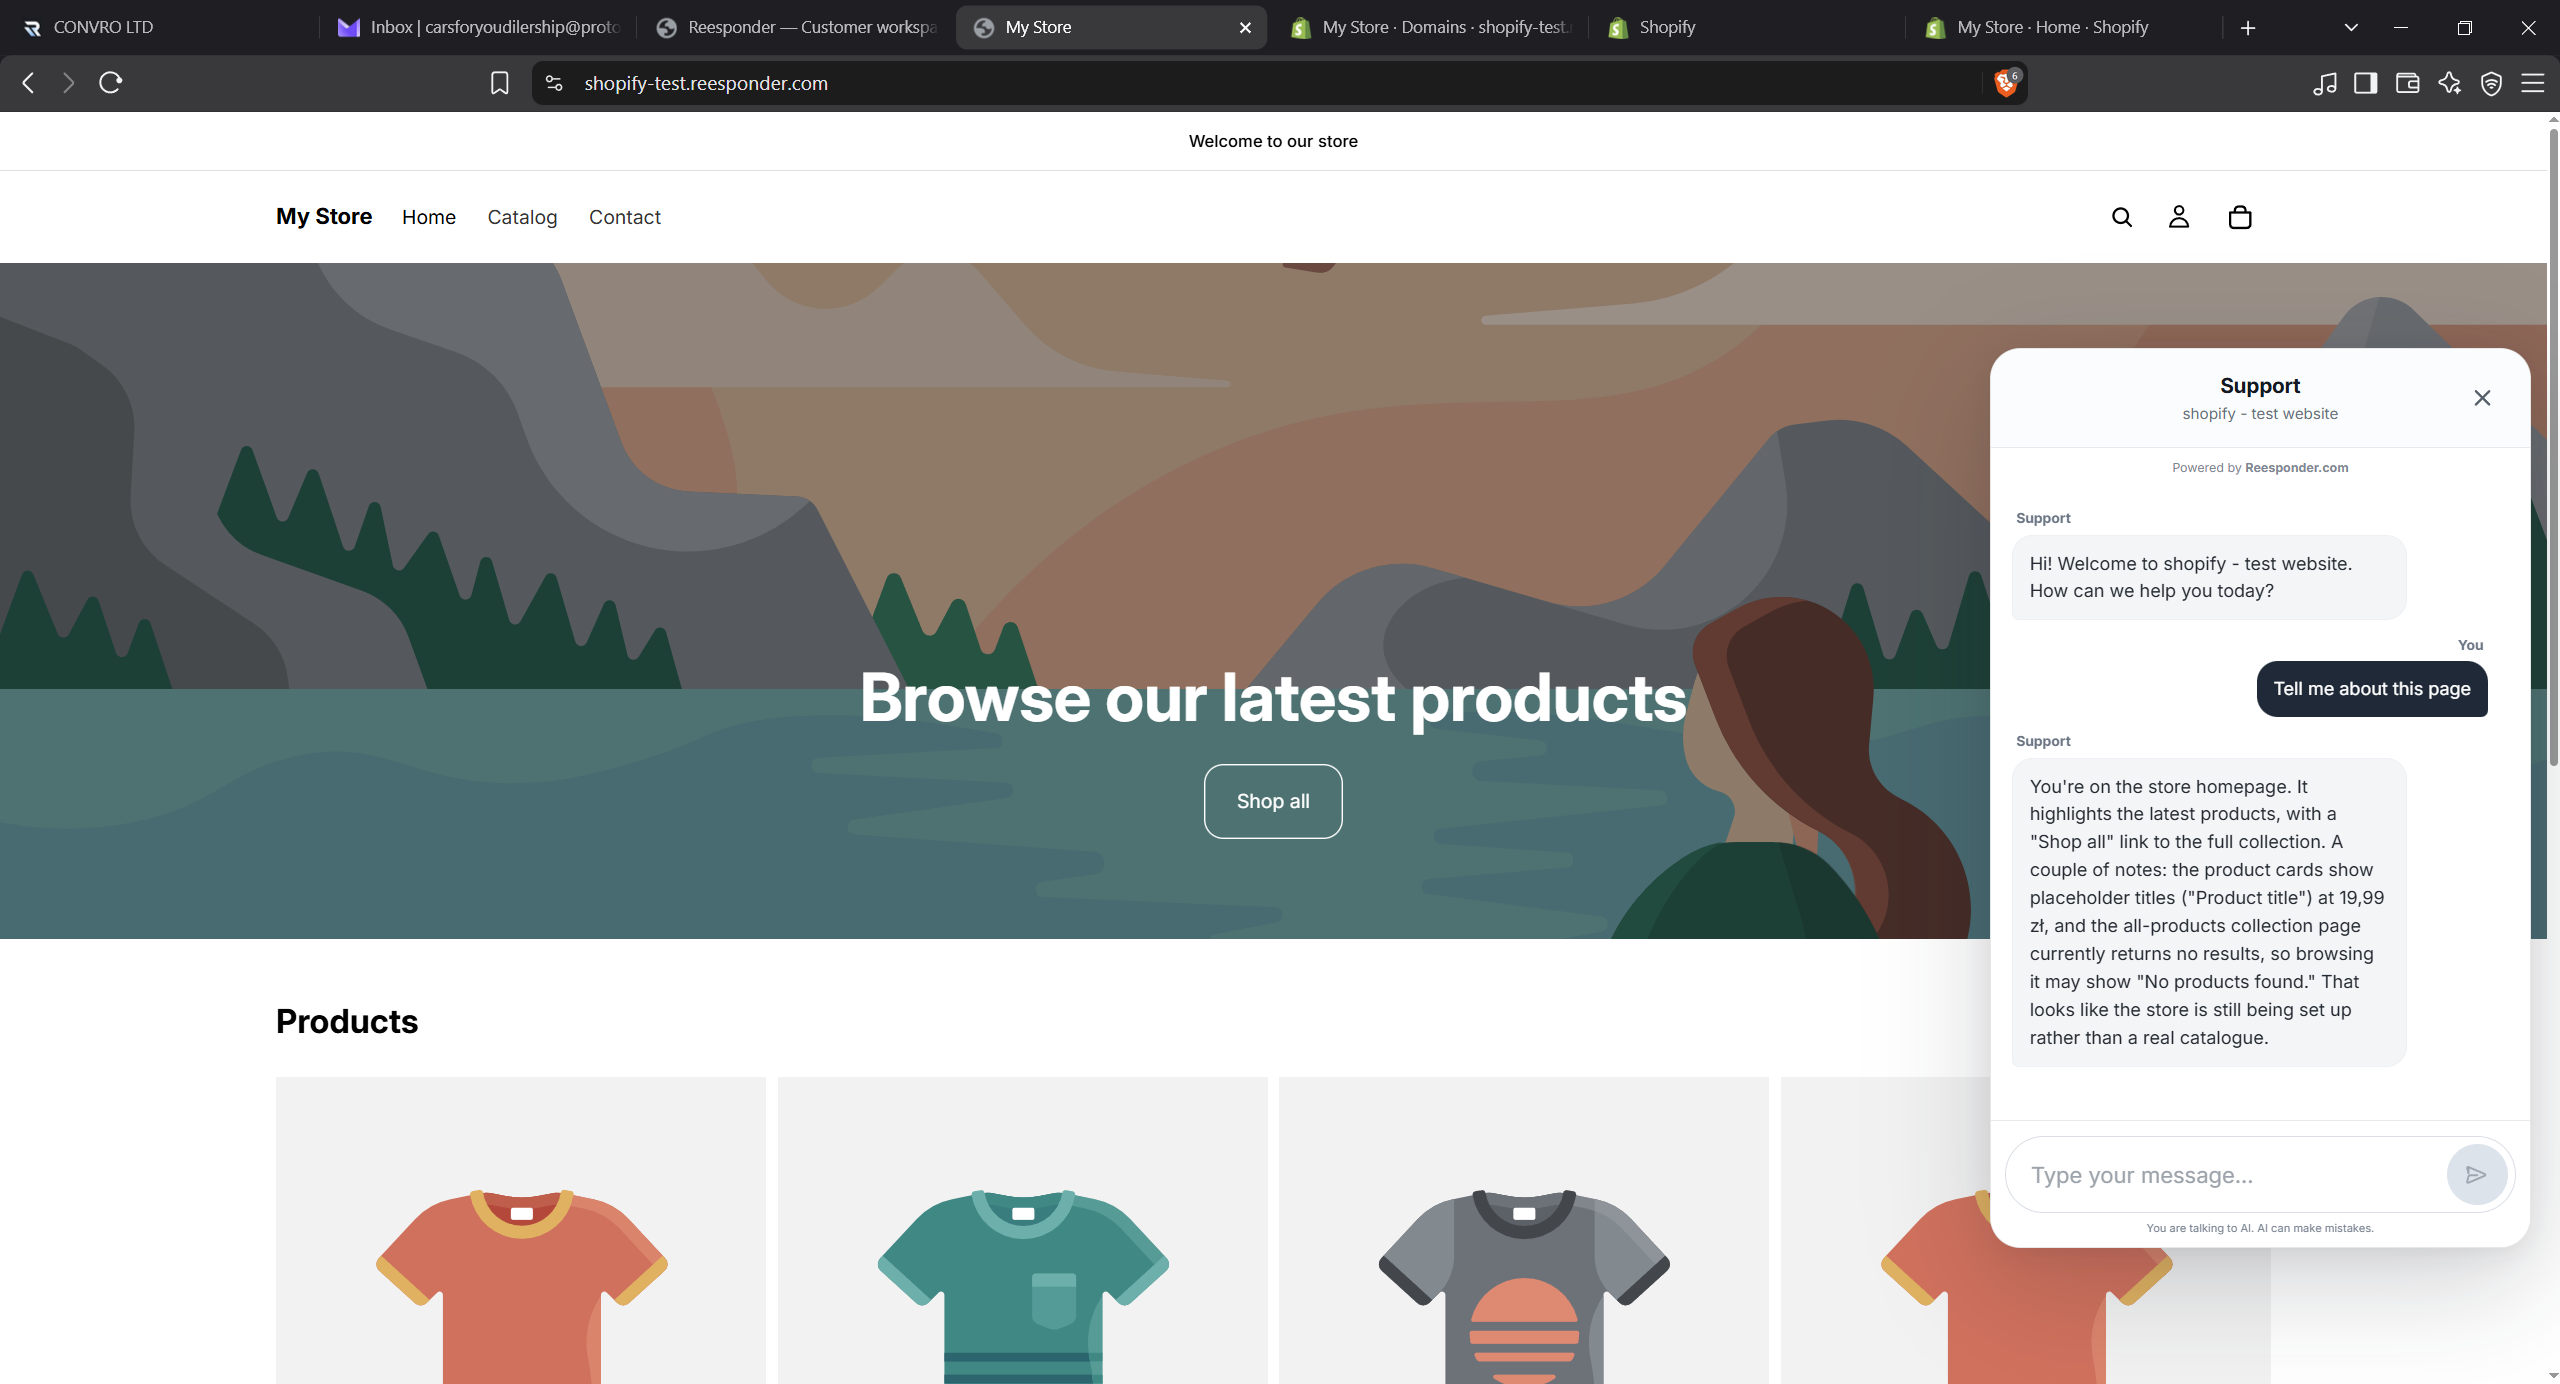
Open the chat and ask about the page.

Try a question about the store or the page you are viewing. The conversation should use the knowledge connected to this website.

Ask about a product or information already available in the connected Knowledge. For private account or order information, configure an authorised Action separately. Installing the storefront widget alone does not grant access to those records.

Open the chat and ask about the page.

Installed is the beginning.

Take a few minutes to check the details that turn a visible chat into useful customer support.

Review the knowledge.

Check what the assistant knows about your website. Add missing details such as delivery rules, support hours and service information in the panel. Use questions your visitors would actually ask.

Explore the workspace

Make the next step useful.

Knowledge answers questions. Actions can connect the conversation to your systems for tasks such as an order lookup, a basket update or a service request.

See Actions in practice

Keep a person within reach.

Configure human escalation for your website, then review incoming conversations. Give your team a clear route to follow up when a visitor needs help beyond the assistant.

Open your workspace

A few things
worth checking.

Practical answers for the person connecting your website.

Is this the Shopify App Store installation route?

No. This walkthrough uses the generated storefront snippet in your Shopify theme. Follow the steps shown here in the Reesponder panel and your active theme.

What happens if I switch themes?

The snippet belongs to the theme you edited. Add it to the new active theme when you change themes, and check the public storefront again.

Does it also appear at checkout?

This guide adds the widget to storefront pages using the edited theme layout. It does not add the widget to Shopify checkout.

Can the assistant access private orders after installation?

The snippet installs the chat. Private customer or order information requires a separately configured, authorised integration through Actions. Website Knowledge alone does not provide that access.

The theme is saved, but the chat is missing. What should I check?

Confirm that you edited the active theme for the correct store, pasted the complete snippet above the closing body tag and saved the file. Open the matching public domain, reload it and check installation detection in Reesponder.

Your website.
A conversation away.

Connect the domain, complete the installation and try the experience yourself.

Open Reesponder Find your plan