Skip to the walkthrough

WordPress connected. No theme editing required.

Upload the plugin, connect your workspace and enable the chat. The same setup brings Reesponder to a WordPress website or a WooCommerce storefront.

Follow the setup
WordPress and WooCommerce storefront on a laptop
WordPressWooCommerce

Start with the public address.

Add the website in Reesponder and open the WordPress installation instructions.

Add your WordPress website.

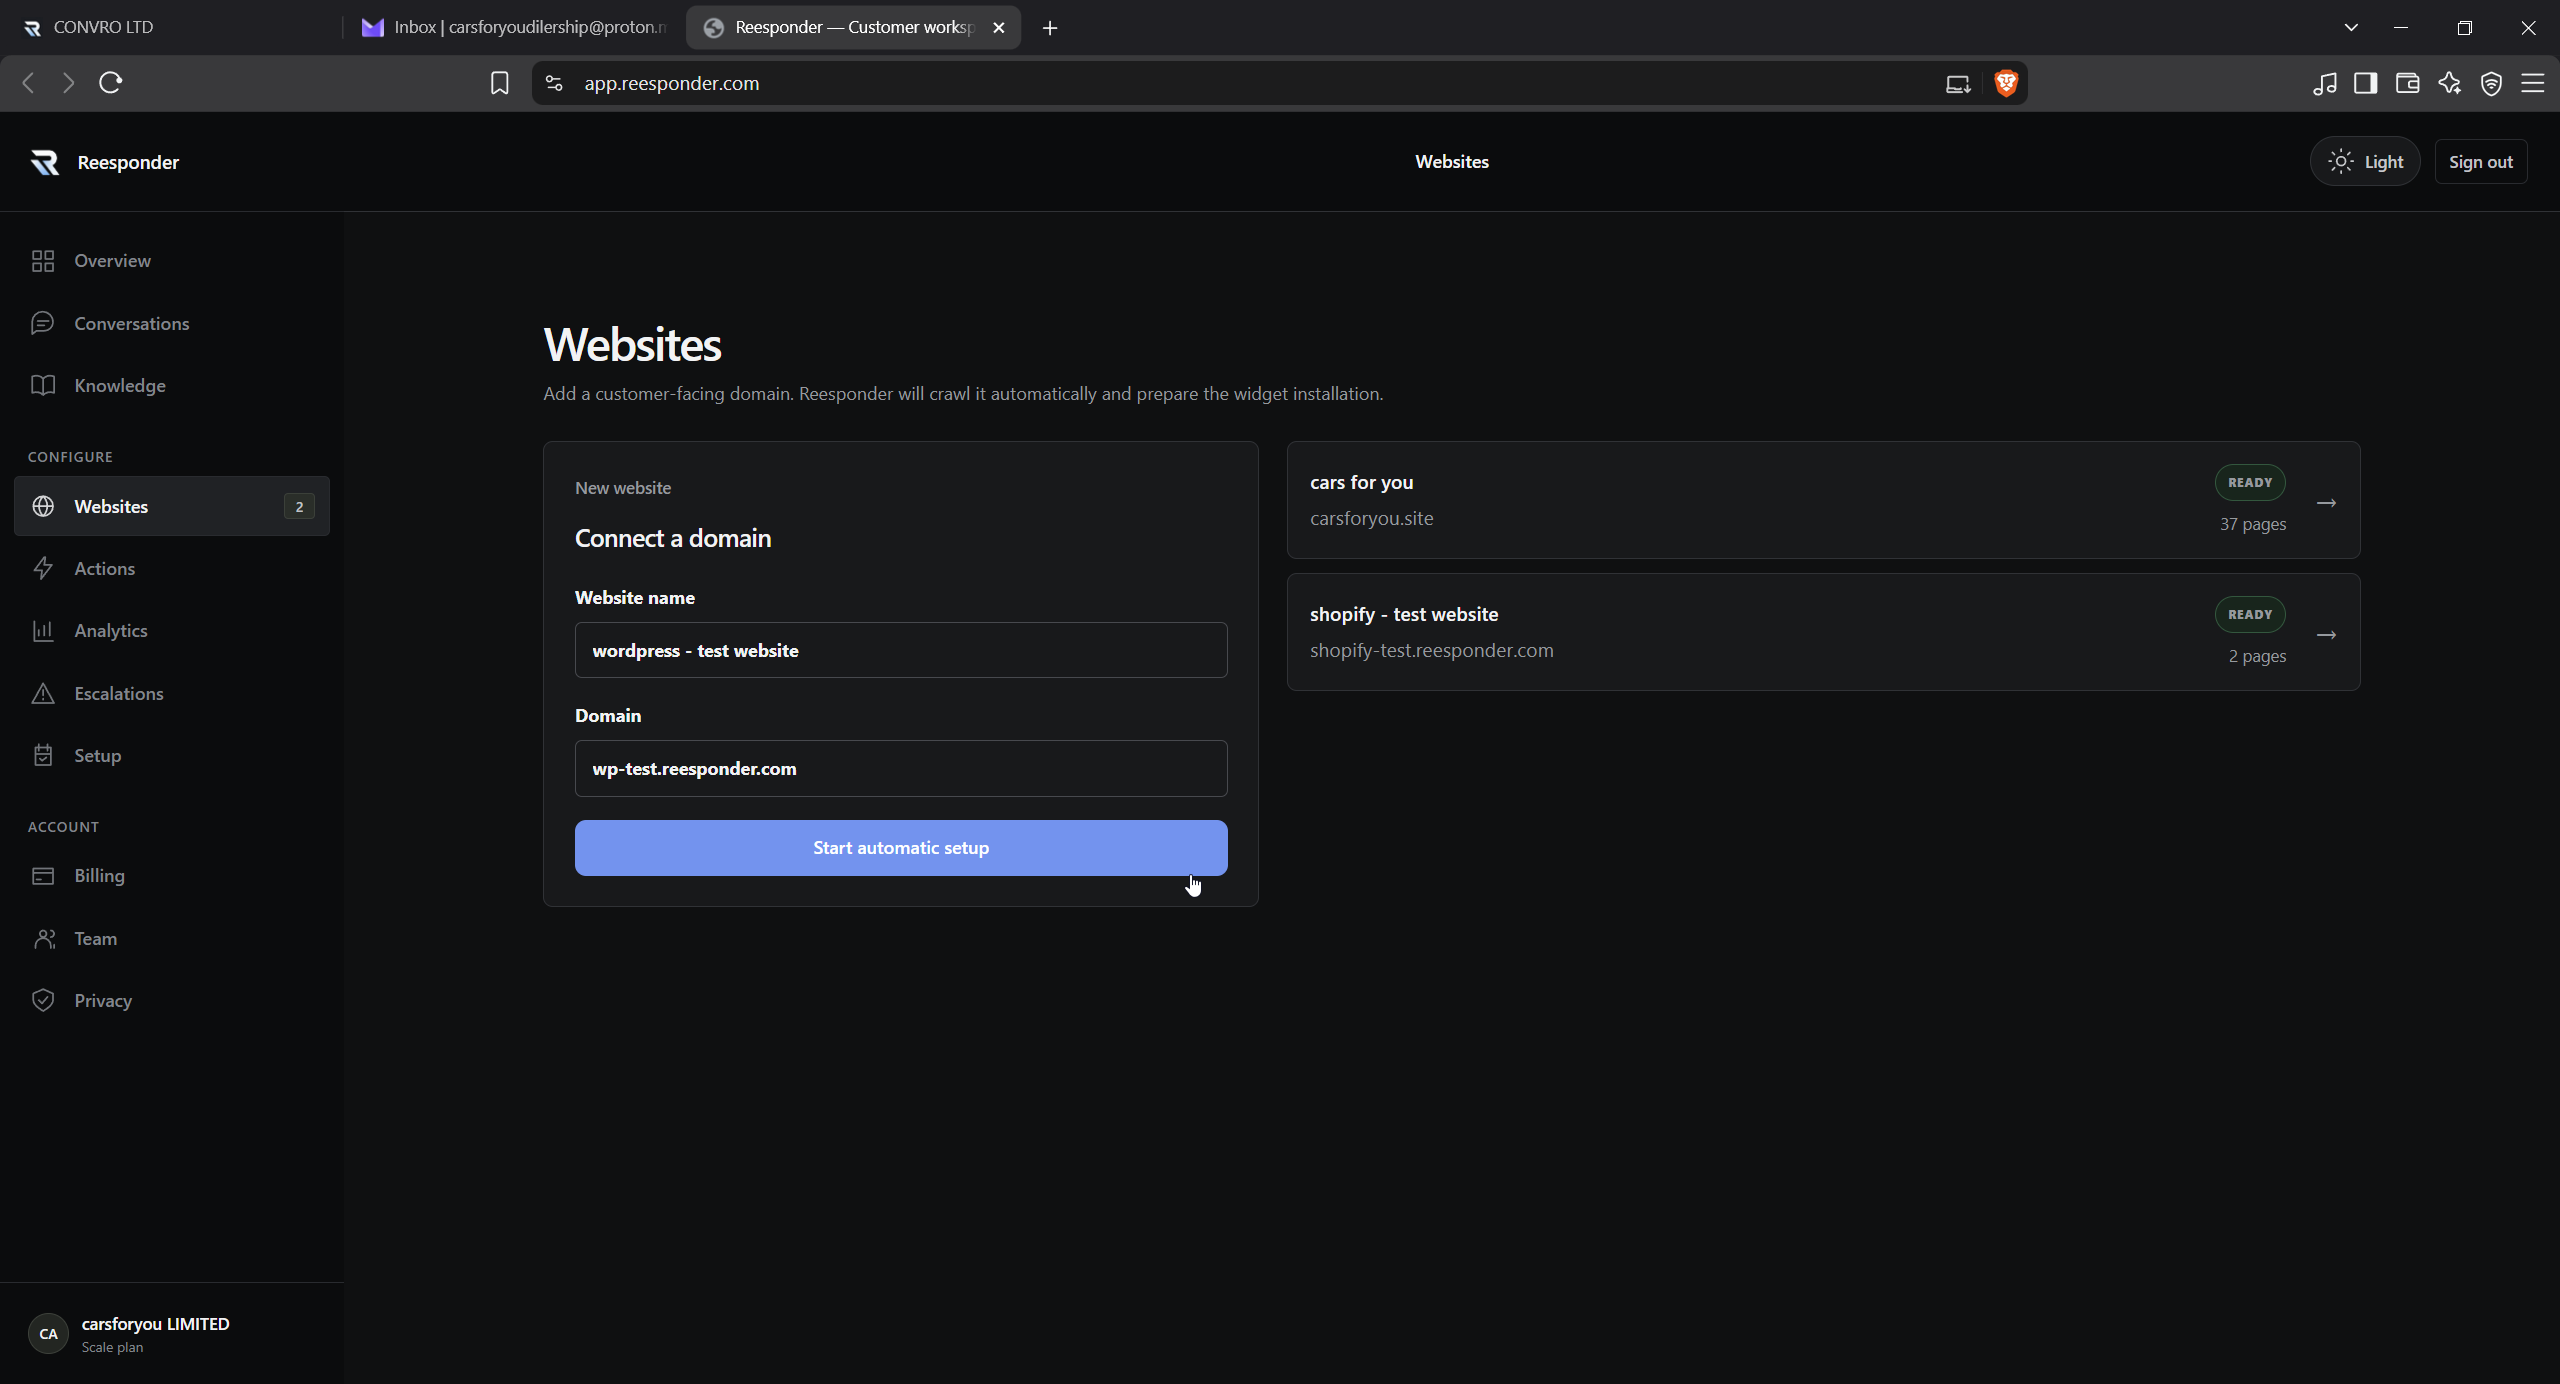
In Reesponder, open Websites, enter a name and your public domain, then click Start automatic setup. Open the new website when its initial crawl has finished.

Use your public website address, not the /wp-admin address. Have a WordPress administrator account ready with permission to install plugins. WooCommerce stores follow this same WordPress installation route.

Enter the public domain of your WordPress website.

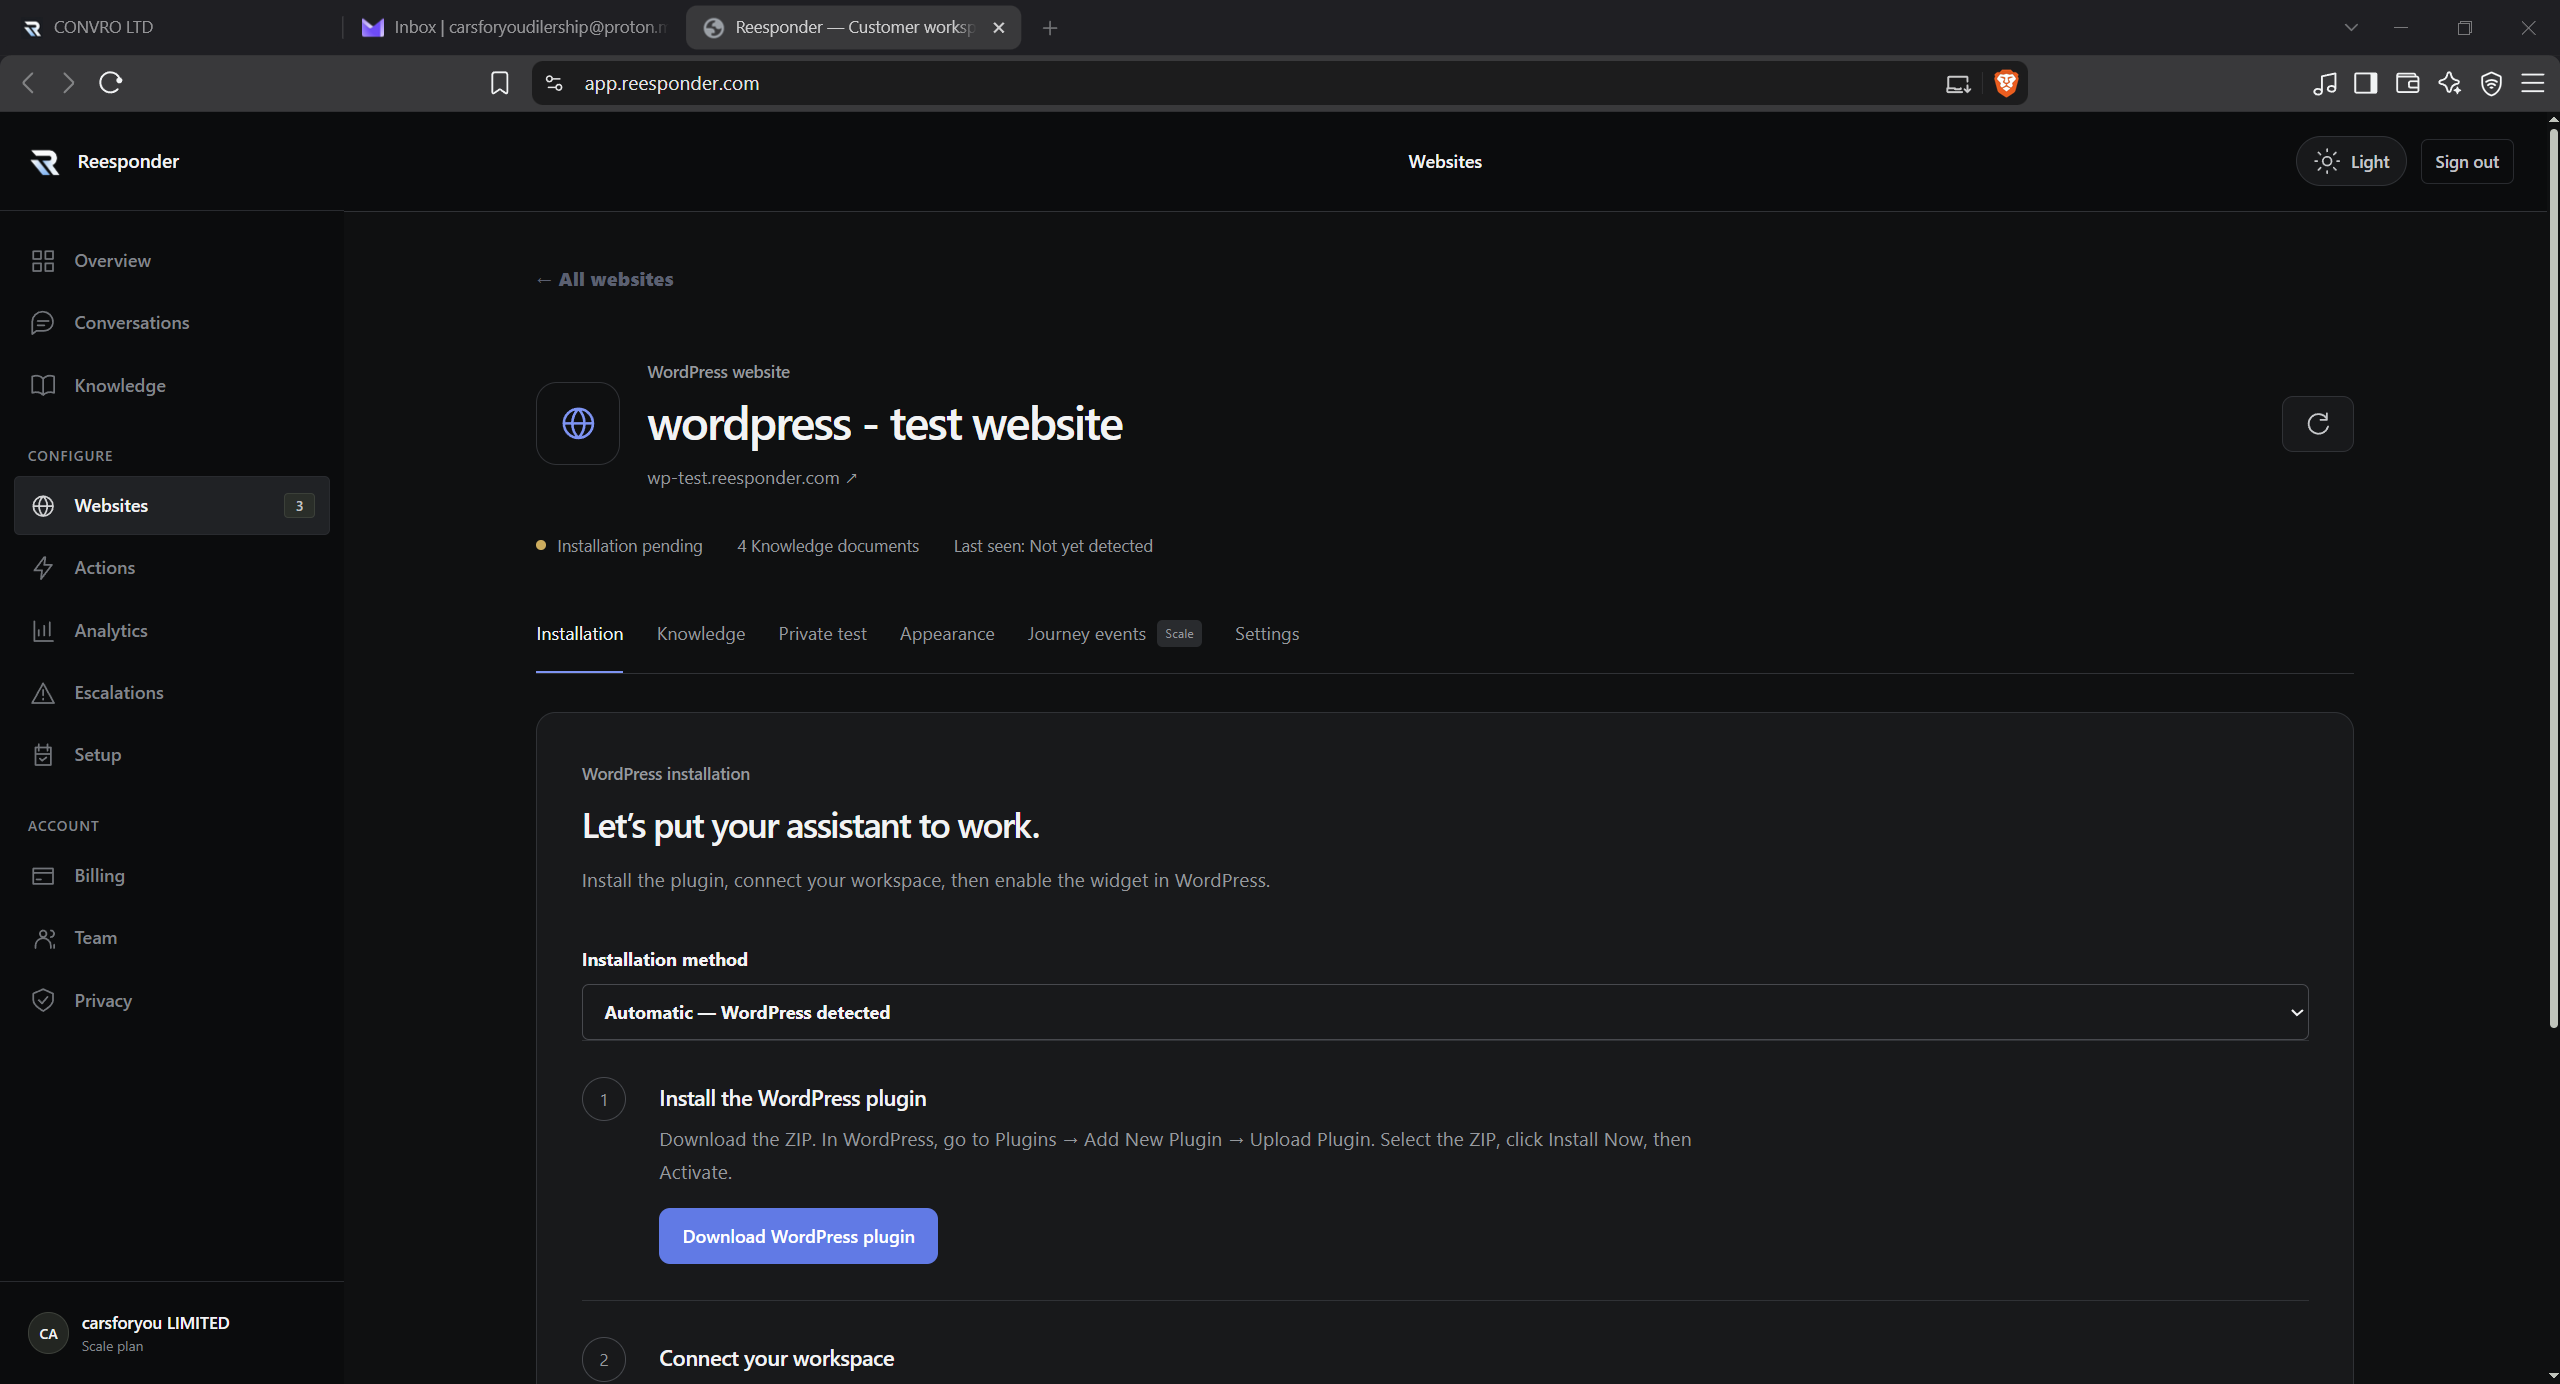
Reesponder recognises WordPress and offers the plugin download.

Use the plugin offered in this website’s Installation tab. Download the ZIP and keep it ready for the next step.

Download the ZIP offered in the website’s Installation tab. Keep it as a ZIP file: WordPress expects the archive during upload. There is no need to edit a theme file for this plugin route.

Reesponder recognises WordPress and offers the plugin download.

Download once. Upload. Activate.

Keep the plugin as a ZIP archive. WordPress installs the files and then asks you to activate the plugin.

Download the plugin and upload it to WordPress.

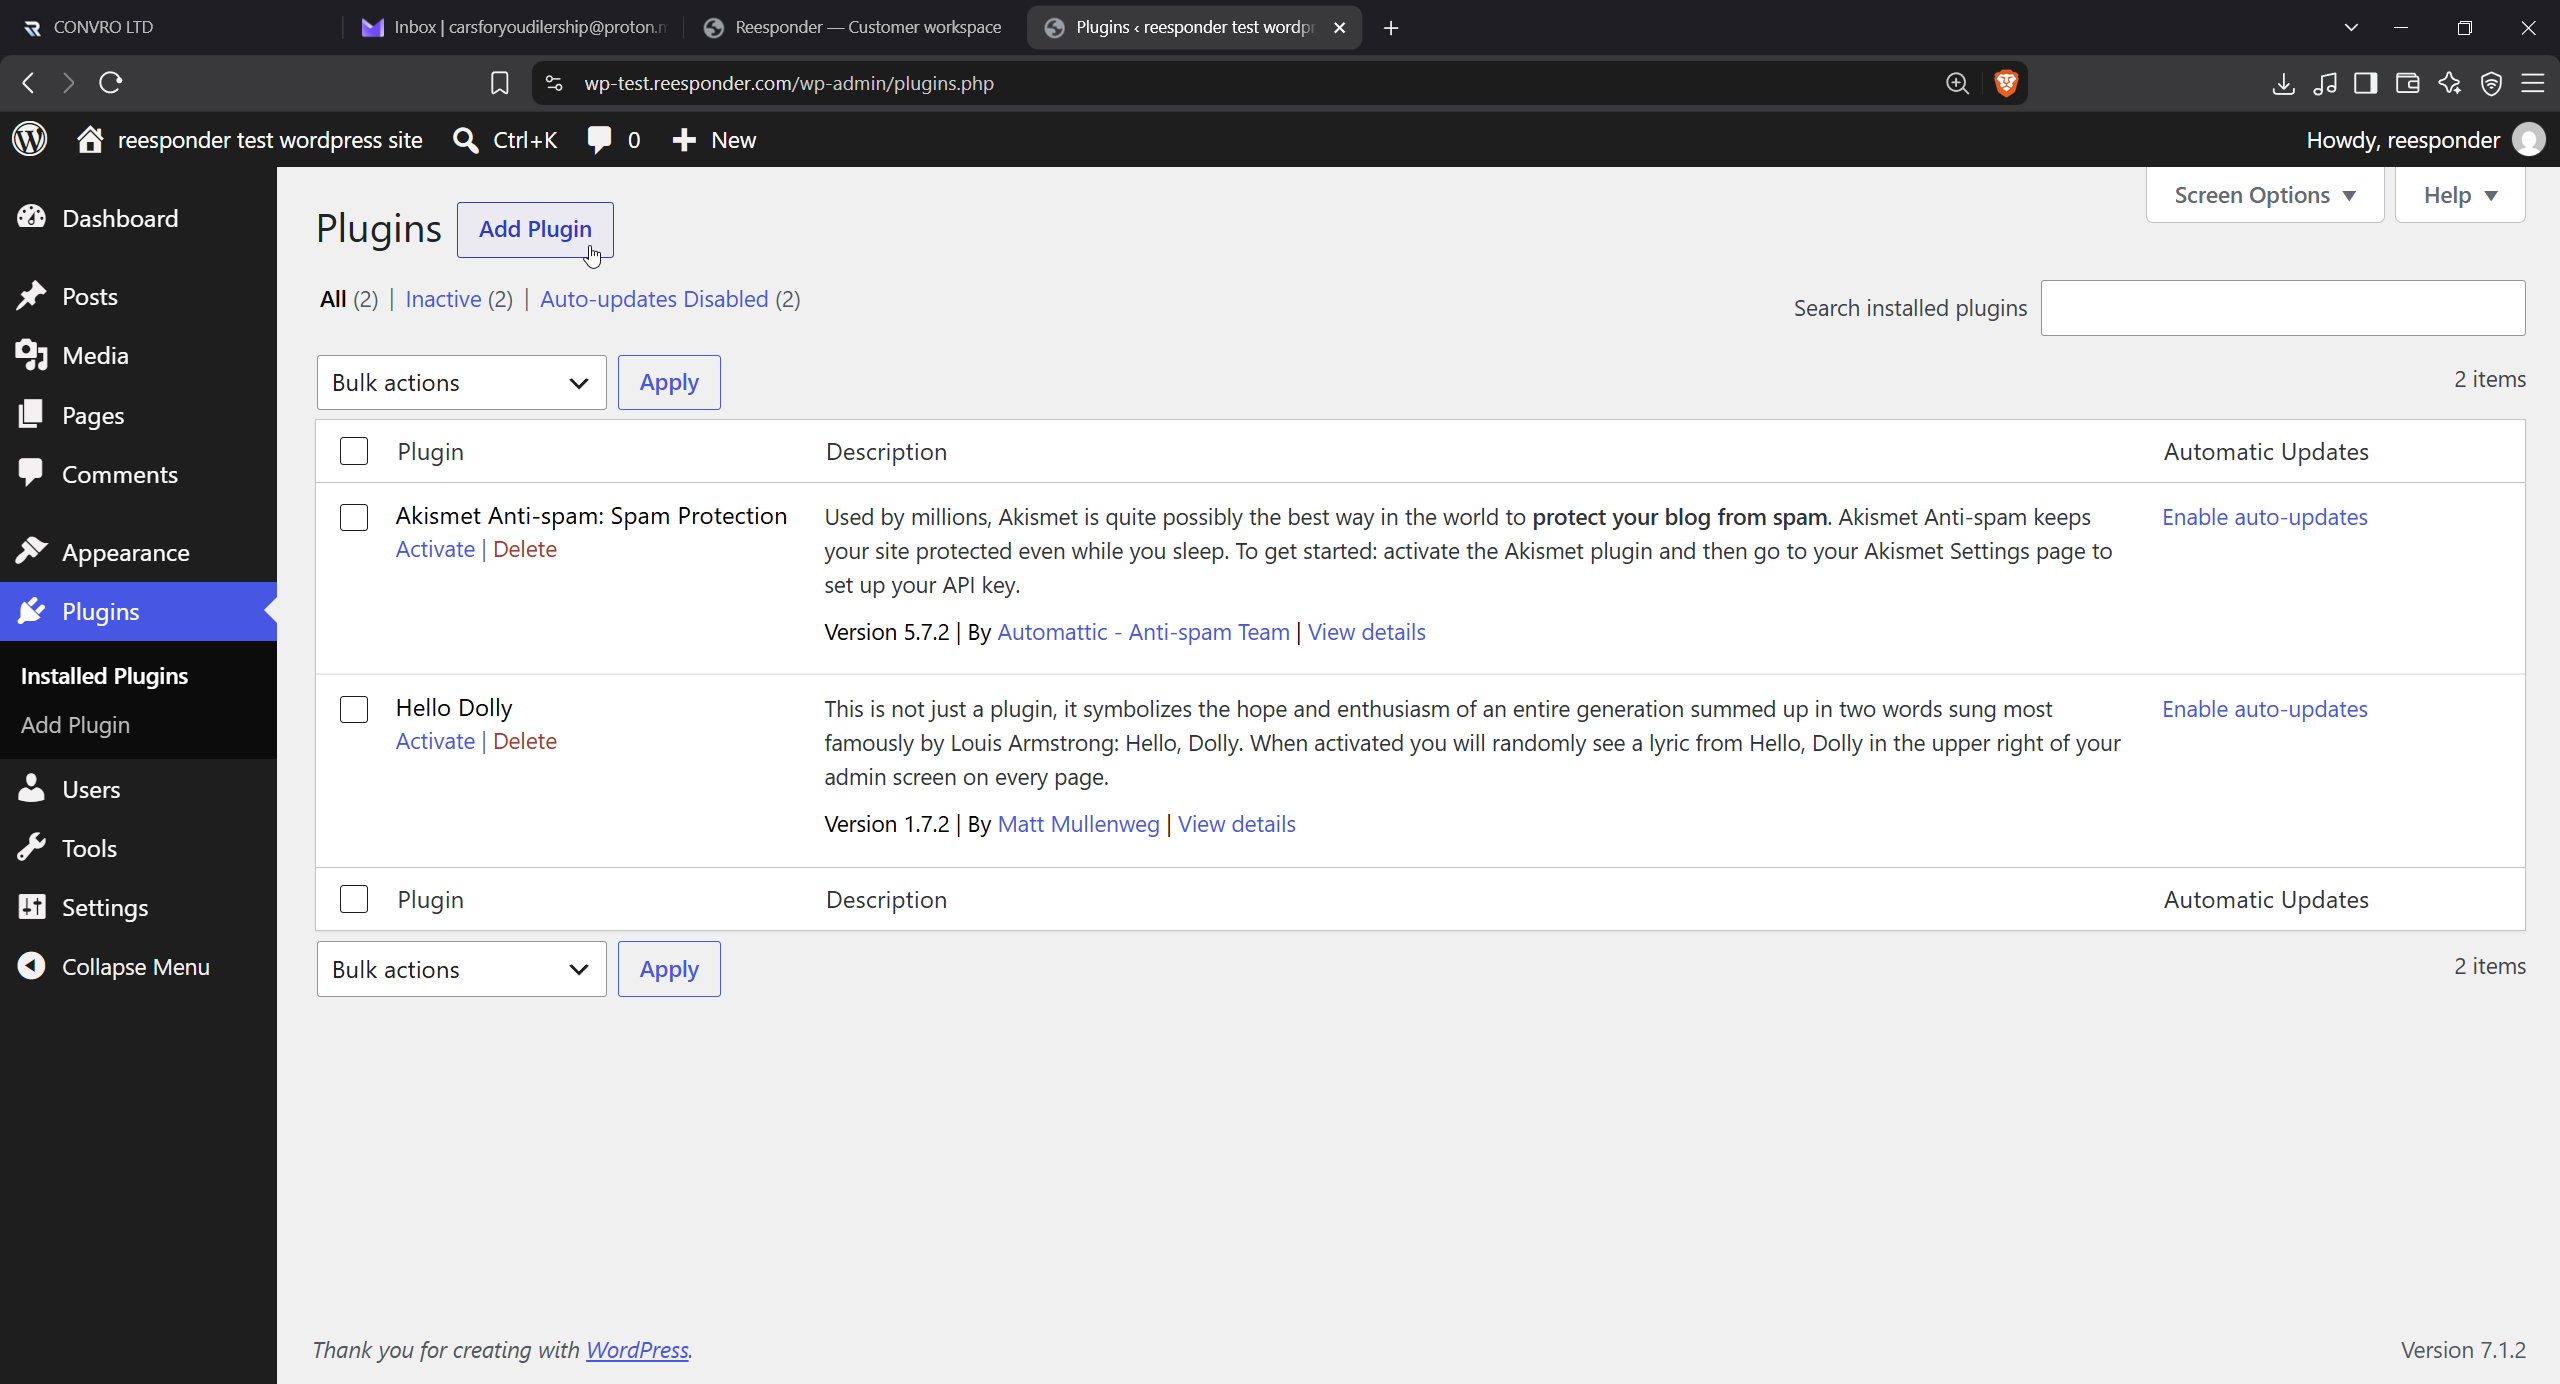
Click Download WordPress plugin in Reesponder. Keep the downloaded file as a ZIP. In your WordPress dashboard, go to Plugins → Add Plugin → Upload Plugin.

Open the WordPress dashboard for the same domain you added to Reesponder. The plugin installation is performed in WordPress; the website’s Knowledge and assistant settings remain in your Reesponder workspace.

In WordPress, click Add Plugin.

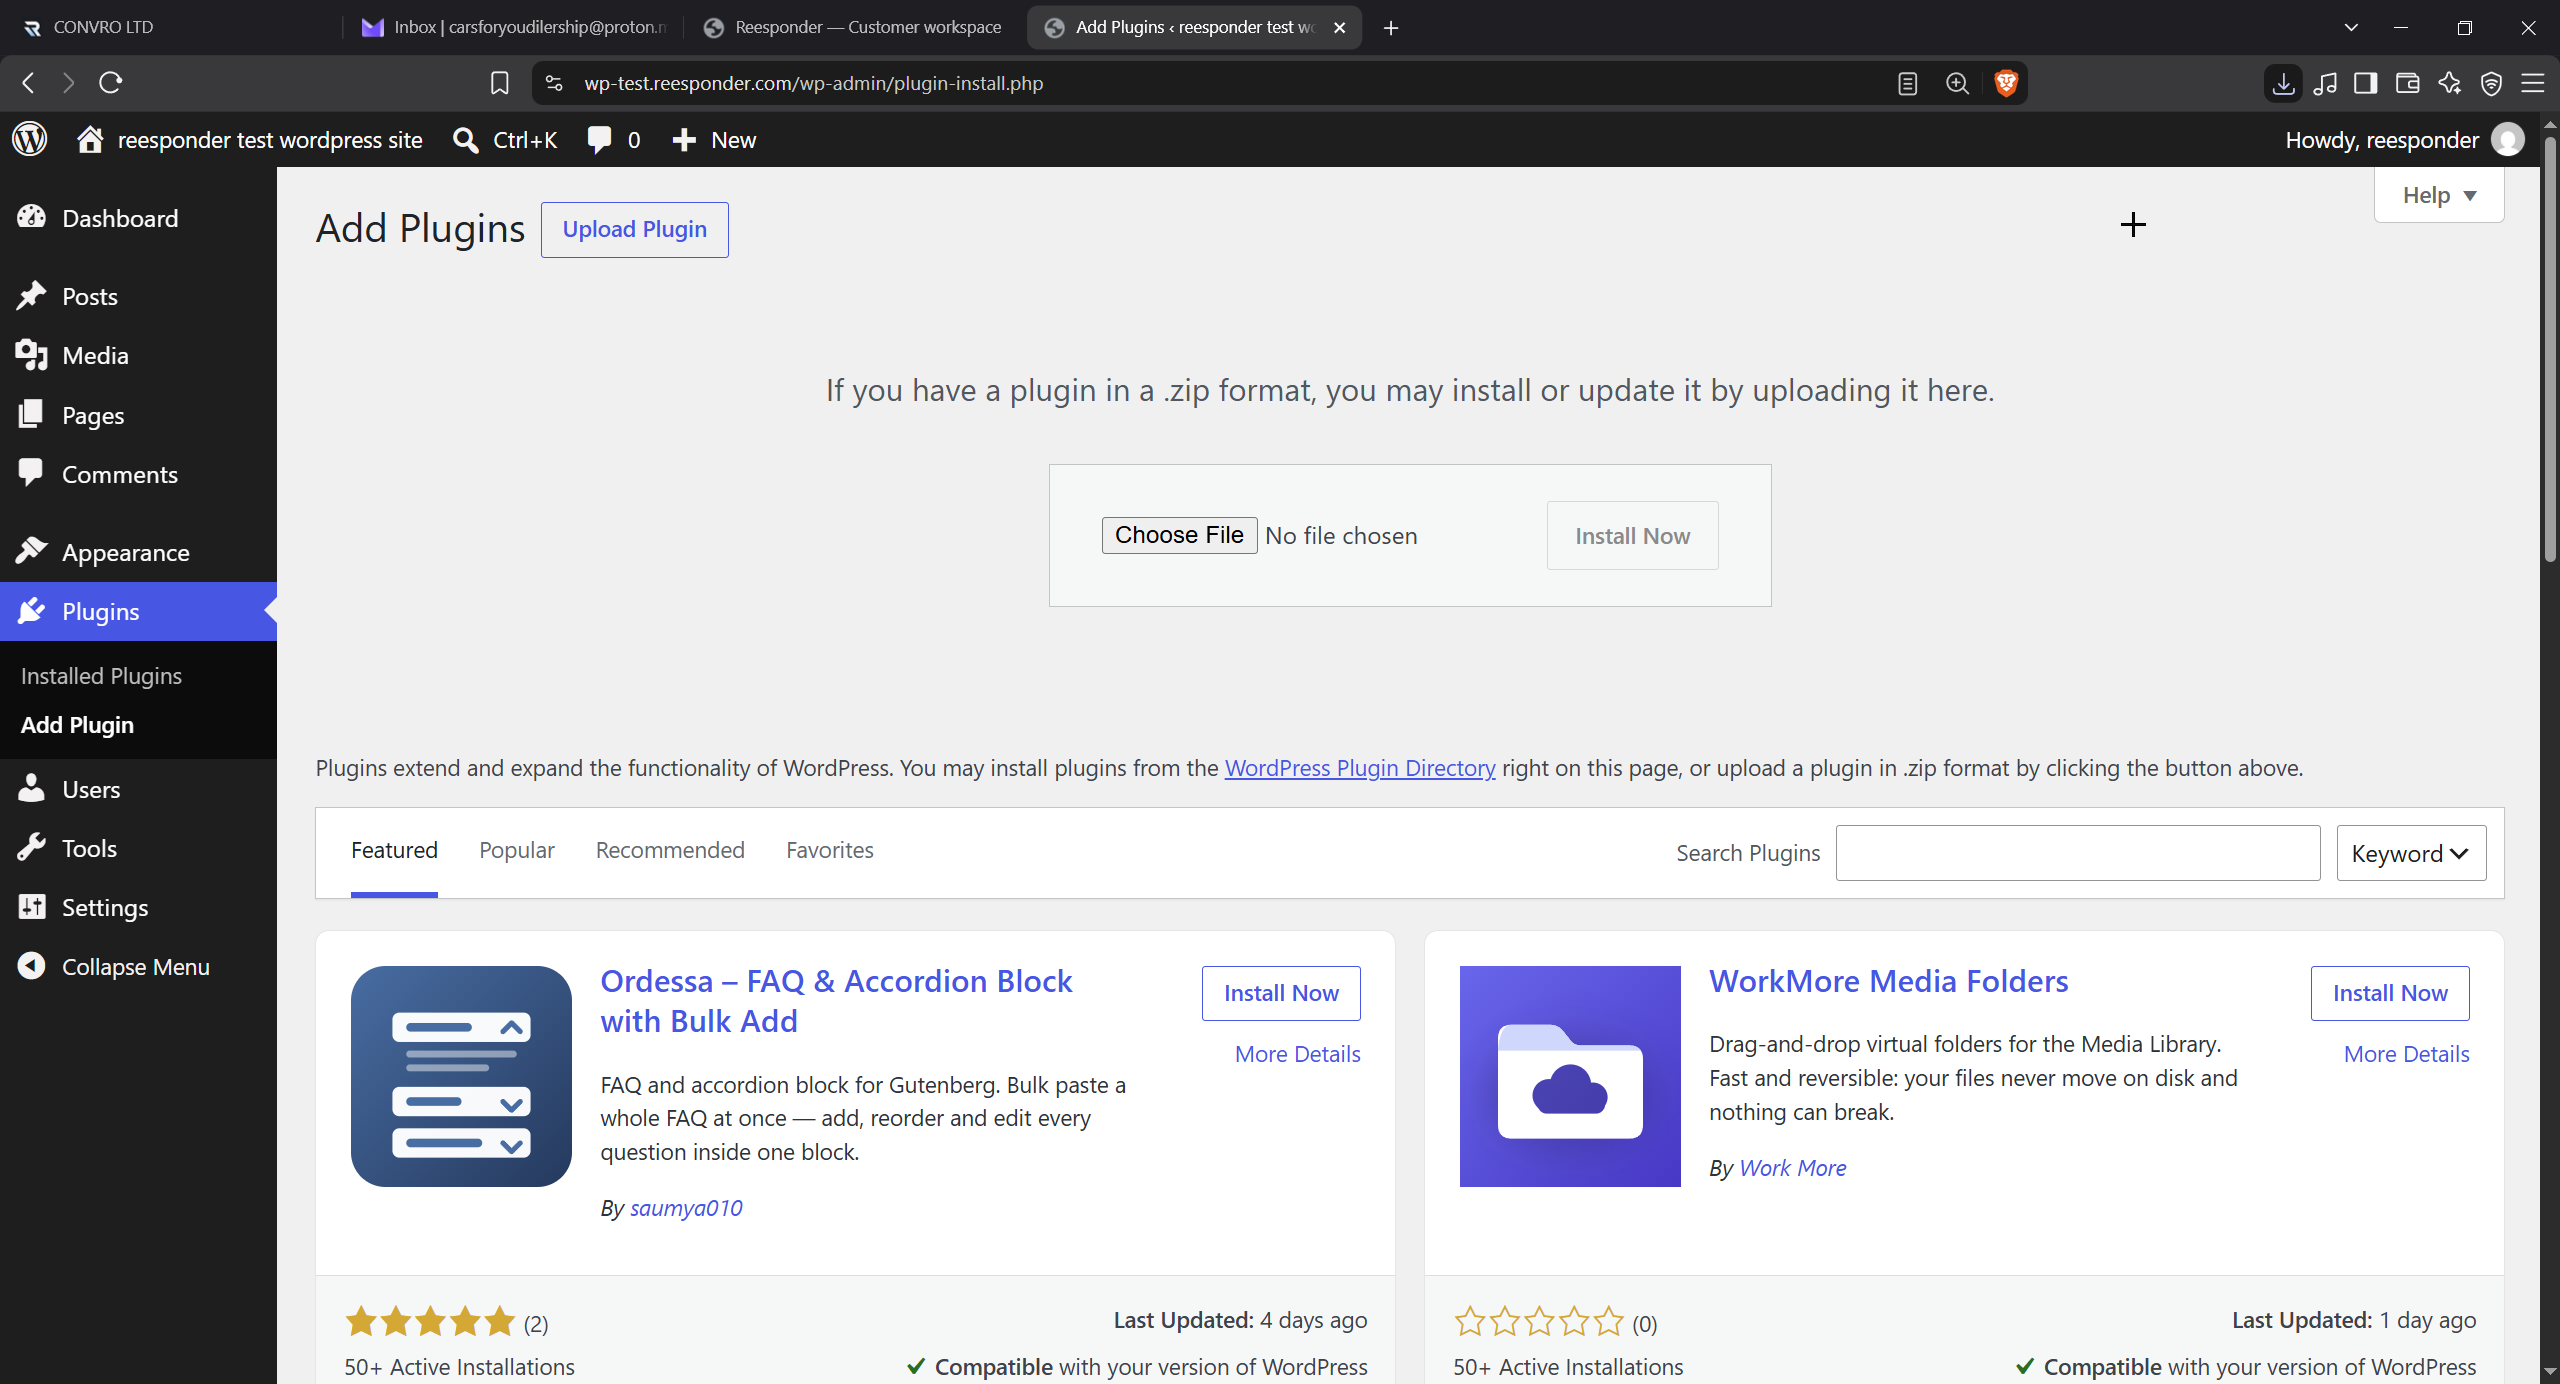
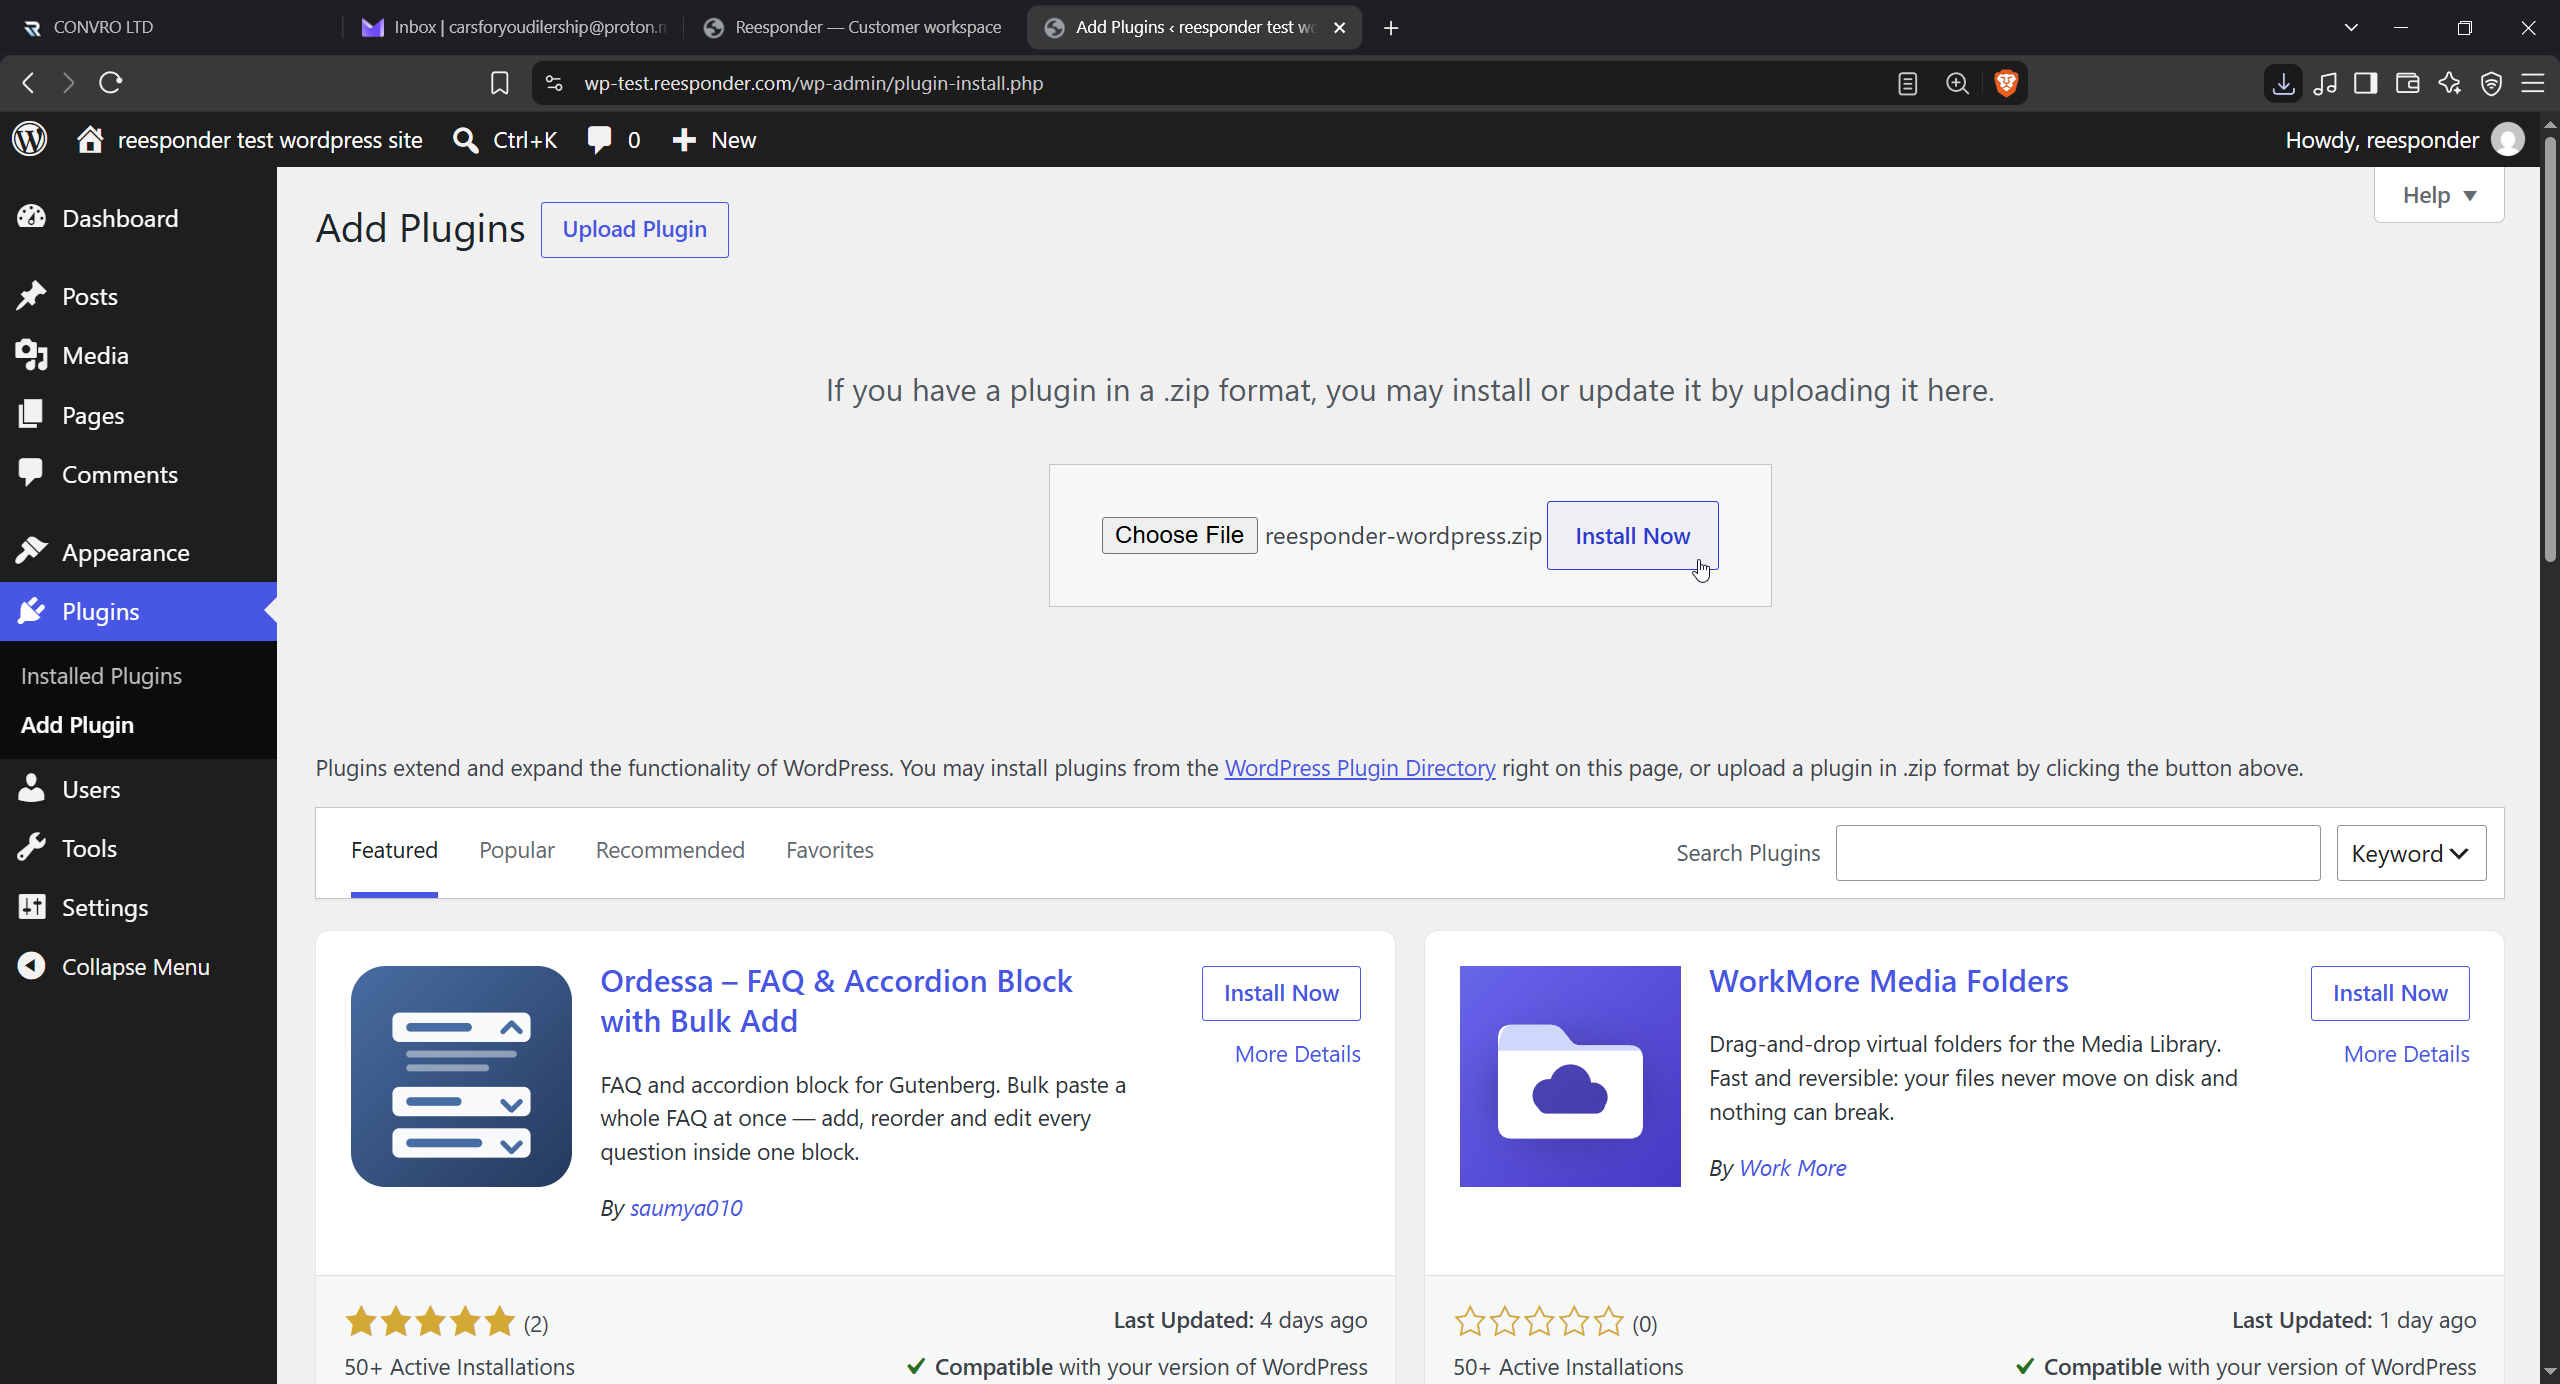
Click Upload Plugin, then Choose File.

The upload form accepts the ZIP downloaded from Reesponder. You do not need to extract it or edit your theme.

Choose the Reesponder plugin archive from your computer. If your WordPress account does not offer plugin uploads, use an administrator account or ask the person who manages the website to install it.

Click Upload Plugin, then Choose File.

Install the ZIP, then activate it.

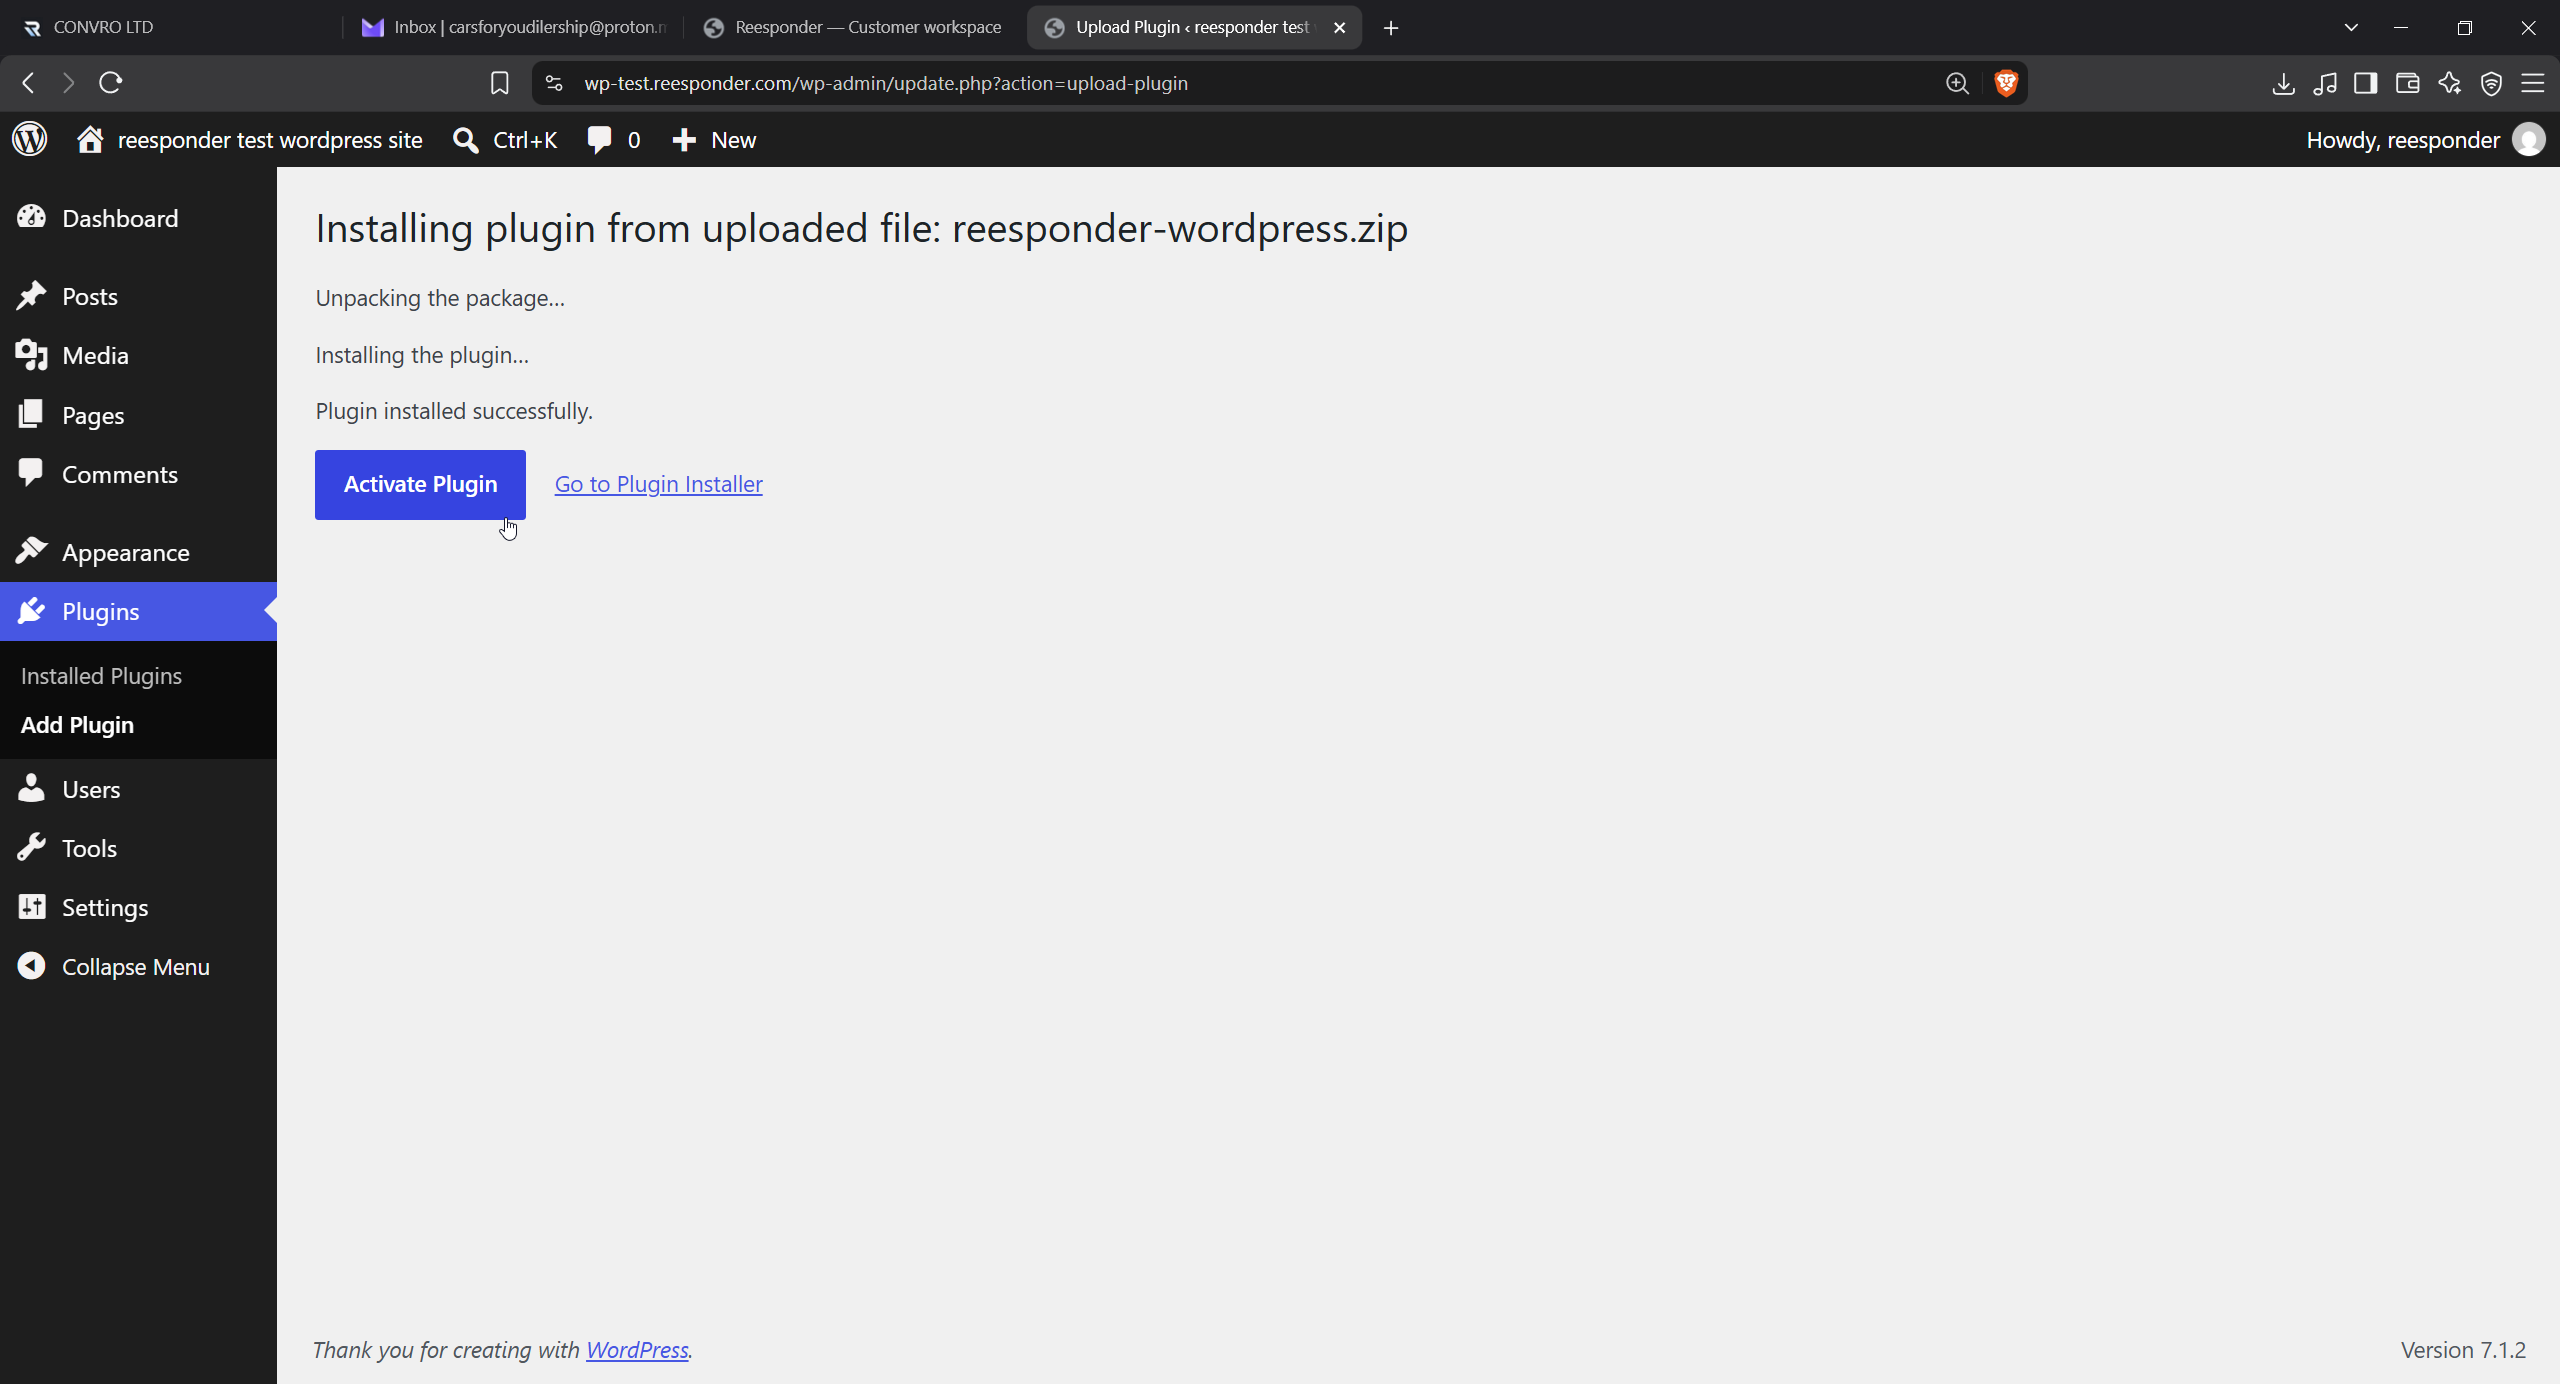
Select reesponder-wordpress.zip and click Install Now. Once WordPress confirms the installation, click Activate Plugin.

Check that the selected file is reesponder-wordpress.zip, then start the installation. Wait for WordPress to report the result before moving to the next step. Selecting a file alone does not install the plugin.

Select the downloaded ZIP and click Install Now.

Click Activate Plugin after the installation succeeds.

Activation makes the plugin available in the WordPress sidebar. The next step connects it to your Reesponder workspace.

Installing and activating are two separate steps. After activation, open the Reesponder entry in the WordPress sidebar to continue with the account connection.

Click Activate Plugin after the installation succeeds.

Give this website the right home.

Approve the website connection in Reesponder, then return to WordPress.

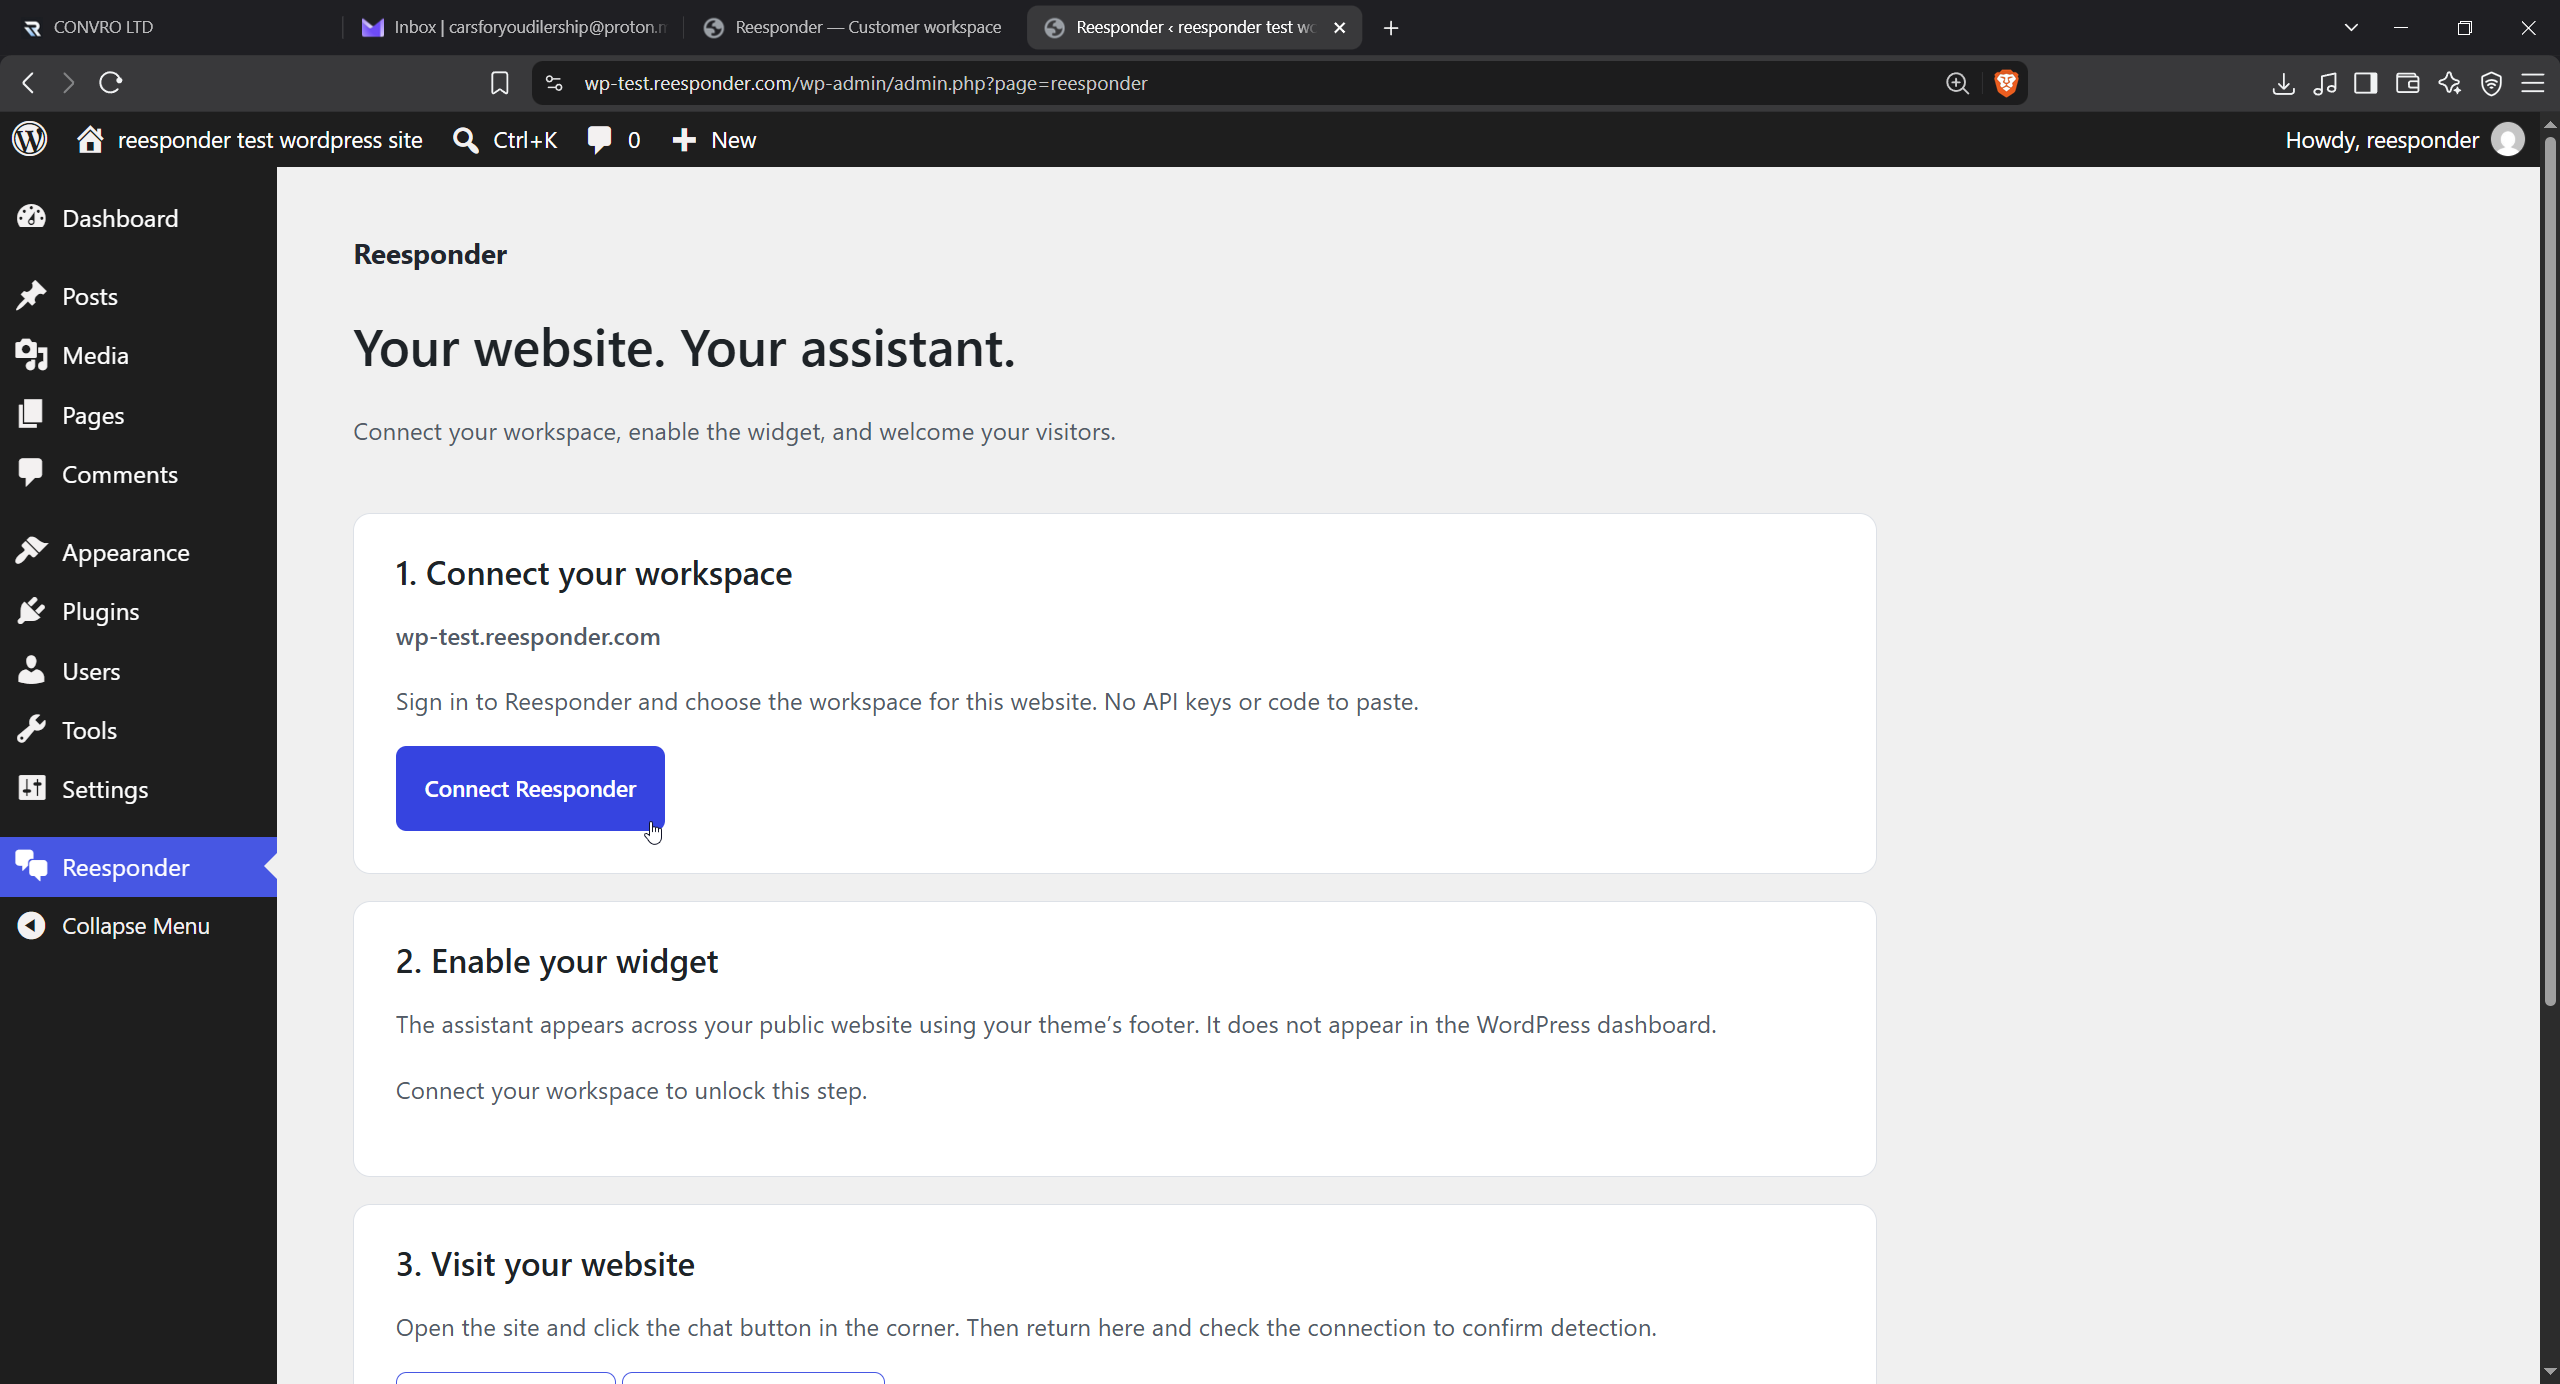
Connect WordPress to your workspace.

Open Reesponder in the WordPress sidebar and click Connect Reesponder. Sign in if asked, choose your workspace and check that the website address is correct before approving.

The connection takes you to Reesponder to authorise the website. Use the account that has access to the intended workspace. You do not need to paste an API key into the WordPress plugin for this flow.

Start the connection from your WordPress dashboard.

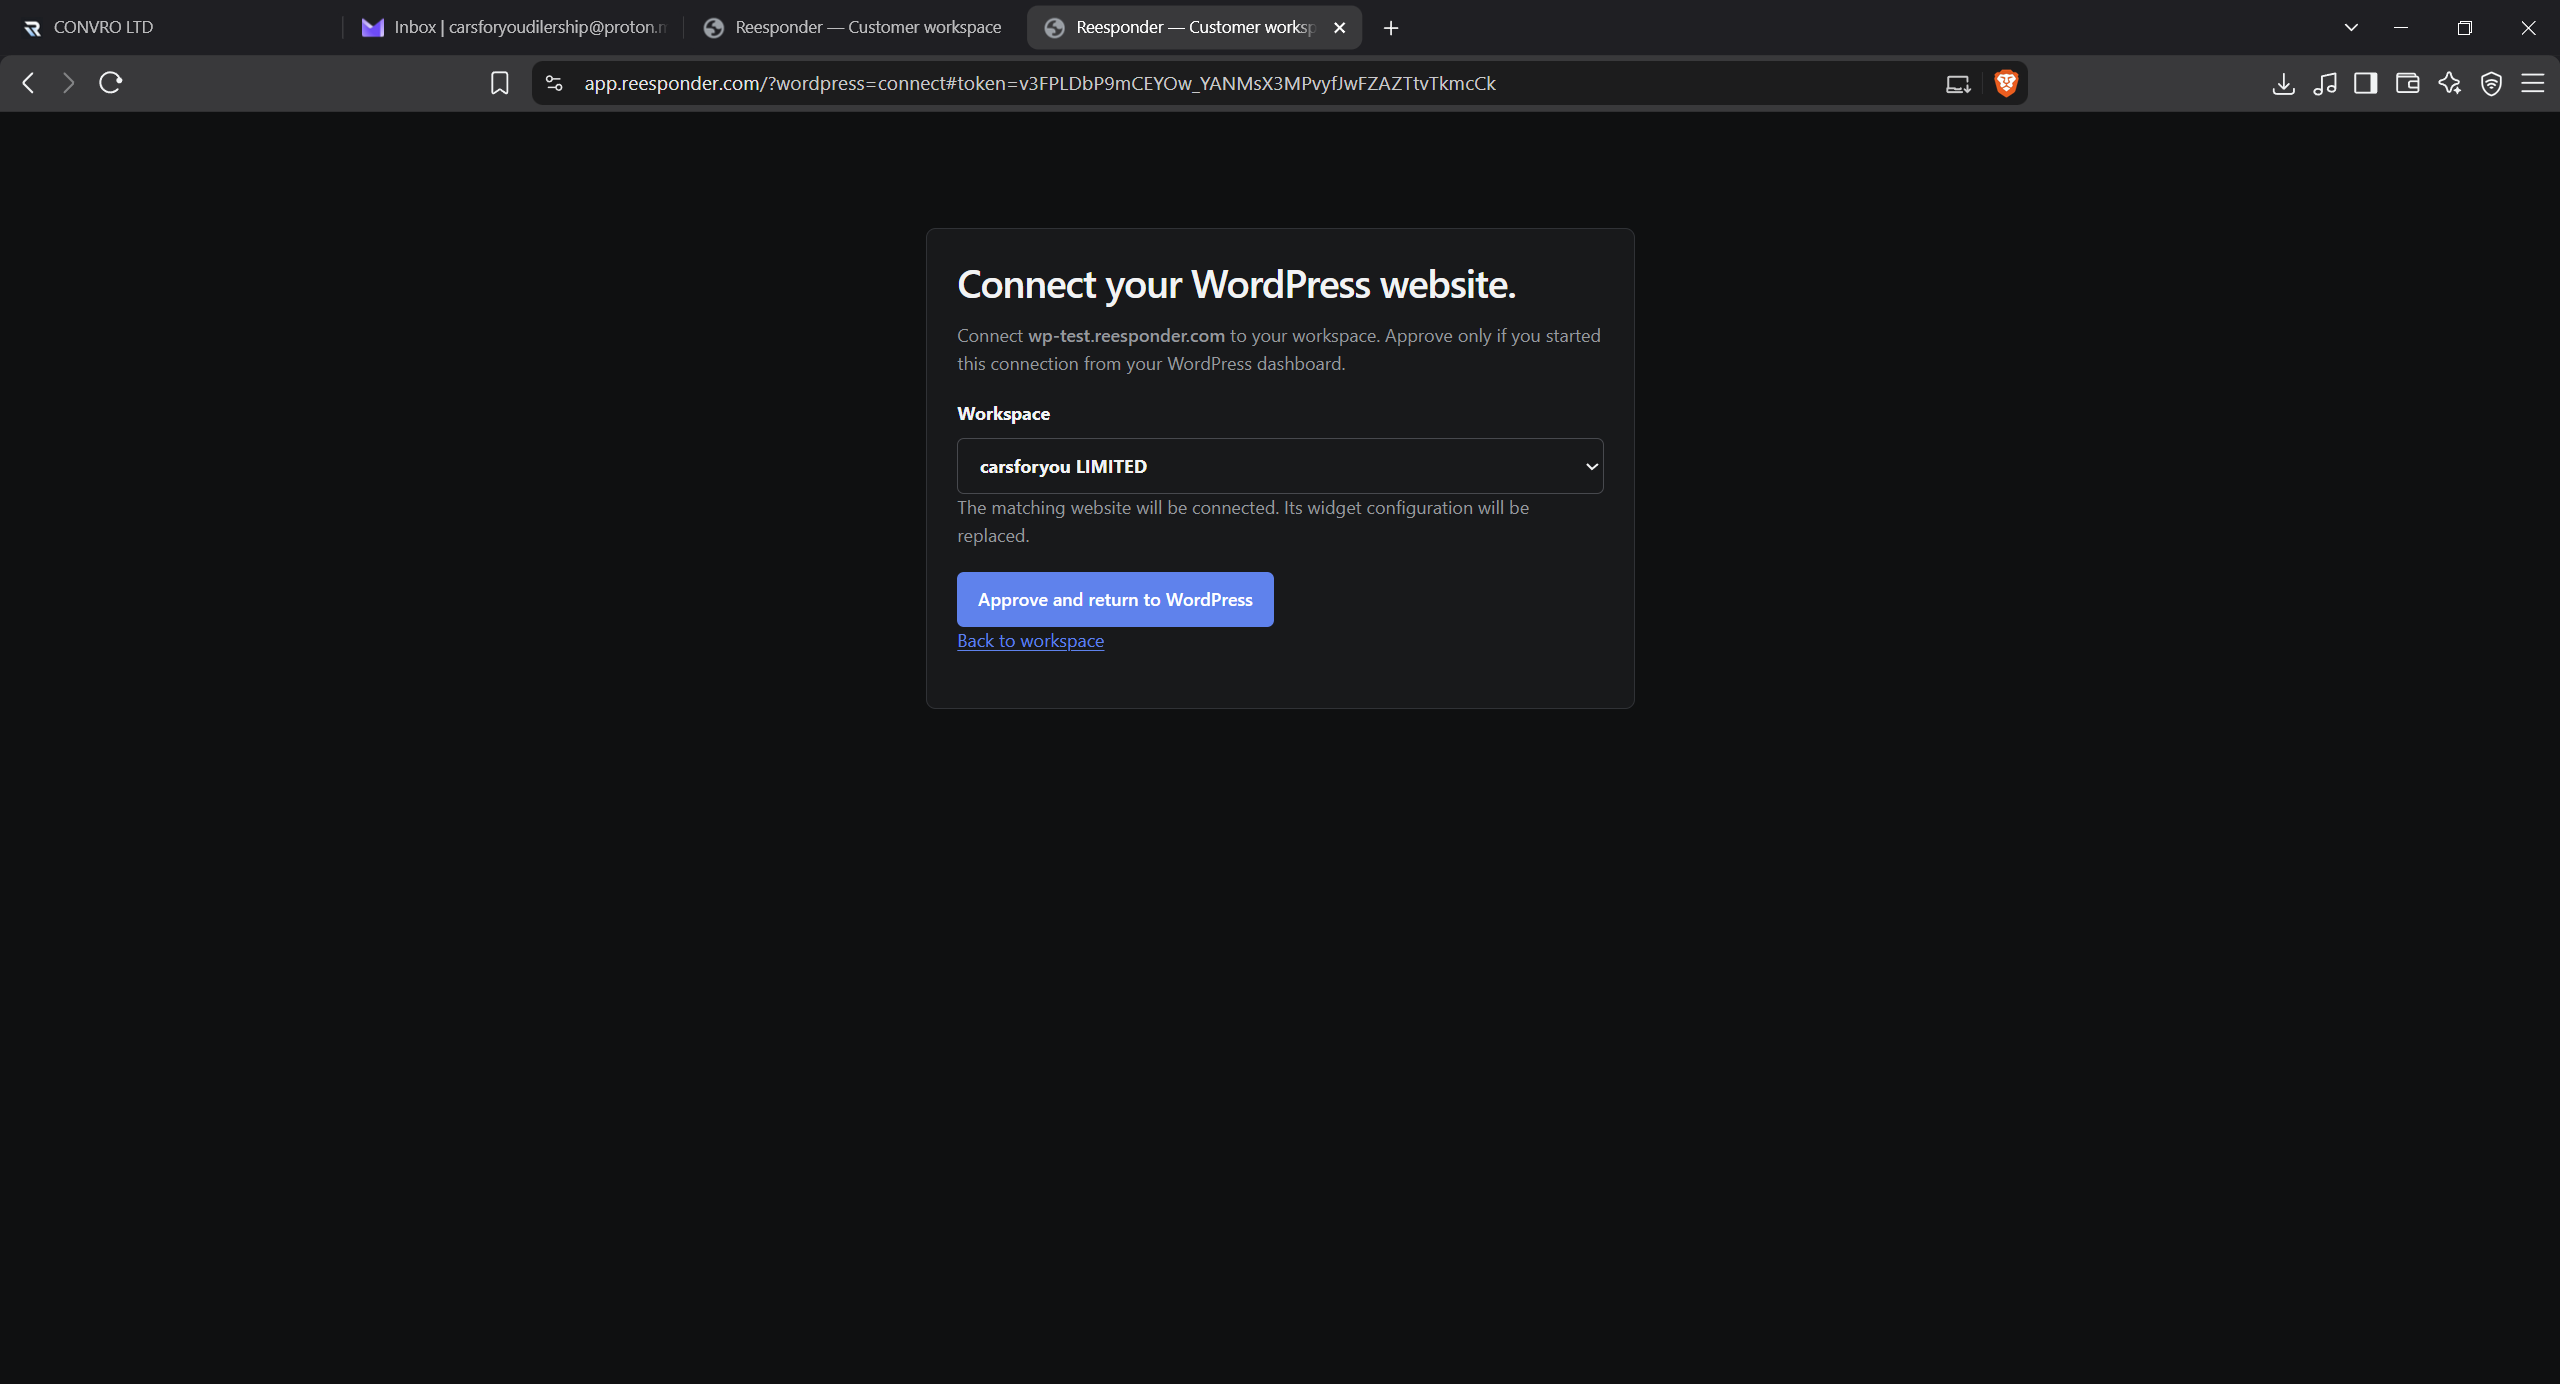
Choose your workspace and click Approve and return to WordPress.

Check the displayed website address and choose the correct workspace. Approve the connection to return to WordPress.

Review the displayed website address before approving. If your account has more than one workspace, choose the one that should manage this website’s Knowledge, conversations and settings.

Choose your workspace and click Approve and return to WordPress.

Make the assistant visible on your website.

Once connected, enable the widget in the plugin and refresh any cached website pages.

Enable the widget.

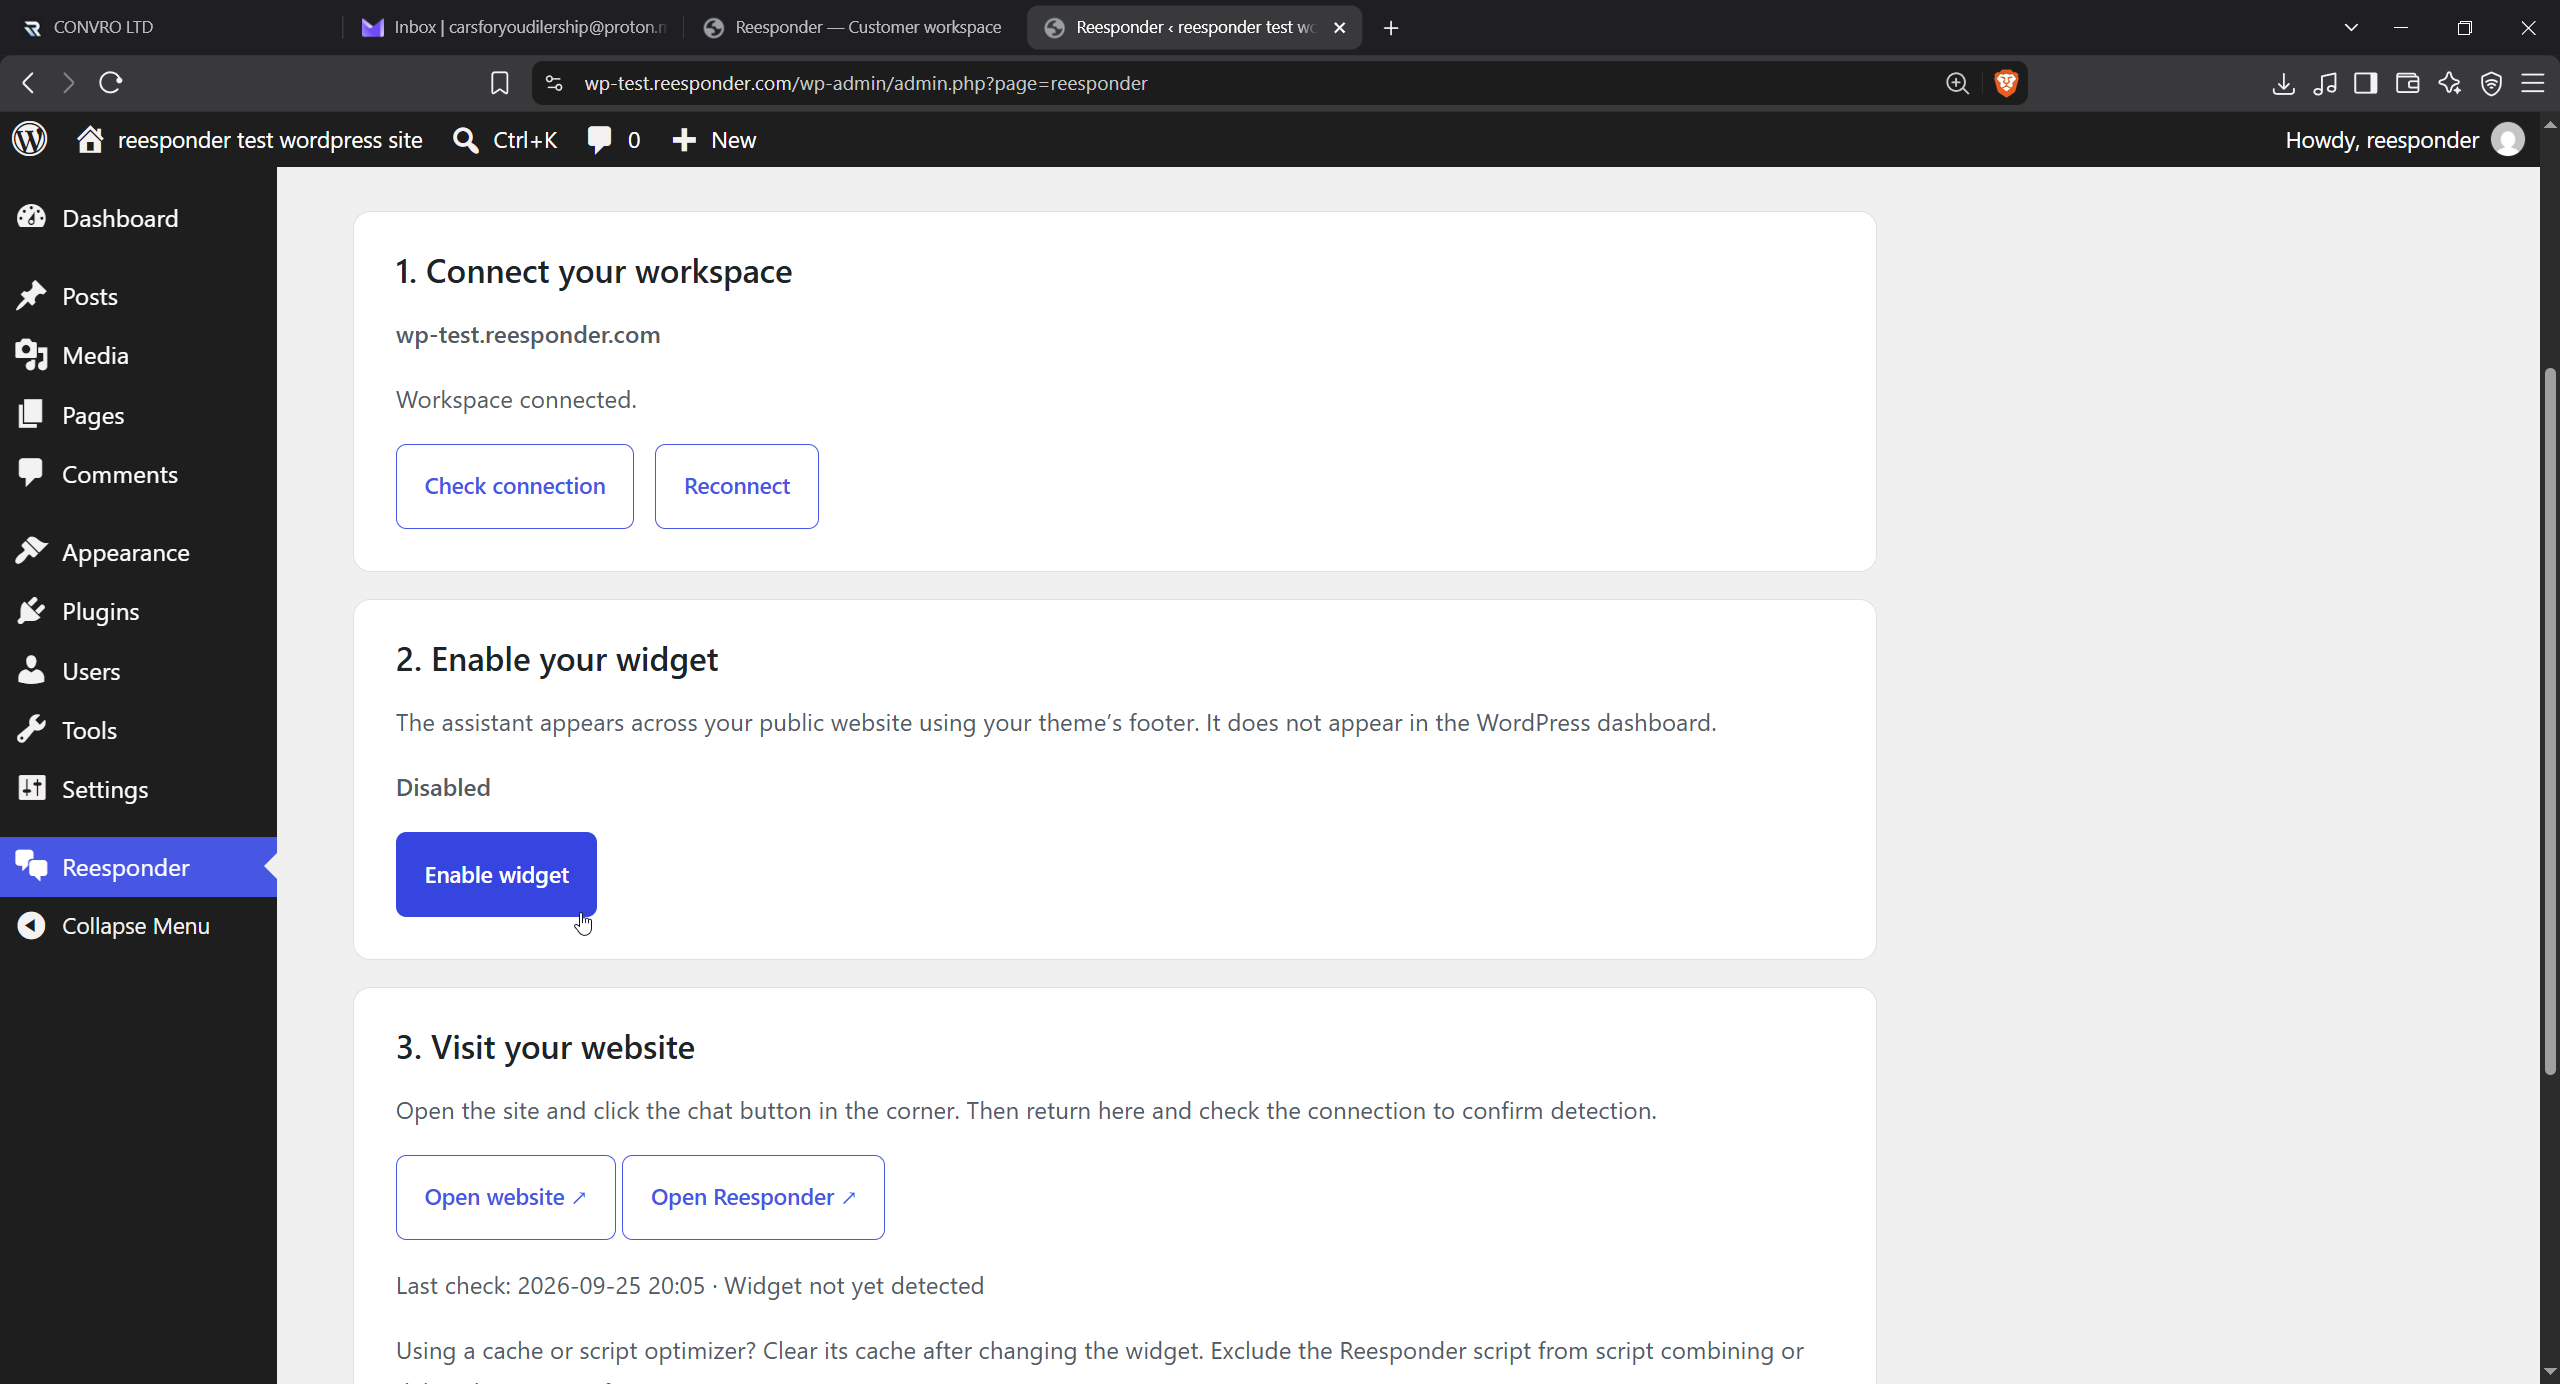
Back in WordPress, check that the workspace is connected and click Enable widget. If you use a page cache, clear it so visitors receive the updated page.

The connected account and the visible widget are separate controls. Enable the widget, then clear any website page cache so visitors receive the updated page. The chat appears on the public website, not inside the WordPress administration dashboard.

Click Enable widget, then Open website.

Check the public page and the conversation.

Open the website as a visitor and test the assistant with a question grounded in your content.

Open your website and send a message.

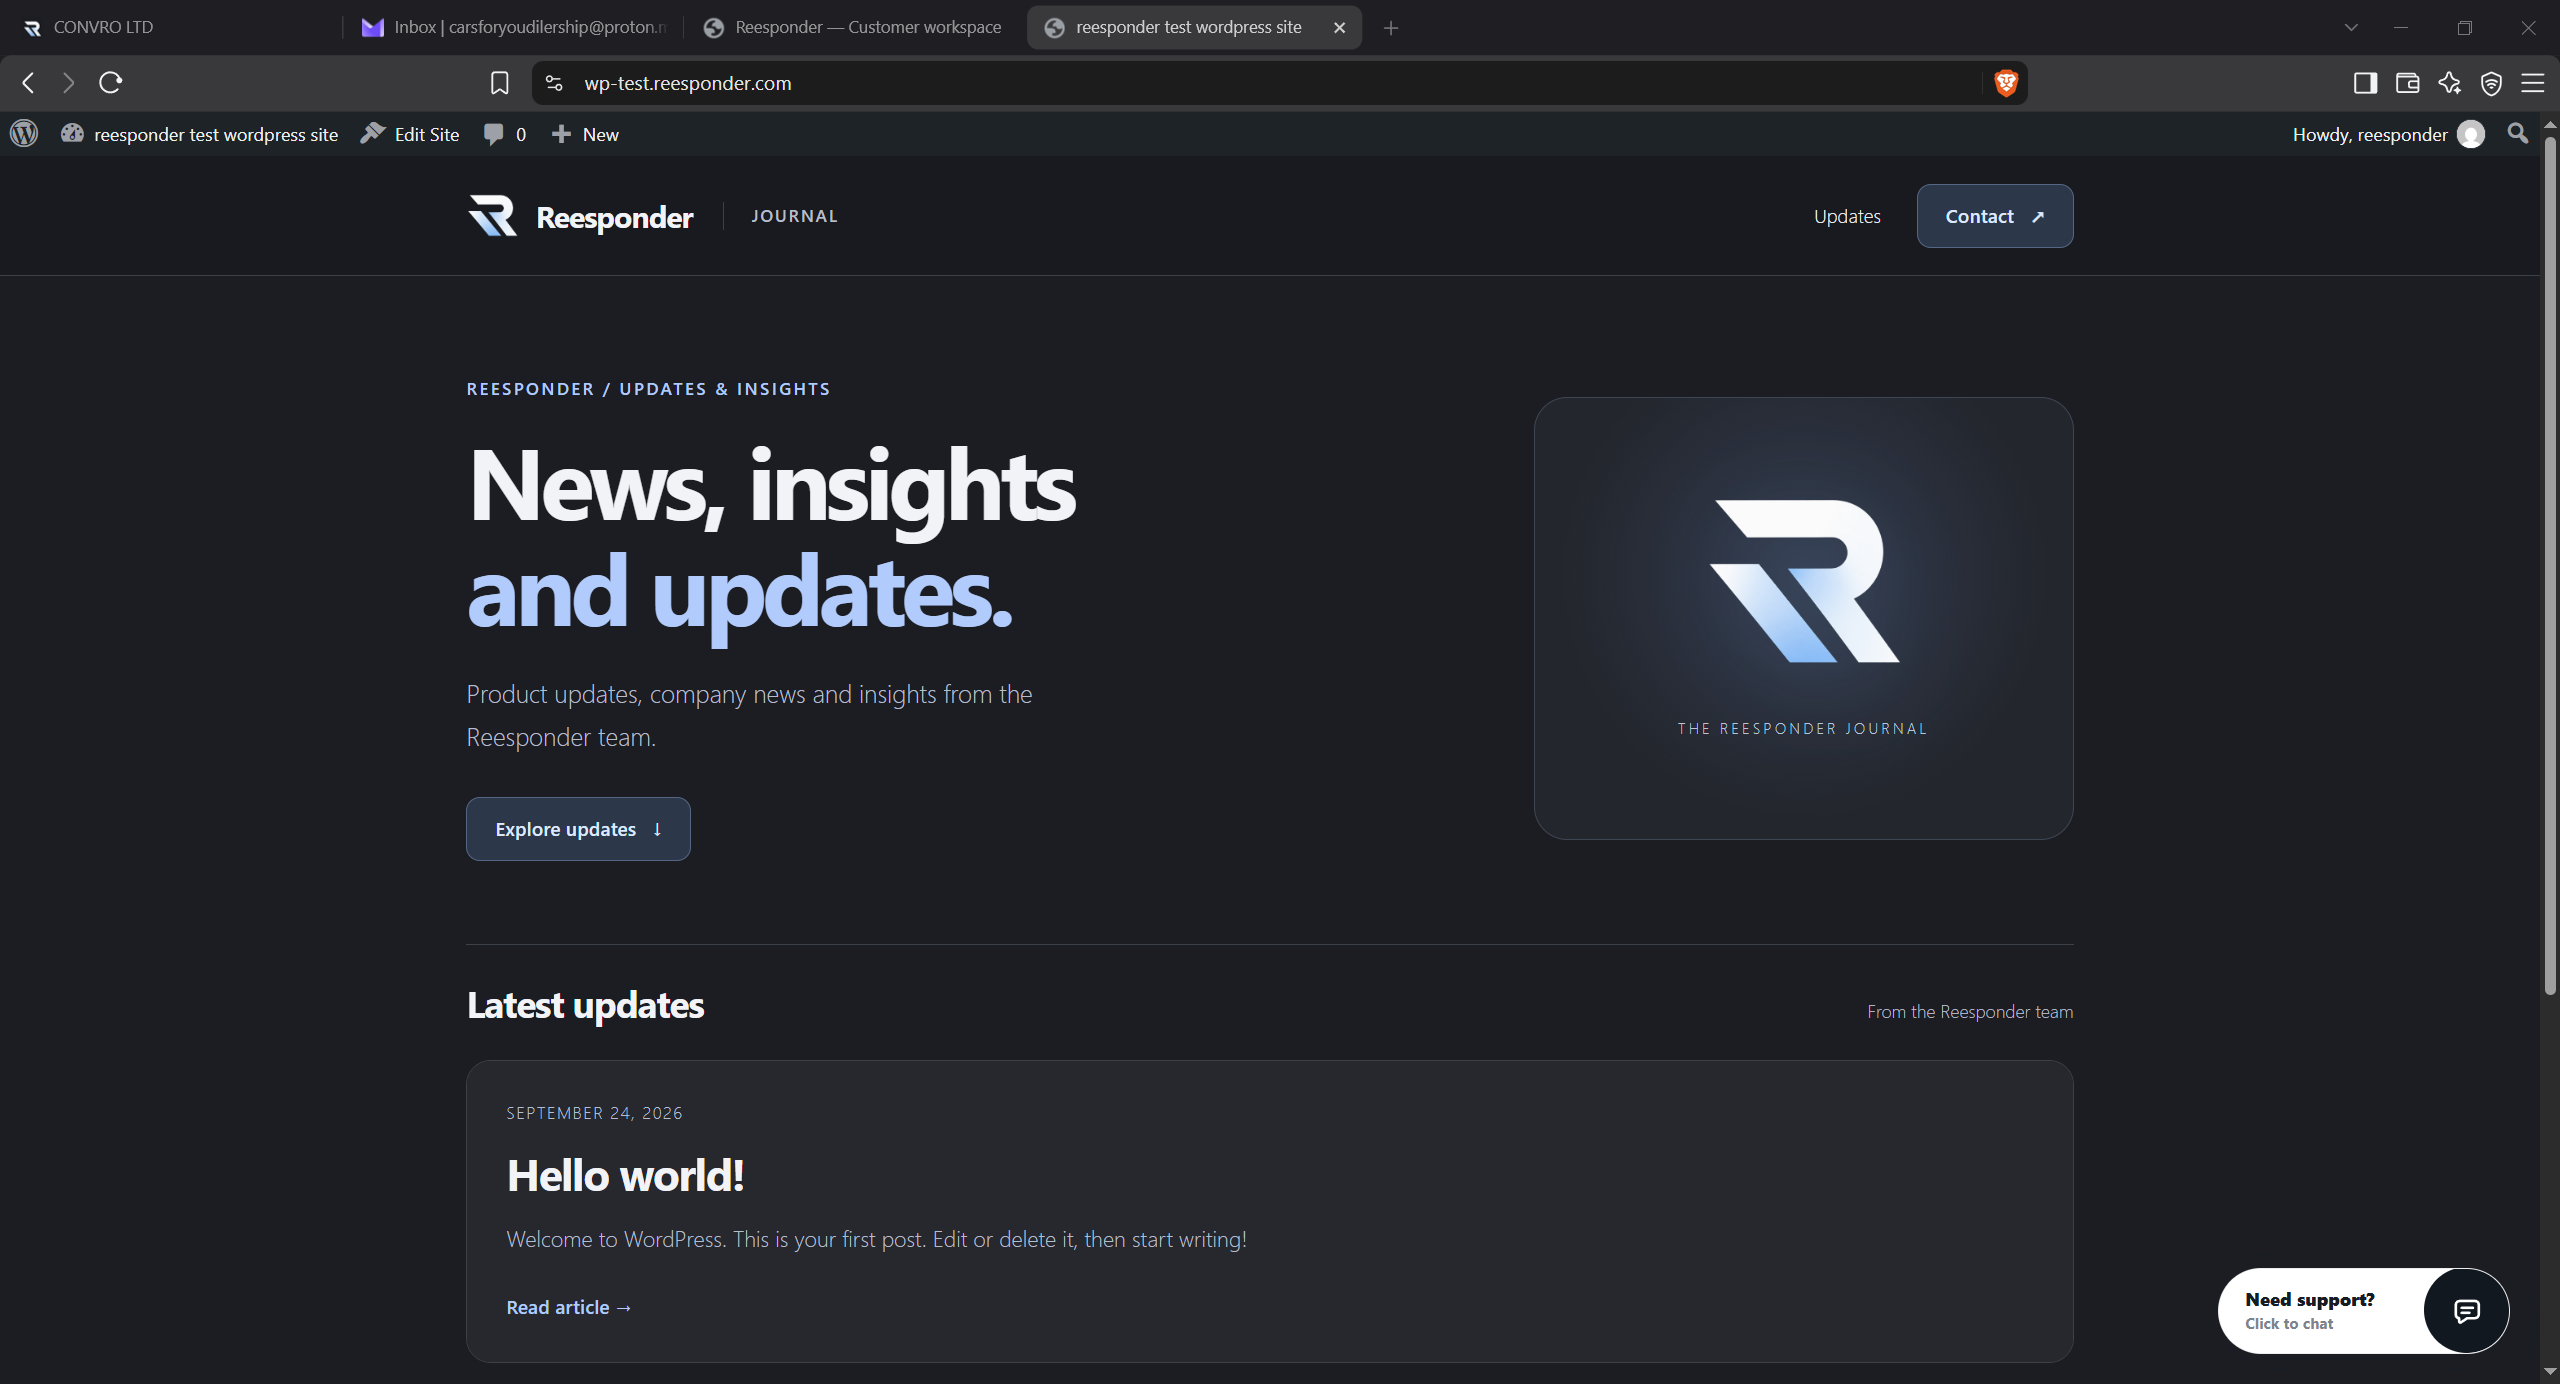
Reload the public website, open the chat and ask a question. You can return to the plugin and click Check connection to confirm that the widget was detected.

Open the public website after enabling the widget. Look for the launcher and return to the plugin to check the connection. A cached page can continue showing the earlier version until its cache is refreshed.

The chat button appears on the website.

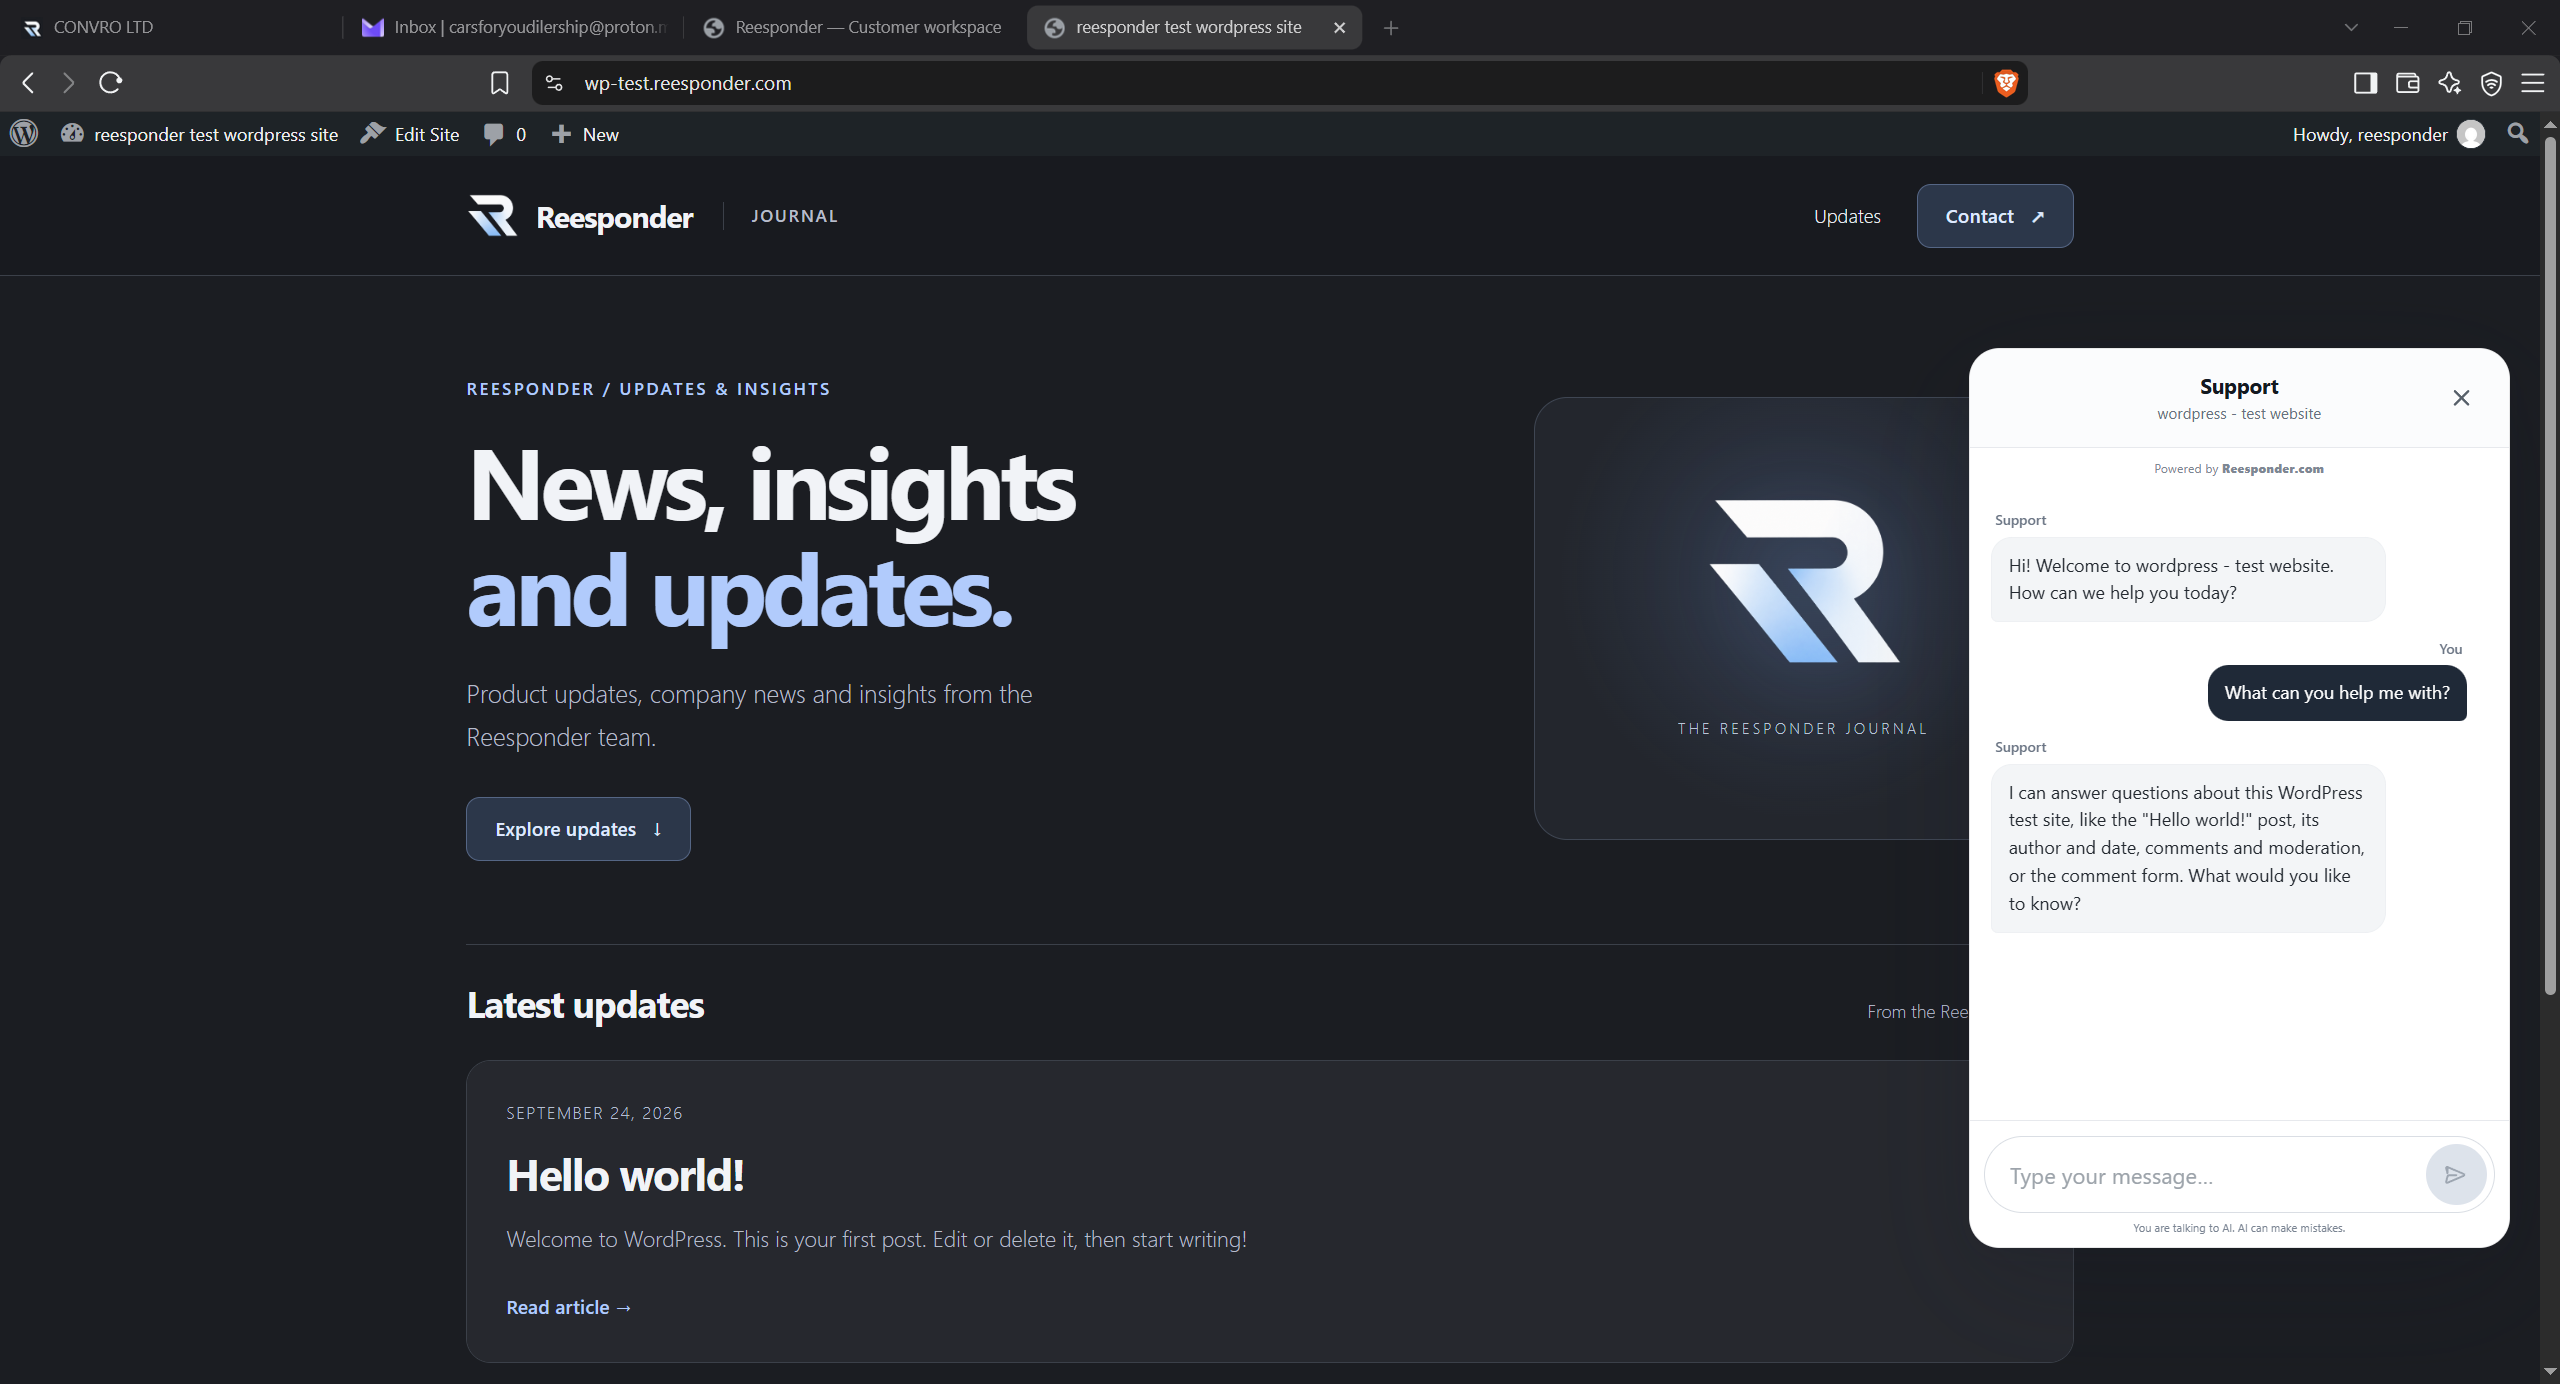
Test a conversation on a page your visitors can reach.

Ask about something customers would expect to find on this website. Review the response before sharing the chat with visitors.

Try a question about the page you are viewing and review the answer in the context of your website. For WooCommerce order lookups, connect the authorised order-status Action separately; the chat installation does not automatically expose customer orders.

Test a conversation on a page your visitors can reach.

Installed is the beginning.

Take a few minutes to check the details that turn a visible chat into useful customer support.

Review the knowledge.

Check what the assistant knows about your website. Add missing details such as delivery rules, support hours and service information in the panel. Use questions your visitors would actually ask.

Explore the workspace

Make the next step useful.

Knowledge answers questions. Actions can connect the conversation to your systems for tasks such as an order lookup, a basket update or a service request.

See Actions in practice

Keep a person within reach.

Configure human escalation for your website, then review incoming conversations. Give your team a clear route to follow up when a visitor needs help beyond the assistant.

Open your workspace

A few things
worth checking.

Practical answers for the person connecting your website.

Do I need a different plugin for WooCommerce?

This guide uses the same WordPress plugin to add the chat to a WordPress website or WooCommerce storefront. Order lookups are configured separately through Actions.

Should I unpack the ZIP before uploading it?

No. Upload reesponder-wordpress.zip directly through Plugins → Add Plugin → Upload Plugin. WordPress handles the archive.

Is connecting the workspace enough to show the widget?

After approving the workspace connection, return to the plugin and use Enable widget. Then open the public website to load it and confirm the installation.

Will changing my WordPress theme remove the installation?

The plugin route does not place the snippet into a specific theme file. Keep the plugin active and check the public website after a theme change. The theme must support the normal WordPress footer hooks.

What if plugin uploads are unavailable?

Use a WordPress account with permission to install plugins, or ask your website administrator to complete the upload and activation.

Does installing the plugin expose customer orders?

No. To retrieve WooCommerce order information, configure the relevant authorised Action and its access controls. Installing the chat and granting access to private data are separate steps.


Your website.
A conversation away.

Connect the domain, complete the installation and try the experience yourself.

Open Reesponder Find your plan